LoRaWAN Soil Sensor GenAI Project (Part 1)
A few months ago I purchased a Dragino LoRaWAN Soil Moisture sensor. Now, what is LoRaWAN, you ask? Well, for me, it's a brand new domain. Similar to radio frequencies, LoRaWAN signals operate in their own dedicated, yet open-source (meaning, not owned by any corporation) bandwidth. There are a ton of YouTube videos on LoRaWAN, so I won't spend this blog post explaining what it is. But in a nutshell, it stands for Long Range Wide Area Network. The attractive thing about this network frequency is that extremely low-power sensors are built to communicate on wireless protocols for long-lasting IoT devices over long distances. People uses LoRaWAN sensors for smart cities (parking), agriculture (hence, soil moisture sensors), or asset tracking like in a manufacturing plant. It uses unlicensed radio frequency bands leading to a very long battery life (8 years) and no need for costly cellular licenses.

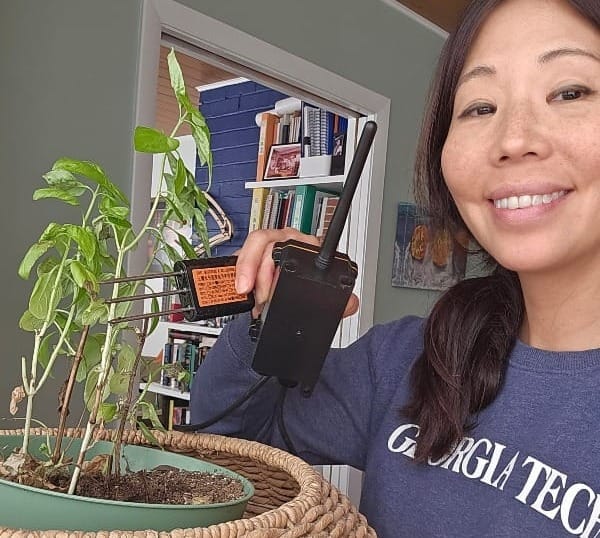
The sensor I purchased wasn't cheap. It was a few hundred dollars including the gateway, which I'll get into later. Here are the specs for the LSE-01. It communicates on the following bands: CN470/EU433/KR920/US915/EU868/AS923/AU915/IN865. The US915 band is what I used that picks up frequencies between 908 - 925 Mhz. It can monitor soil moisture, soil temperature, and soil conductivity, with a waterproof enclosure and an 8500mAH Lithium battery (hence, it's called "SE01-LB" sensor). This battery is un-chargeable and this was funny, because, when I tried to figure out how to "activate" it, knowing it's in some kind of deep sleep for storage, I couldn't find the "on" button. Lo and behold, it was an obvious transparent kind of button.

A Three-Part Odyssey
Part 1 - LoRa Connection
I love this project because it really challenges my curiosity! Since it's Halloween season, I named my LoRa Soil Application, "lestat-lives". Now, in Part 1, my goal is to connect it, have the gateway see it, and validate that the up-link is coming through - meaning, all the temperature, humidity, and other data elements as it should. Great news! I accomplished this today!

Part 2 - Payload API
Now, the last two parts will also be quite challenging. Especially Part 2, where I need to figure out the formatting requirements of the sensor payload, and how TTN would prefer I ask for it. At first I thought a FastAPI middleman would do the trick, but I've been learning there might be easier services. But it really comes down to how the TTN payload wants it brokered.
Part 3 - Simple Chat Agent on Orin
Part 3 should be fairly smooth sailing, as I've dealt with Jetson devices since 2017. But I'm pleased to get my hands on an Orin Nano. I have to flash it with Ubuntu 24 and install JetPack, then from there I hope all I need to do is use the pre-built/TensorRT optimized Llama and well, just, put stuff together like this:
Call Payload API -> Write prompt template -> Initialize Llama -> Pass payload as injection into prompt (sensor context) -> Chat
It would look something like this:
# For chat-based interaction
def setup_llm_chain():
    llm = LlamaCpp(
        model_path="/path/to/llama-model.gguf",
        temperature=0.7,
        max_tokens=512
    )

    prompt = PromptTemplate(
        input_variables=["sensor_context", "timestamp"],
        template="""
        Context: {sensor_context}
        Time: {timestamp}

        Analyze this soil sensor data and provide insights:
        """
    )

    chain = LLMChain(llm=llm, prompt=prompt)
    return chain
Equipment
Ok, so let's start with three pieces of equipment. This is all you'll need to get this party started:
1) Local computer.
For me, my personal machine is an HP Elitedesk loaded with Ubuntu 24.04.2 LTS. My machine doesn't come with a WiFi adapter. It's not pictured below, and it probably won't be a problem you'll encounter, but luckily I had an external USB WiFi adapter.
2) Dragino Gateway.
LoRaWAN Pico Station. This is an open source LoRaWAN gateway that lets you bridge a LoRa wireless network to an IP network via WiFi or Ethernet. This is how data is up-linked and down-linked from the sensor. You can use a Web GUI, which I used, or SSH into via LAN or WiFi.

Here I used an Ethernet cable, but I ended up just using WiFi. When you plug in the Gateway, you will instantly be able to see the WiFi network. For me, it was called dragino-2a750. The default network password is dragino+dragino. This will take you to 10.130.1.1 where the Dragino Interface will pop up.


Now that you've set up the Gateway, the next step, still dealing with the Gateway, is to set up the free "Things Network" interface. An alternative is ChirpStack. But honestly, I just wanted to keep things easy, and The Things Network (TTN), was easy enough. You create an account and here is when you set up the cluster on the above after you've set up an account. North America typically uses nam1.cloud.thethings.network, and we must be sure that it access the US 908-925 Mhz band frequency. By the way, all the nitty gritty of setting up the configurations is here: Setting up the LoRaWAN and Troubleshooting.
We check the LED Status to confirm POWER LED (RED) Solid, The SYS LED should be SOLID BLUE when connected to LoRaWAN server and the LORA LED will flash green when receiving packets (once sensors are connected). The configurations were not trivial, so take a look at my detailed guide.
3) LoRaWAN Soil Sensor.
This is probably the case with every LoRaWAN sensor, regardless of the manufacturer (e.g. Dragino), but there will be important device information either on the hardware itself, or in a hidden sticker that's too easy to throw away. For this sensor, there was the DEV EUI, APP EUI, APP KEY. We register the device and power the sensor on.
We have to register the sensor on the TTN application, as an app. Following the directions in the instruction guidebook will help you get everything going. But it's not trivial. You need all the above KEYs. Now all we have to do is be patient! Every 30 minutes or so (because it's low-power), the data will pop in. Take a look below. You should see output like this:
{
  "Bat": 3.606,
  "Hardware_flag": 0,
  "Interrupt_flag": 0,
  "Sensor_flag": 1,
  "TempC_DS18B20": "327.60",
  "conduct_SOIL": 10,
  "temp_SOIL": "20.60",
  "water_SOIL": "4.65"
}
Next Steps and Deep Dives
Now, something I did to hack the configuration process was to convert this 50-page instruction guidebook from .pdf to .txt and pass it as context to Cursor. So, yeah, I ended up installing Cursor on Ubuntu. I think this is what Cursor is meant to do. It's meant to take very long technical documentation and help you as an assistant to troubleshoot and debug. This was super helpful for me since I was dealing with new IoT networking configurations.
- Part 1: Setting up the LoRaWAN and Troubleshooting
- Part 2 TBD: Sending the payload to FastAPI and calling it from the Orin
- Part 3 TBD: Installing Llama optimized for the Orin, and writing an agent to parse the payload

Here's the video off TikTok showing this in a bit more exciting and dynamic detail, ala Nirvana.
@mybuddyskynet I finally got to it this weekend, part 1 of an ambitious and fun project to have the Jetson Orin use Llama to parse and analyze streaming data from a LoRA sensor. https://ordun.ghost.io/2025/10/20/lorawan-soil-sensor-genai-project-part-1/ #machinelearning #AI #deeplearning #coding
♬ sonido original - @Soyfandelrock