Centroids and Large Persons in Yolov5
I remember when pjreddie released You-Only-Look-Once (YOLO) several years ago, and installing darknet (https://github.com/pjreddie/darknet). I also laughed when I read his hilarious licensing agreement LICENSE.fuck (https://github.com/pjreddie/darknet/blob/master/LICENSE.fuck). Well, Yolo continues to give back. And now in 2022 we can all enjoy the excellent documentation from Yolov5. A few years ago I wrote a brief overview of object detection methods that also touched on Yolo. Yolo was an improvement on older methods at the time that used Selective Search, stringing together multiple pipelines that were expensive to run. Instead, Yolo divides an image into a grid and predicts class probabilities and bounding box. It then runs regression on each of the bounding boxes to output the final typical bounding box you see in these detections of the format: dx, dy, dh, dw, confidence
@mybuddyskynet Blog post about how to modify the code https://nudratic.ghost.io/2022/08/12/centroids-and-large-persons-in-yolov5/ #AI #datascience #machinelearning #deeplearning #computerscience #tech #technology #computervision #python
♬ Worth It (feat. Kid Ink) - Fifth Harmony
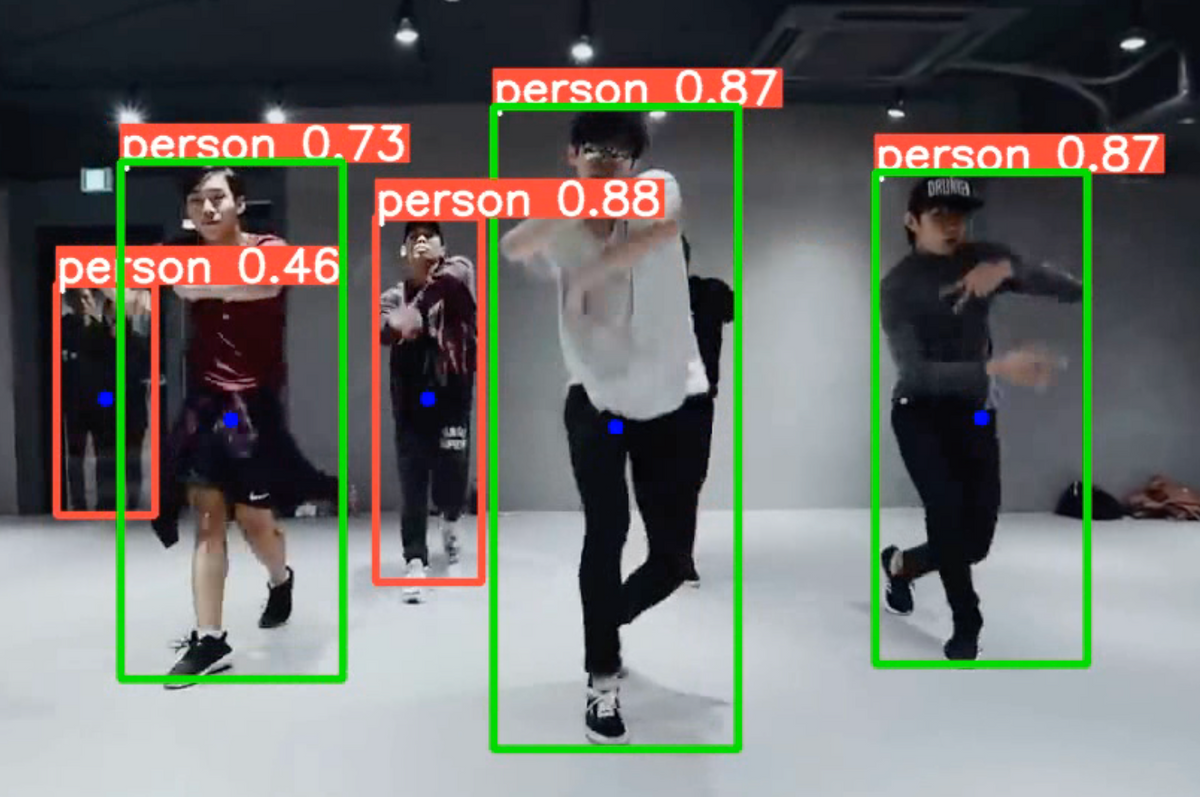
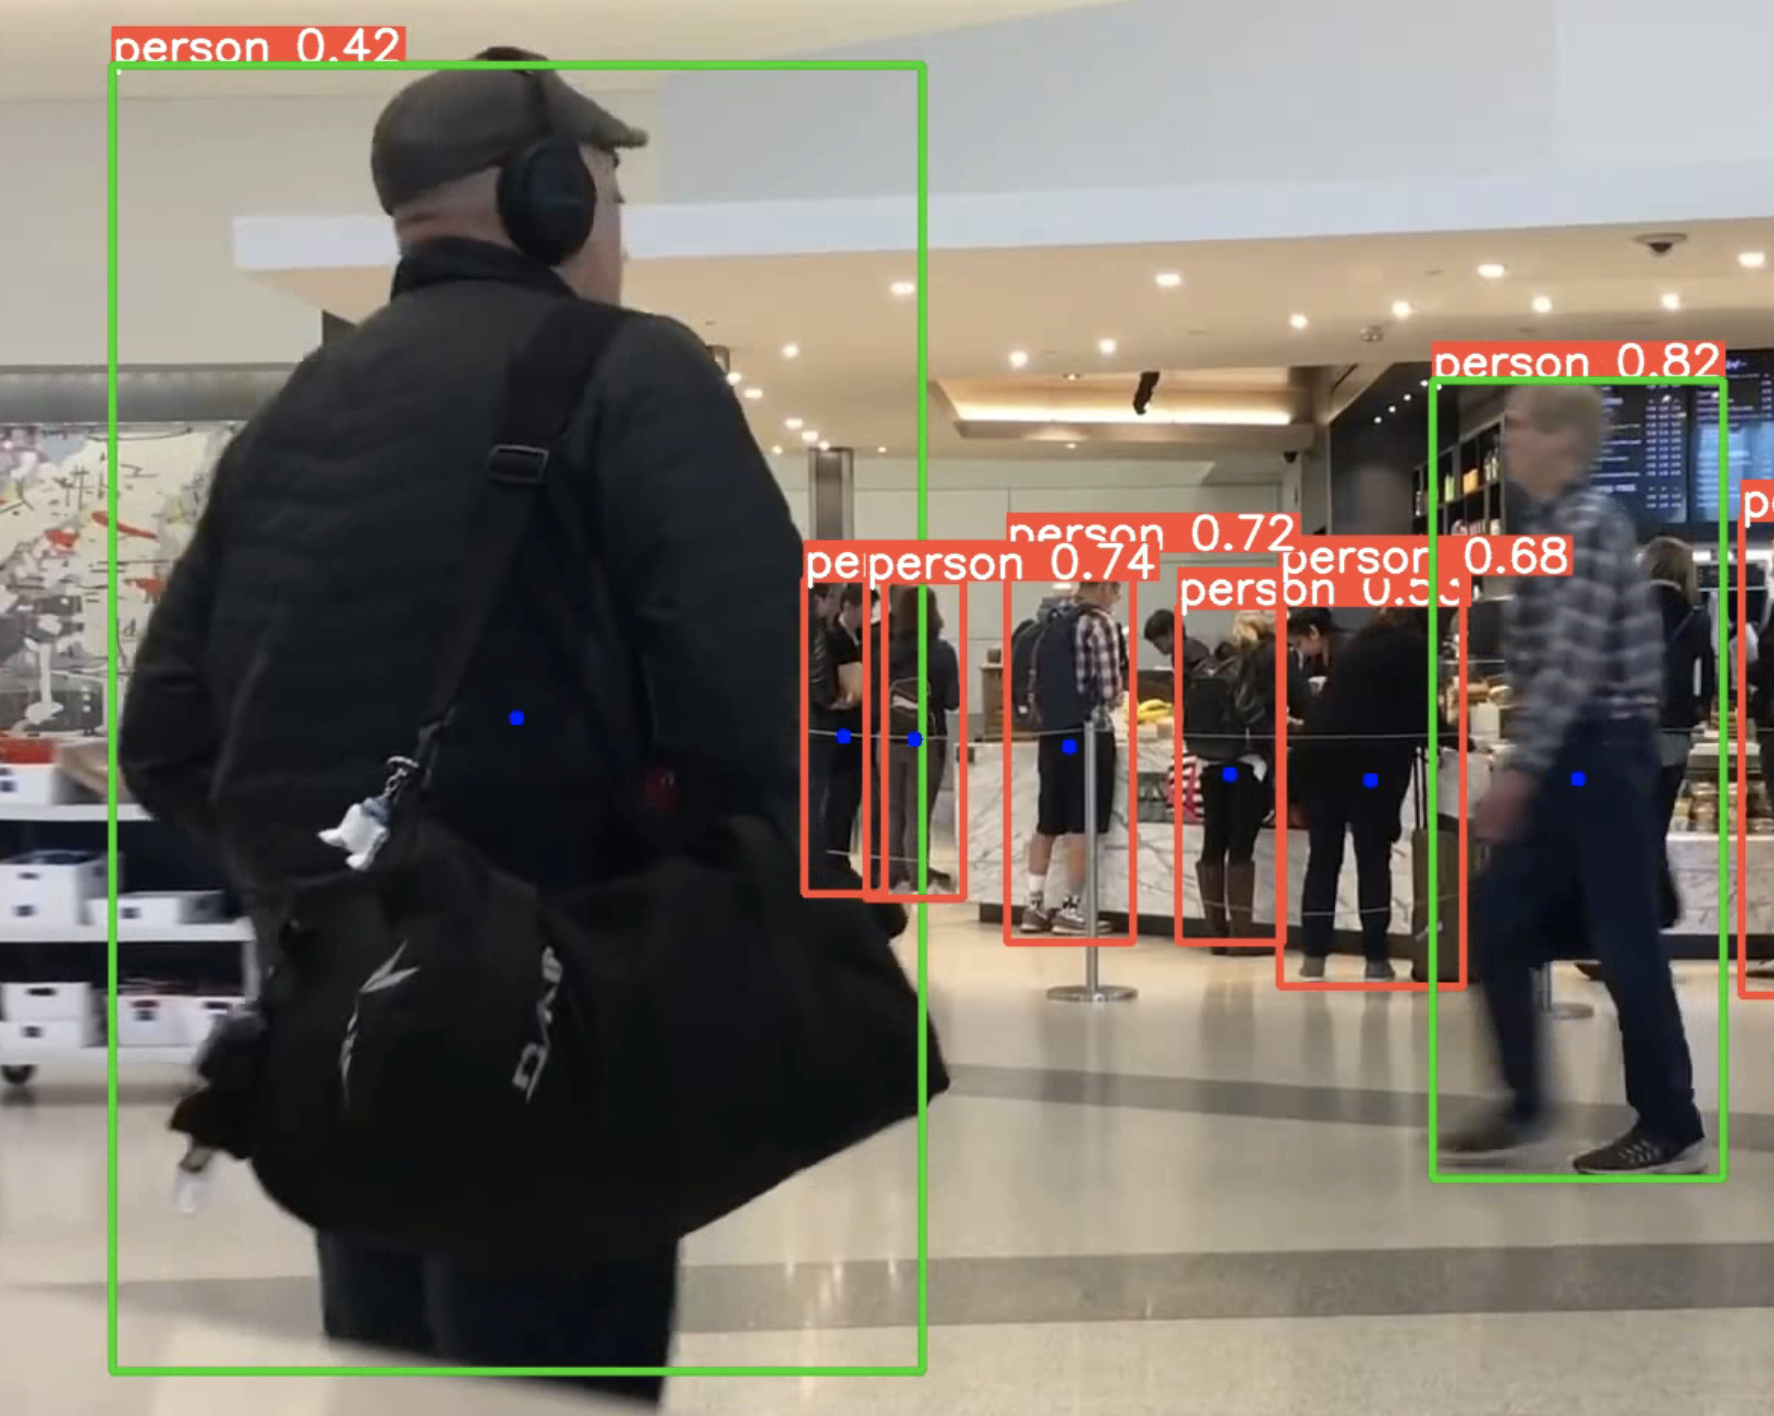
Recently I took a look at the ultralytics implementation of Yolov5 here: https://github.com/ultralytics/yolov5. My goal was to output centroids of each bounding box, which will provide me the approximate center of the person, like so. Notice the blue dots. In addition to the largest person in the frame, the green bounding box. (Video was taken from YouTube)

Yolo has all you need
When you open up detect.py that's used for all the video detections, you'll notice a line of code way at the bottom in a for loop:
for *xyxy, conf, cls in reversed(det):
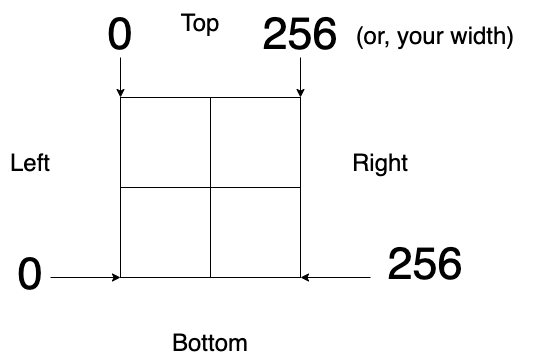
This is all you need. The xyxy is the actual coordinates of the box contained within *xyxy. Furthermore, there's a clue later on in the code under if save_text(): that tells us a normalizatin of the xyxy coordinates to give us a width and height:
# normalized xywh - calculate it for biggest area function
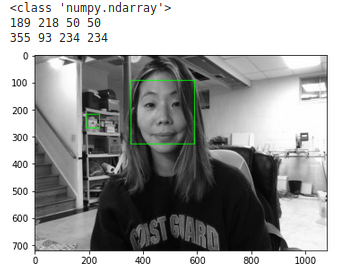
xywh = (xyxy2xywh(torch.tensor(xyxy).view(1, 4)) / gn).view(-1).tolist() The outputs look like this:
xywh: [0.6895833611488342, 0.4893518388271332, 0.04374999925494194, 0.24722221493721008] - which is the normalized (0,1) values of the x-coord, y-coord, width, height, in that order.
Add functions to class Annotator in utils/plots.py
With these two coordinates, you can now build two simple functions for a centroid and also finding the largest person in the frame:
Go to the utils\plots.py file. You'll see a class on line 68 class Annotator.
 def centroid(self, box):
        print("box[0]", box[0].item())
        cx = (box[0]+box[2])/2
        cy = (box[1]+box[3])/2
        centroid = (cx,cy)

        radius = 5
        color = (255, 0, 0)
        thickness = -1 # filled in
        coords = (int(centroid[0].item()), int(centroid[1].item()))
        cv2.circle(self.im, coords, radius, color, thickness)

 def biggest_area(self, box, xywh):
        # box - xyxy
        # Find the closest person to the camera by calculating hte area
        p1, p2 = (int(box[0]), int(box[1])), (int(box[2]), int(box[3]))
        if xywh[2]*xywh[3] >=0.03:
            cv2.rectangle(self.im, p1, p2, (0,255,0), thickness=self.lw, lineType=cv2.LINE_AA)
Don't be tempted to just copy and paste this code. It's super easy to understand. First, for centroid, we pass the box coordinates that Annotator uses - that's the xyxy == box. It calculates the center of the x coordinates and the y coordinates, giving the center of the box. Note that it's not true to the human body, only relative to the bounding box. So for example, if the person sits on the ground, it may not provide the centroid of the body (e.g. middle of stomach), but rather the box. The rest of the function is OpenCV fun.
The biggest_area function, takes both the raw xyxy coords and the normalized coords xywh. This is relevant because it becomes an area calculation. The largest area of the box indicates the person closest to the frame. I used an eye-ball heuristic of 0.03 by just watching the cascade of print statements for the normalized areas. You can modify this to a higher normalized number if you want someone bigger. But my guess is that 0.03 is about right.
Modify detect.py, now
Now under the main detect.py script, you'll see a function called def run(). There's a loop towards the bottom that starts with if len(det) and is commented with #Write results
for *xyxy, conf, cls in reversed(det):
This is where you want to call the newly modified annotator class on the two functions you just added: annotator.centroid(xyxy) and annotator.biggest_area(xyxy, xywh).
if save_img or save_crop or view_img:  # Add bbox to image
    c = int(cls)  # integer class
    label = None if hide_labels else (names[c] if hide_conf else f'{names[c]} {conf:.2f}')
    annotator.box_label(xyxy, label, color=colors(c, True))
    annotator.centroid(xyxy)
    annotator.biggest_area(xyxy, xywh)
Run inferences on video
Usage:
Open up terminal and run:
python detect.py --weights yolov5s.pt --source video.mp4 If you want to only detect persons, pass it 0 for the classes. You can find all the classes based on COCO classes online.
python detect.py --weights yolov5s.pt --source video.mp4 --classes 0Open up the detect.py script to find a bunch of options - from images to calling a URL from YouTube! Have fun!