Building the RTX2080 Machine
[This post was originally published in 2019]
This post is about my journey building my first GPU machine, complete with not one but two RTX2080's. As I start my PhD program at University of Maryland Baltimore County (UMBC), I wanted to ensure that I had the compute resources I needed right off the bat.
@mybuddyskynet Hi guys. Been working a lot! Someone asked me about how to build your own GPU machine... Here you go! #python #machinelearning #computervision #datascience #coding #deeplearning #AI #phd #nvidia
♬ original sound - AIburbclave
Why?
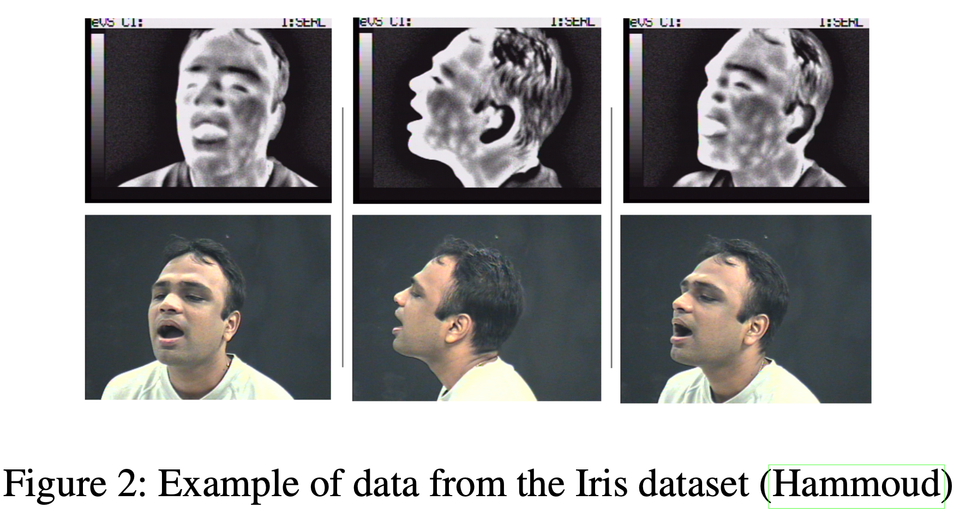
At least for now, my research will focus on thermal imagery and GANs which I've never trained before, and some other algorithms under my advisors Ed Raff and Sanjay Purushotham. Based on an old Titan cluster at my company, the folks there have been taking good care of servicing it since 2012. For almost eight years, it's been working just fine. So, I hope to continue using this machine for several years down the line. Other considerations for why I chose to build versus buy:
- I can't use my company GPU resources. We have several DGX machines, several smaller 4x-card machines, and a few more. But these are reserved only to train models for business.
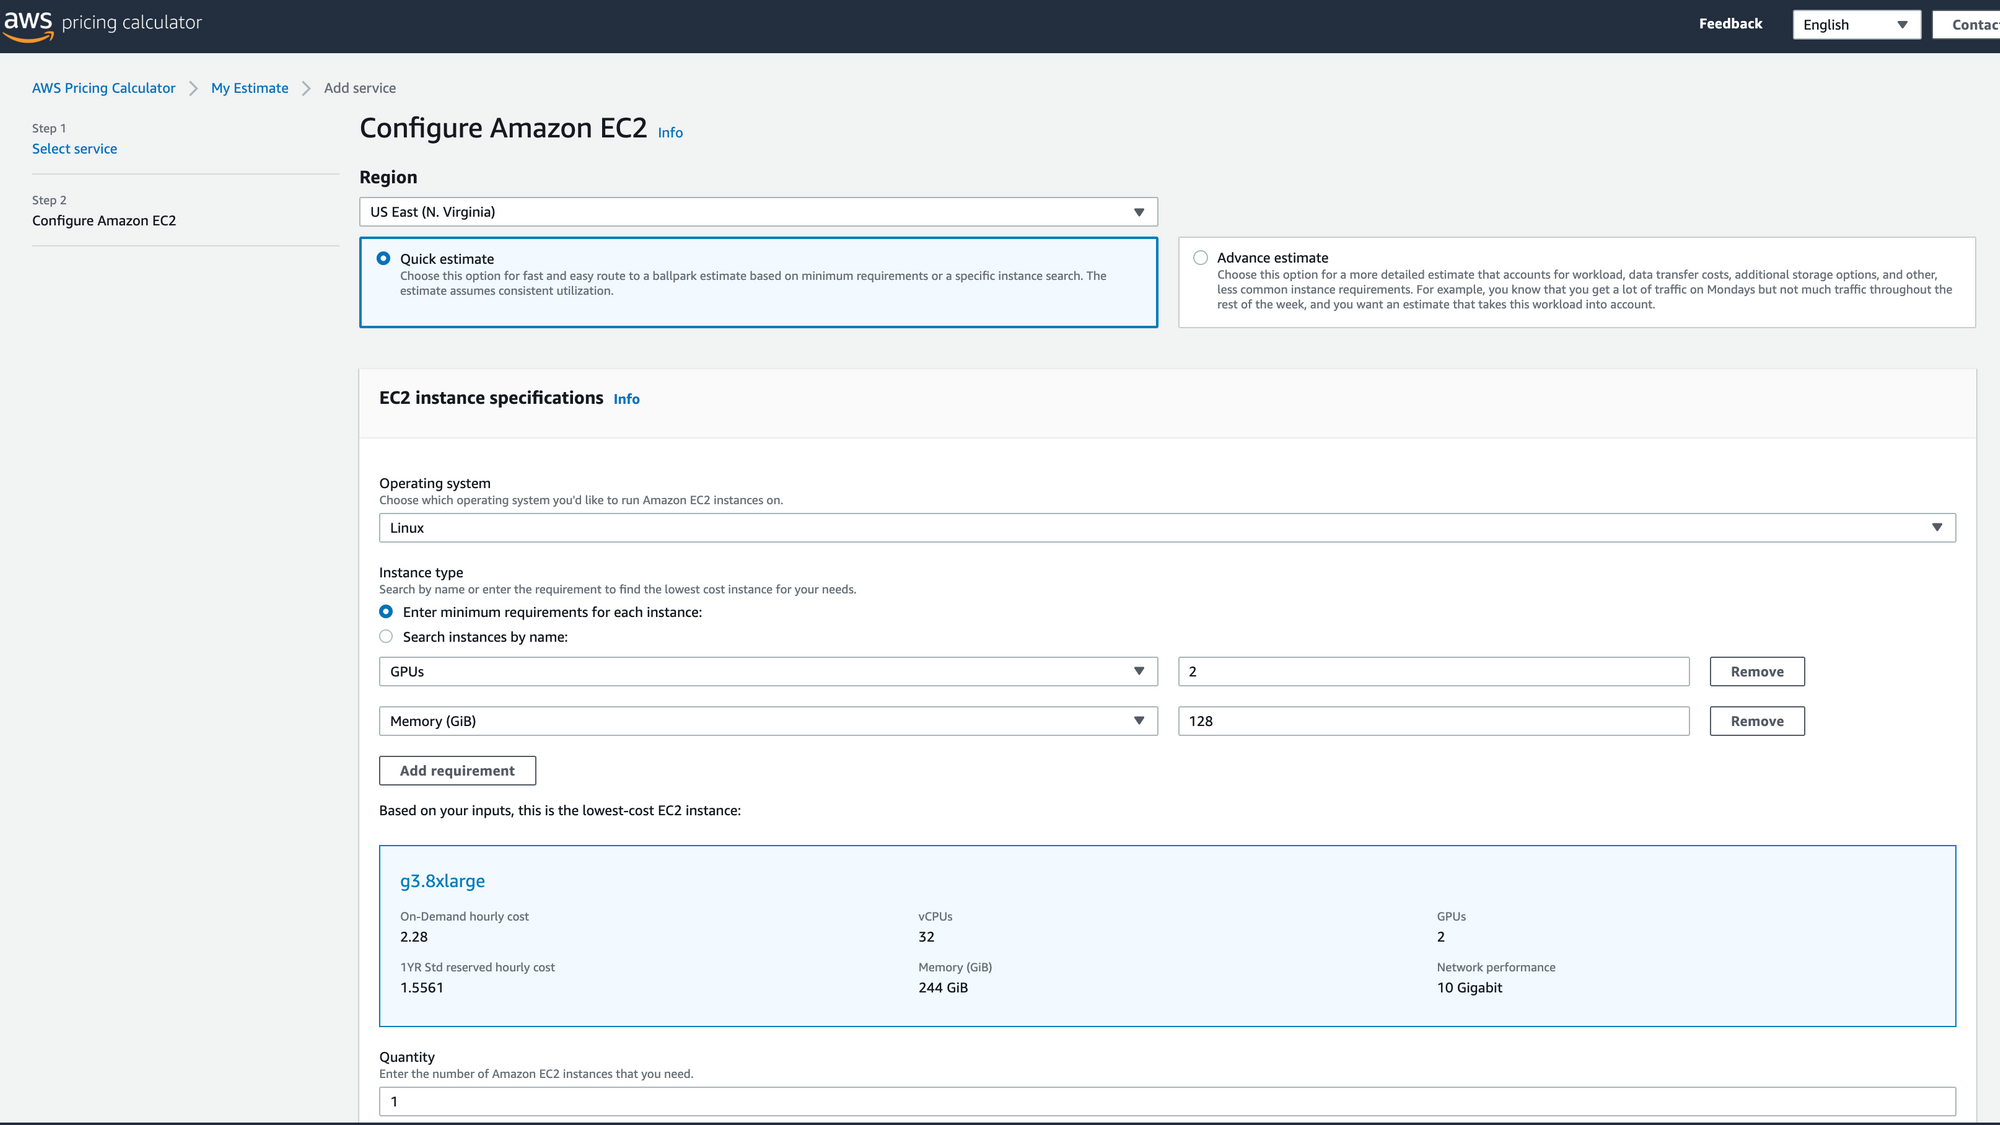
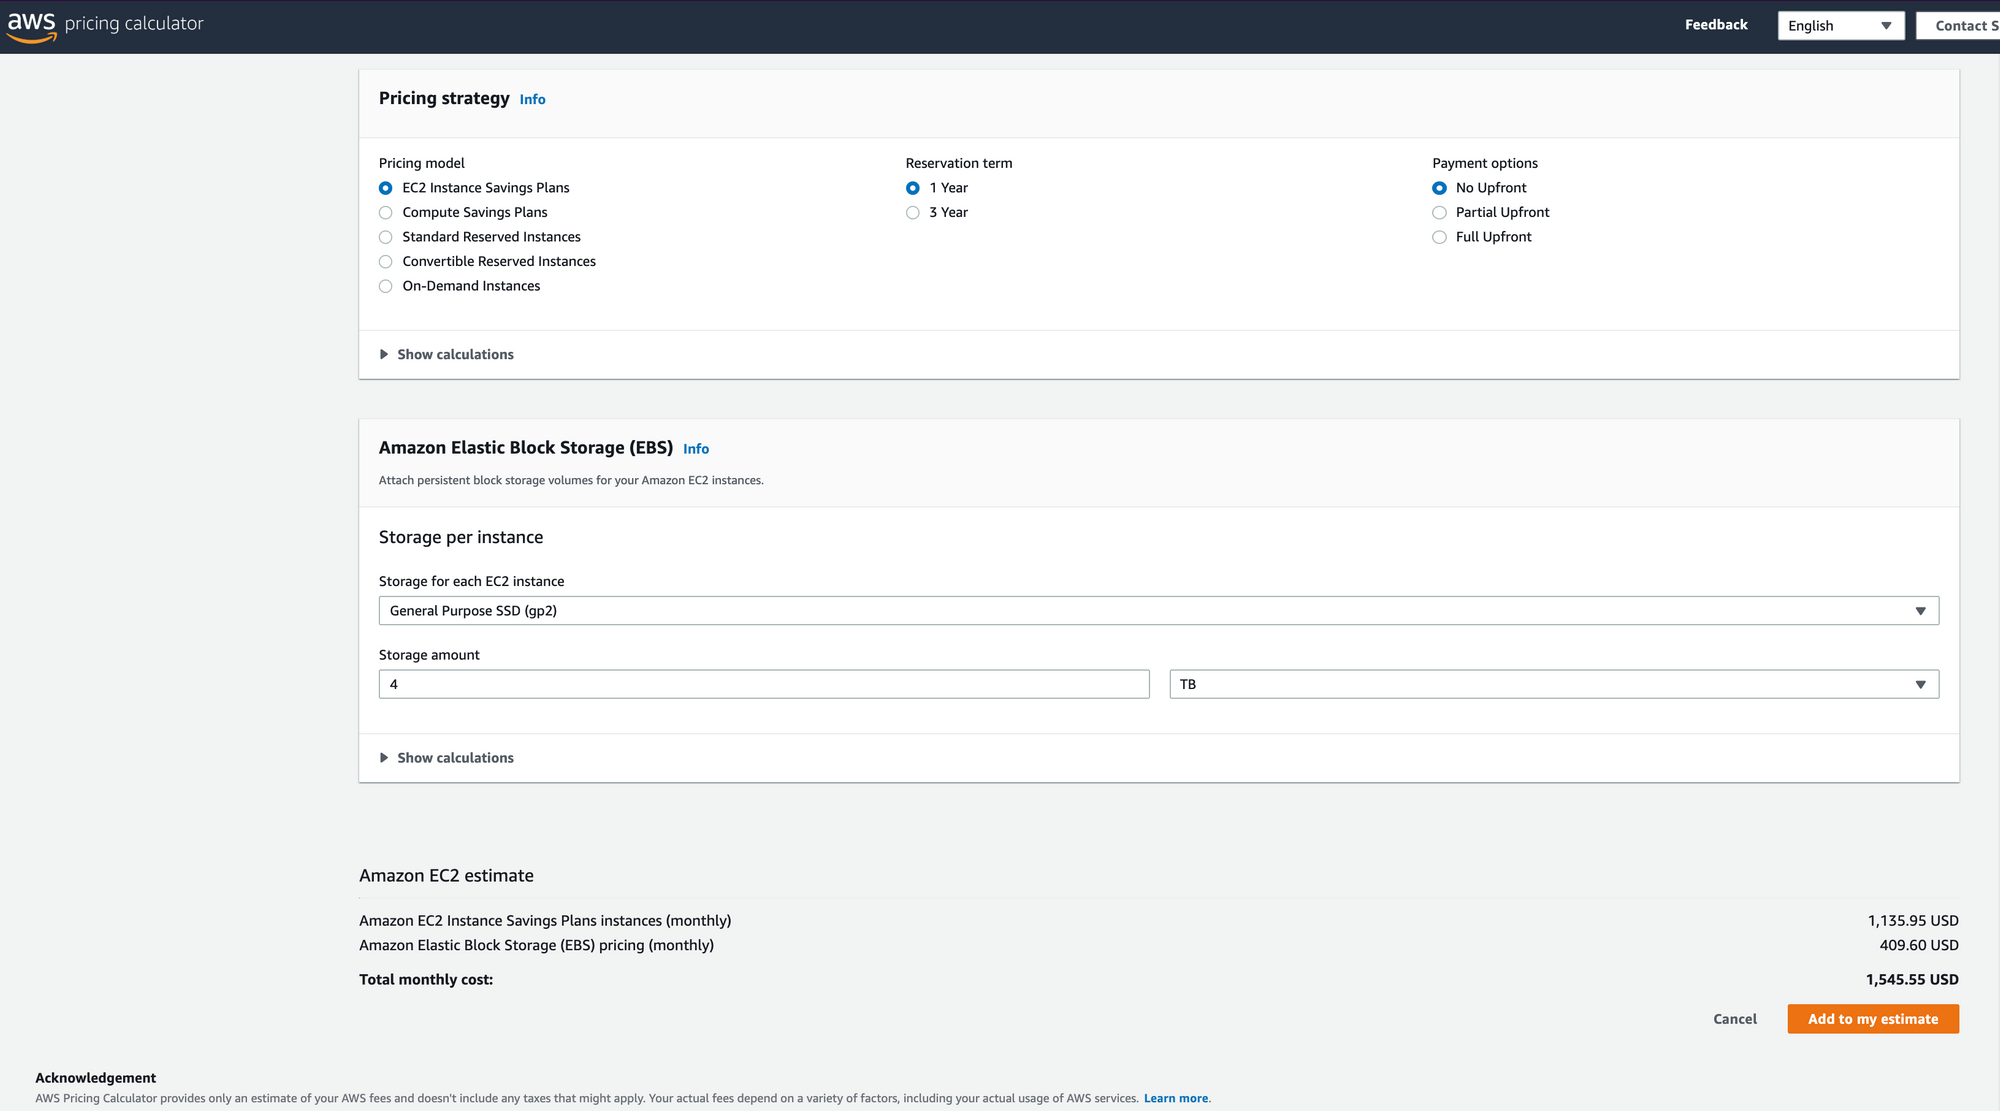
- I used AWS back in 2017 and wow, it cost a lot of money. Using the new AWS calculator, I specked out a very basic estimate of what it would cost to build a machine like this. The ballpark figure I got back was $1,545.55 USD per month after adding the 4TB of storage I have on this machine, roughly 1 instance x 1.5561 USD x 730 hours in month = 1,135.95 USD. Granted I probably won't be training models for 24 hours straight every single day every month, but in order to gain access you gotta commit to this commitment.
- Lastly, the data I'm using may be data that I'm not comfortable storing on the cloud, and would prefer to keep locally. Also, I'll be moving overseas and will need to take this machine with me, to ensure continuity in research without any compute interruption. These two points may not relate at all to you, but these key points were important in my decision to build versus buy.
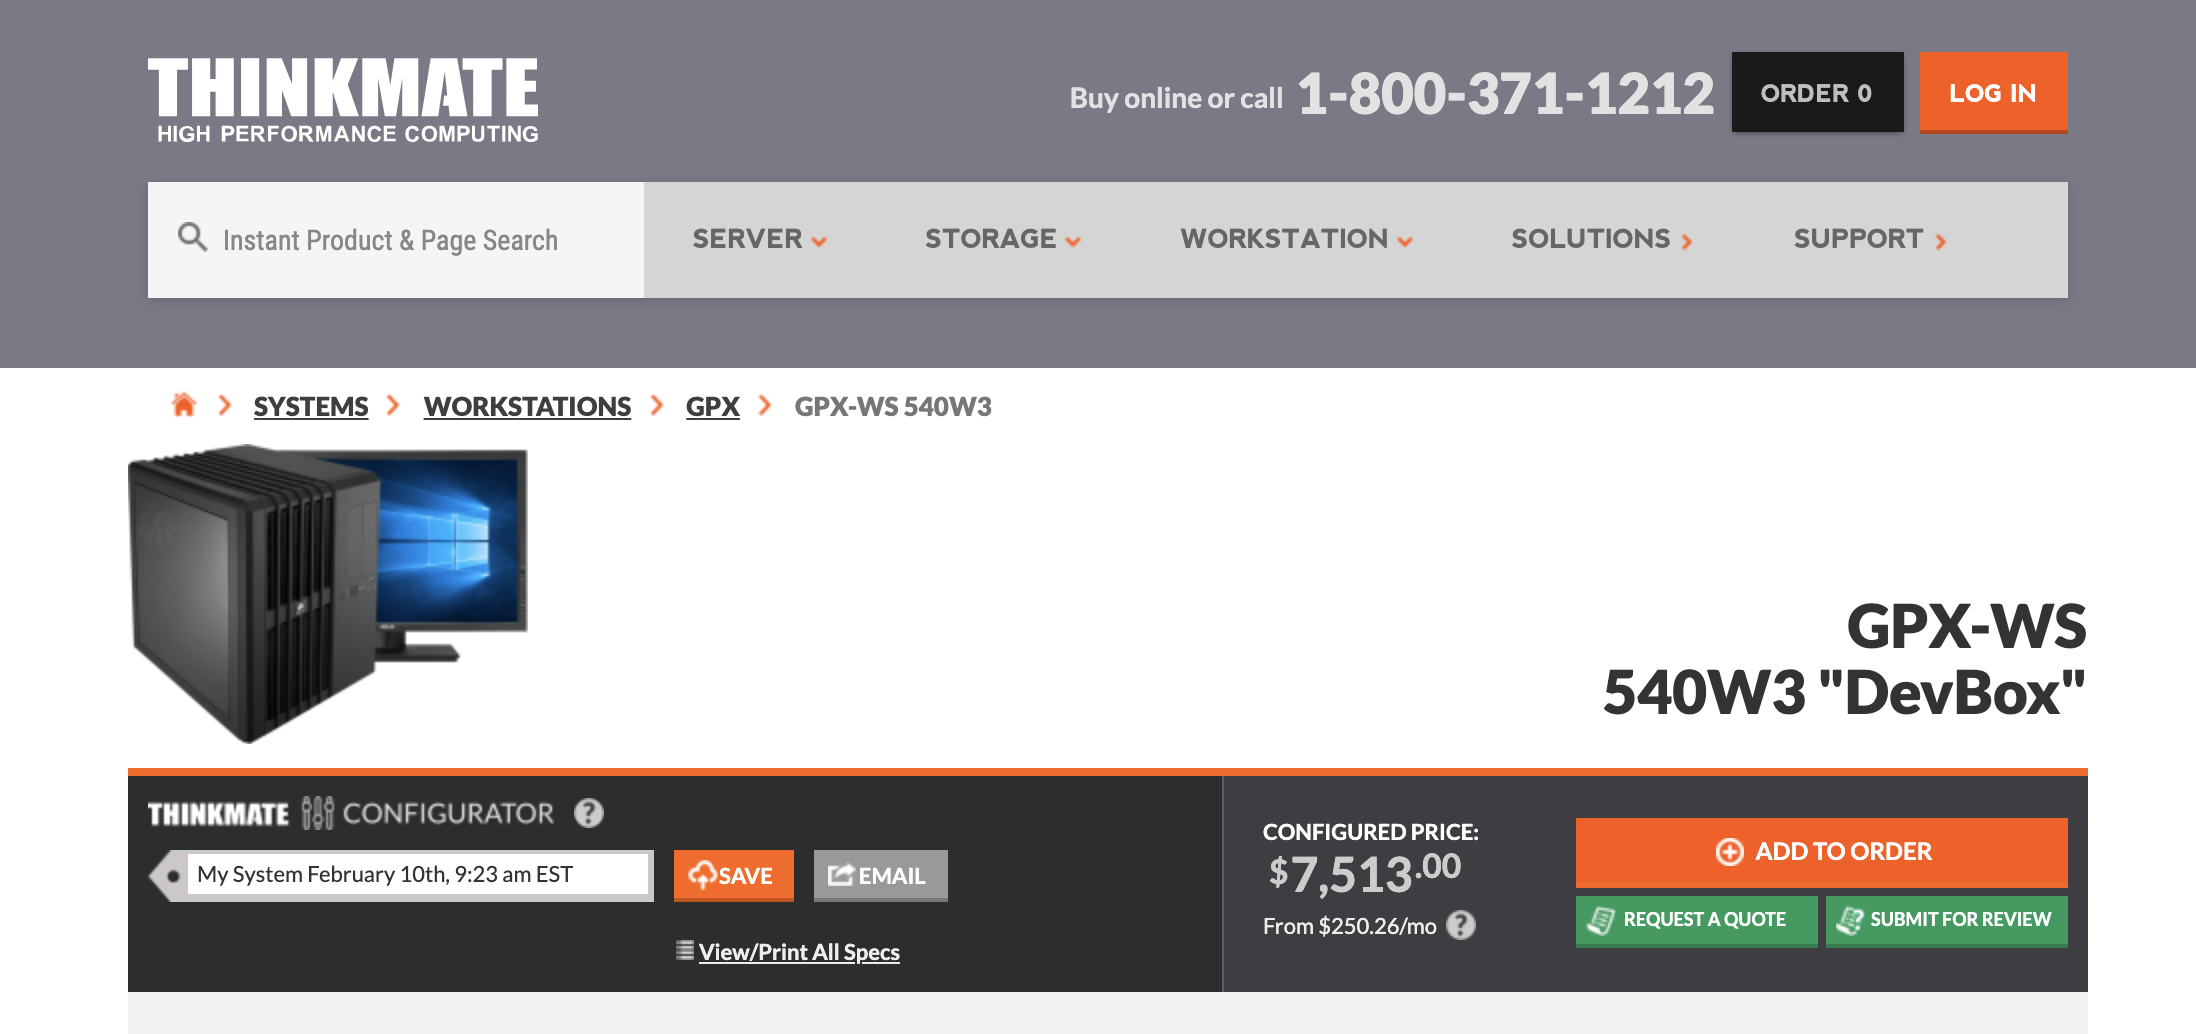
I also ran a ballpark speck at Thinkmate using their GPX-WS 540W3 build. They didn't have all the parts I needed, so I had to speck out 192 Gb DDR4 memory instead of the 128 Gb I installed. So the prices may be a little off, but this speck also has 2 RTX 2080 Ti's, the same type of case, a 4 TB SSD instead of harddrives, and no DVD bay. Also, the Thinkmate doesn't have a monitor or peripherals included. You can see the ballpark price is way up there around $7500!
To give you a sense of my build, it was close to $4000 (recall the AWS speck was $1545.55 per month, hopefully already a ROI after 2.5 months). But you could definitely bring it down to $2800 if you opted for a cheaper CPU cooler, CPU, less memory and purchase only 1 GPU card. So, in no way is this a cheap machine that I built. For hobbyists, enthusiasts, and those getting started, there are great free resources out there that one can use for a limited amount of time typically leveraging a Tesla K80 GPU:
- Google Colaboratory
- Kaggle Kernels
- Low priced FloydHub plans
- And probably more "built in" plans using automated machine learning software.
I think there are some other intangible benefits of building a machine. You get an opportunity to be hands-on and control the configuration of your compute resources. You also get an intimate understanding and appreciation of the components, providing a great educational opportunity for those who don't normally build computers.
Equipment
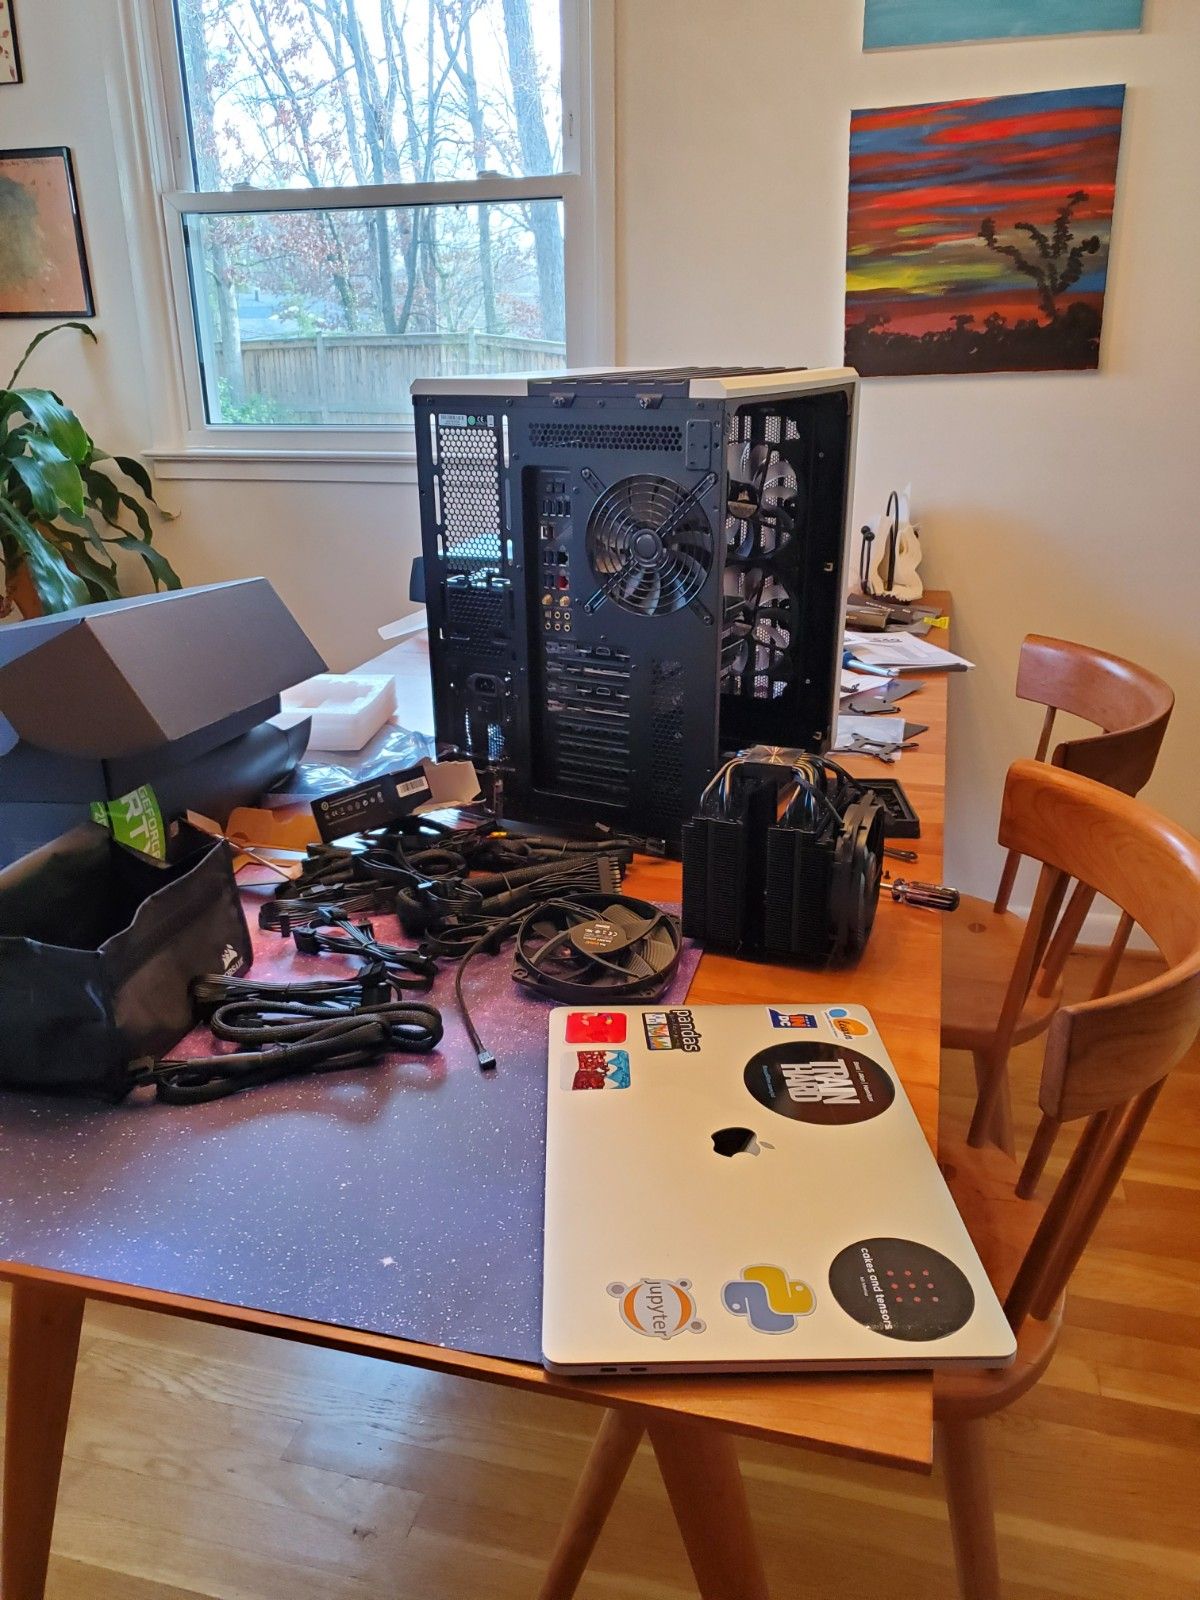
During the build, I worked with a friend. This was helpful because he had built a few computers in his lifetime, but not one with a GPU. So it was a great learning experience for him and me. Also it helps to work with a friend because there were times that two people were needed to physically install the components - i.e. hold a flashlight, screw in tiny bolts, etc.
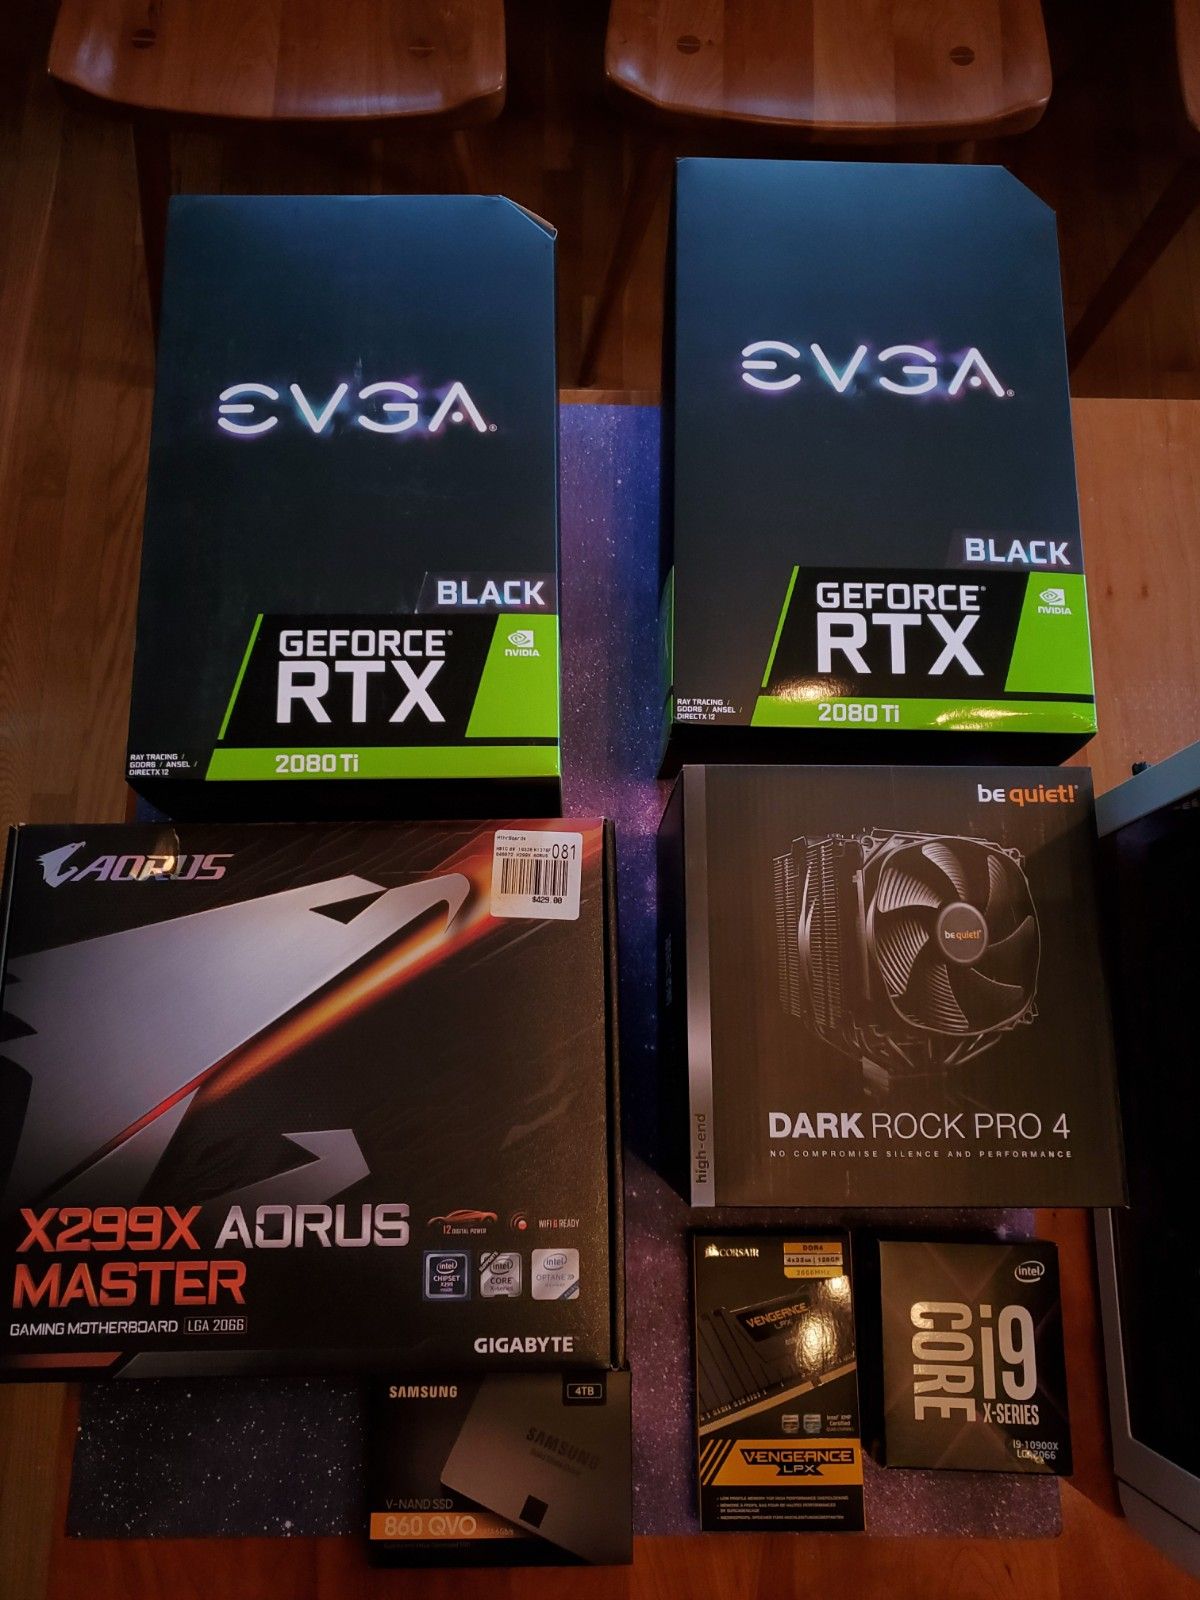
Here are the specks from pcpartpicker. The one difference from the list below, is that I opted to order a 4 TB SSD, not the 1 TB specked out below. Also make sure to check out Microcenter (in my neck of the woods) or Fry's. I had to order the CPU and the Motherboard from Microcenter, instead of online, cause it would ship faster.
| Type | Item | Price |
|---|---|---|
| CPU | Intel Core i9-10900X 3.7 GHz 10-Core Processor | $599.99 @ Best Buy |
| CPU Cooler | be quiet! Dark Rock Pro 4 50.5 CFM CPU Cooler | $89.90 @ Amazon |
| Motherboard | Gigabyte X299X AORUS MASTER EATX LGA2066 Motherboard | $429.00 @ B&H |
| Memory | Corsair Vengeance LPX 128 GB (4 x 32 GB) DDR4-2666 Memory | $579.99 @ Newegg |
| Storage | Samsung 860 QVO 1 TB 2.5" Solid State Drive | $106.99 @ B&H |
| Video Card | EVGA GeForce RTX 2080 Ti 11 GB Black Video Card (2-Way SLI) | $1099.98 @ Walmart |
| Video Card | EVGA GeForce RTX 2080 Ti 11 GB Black Video Card (2-Way SLI) | $1099.98 @ Walmart |
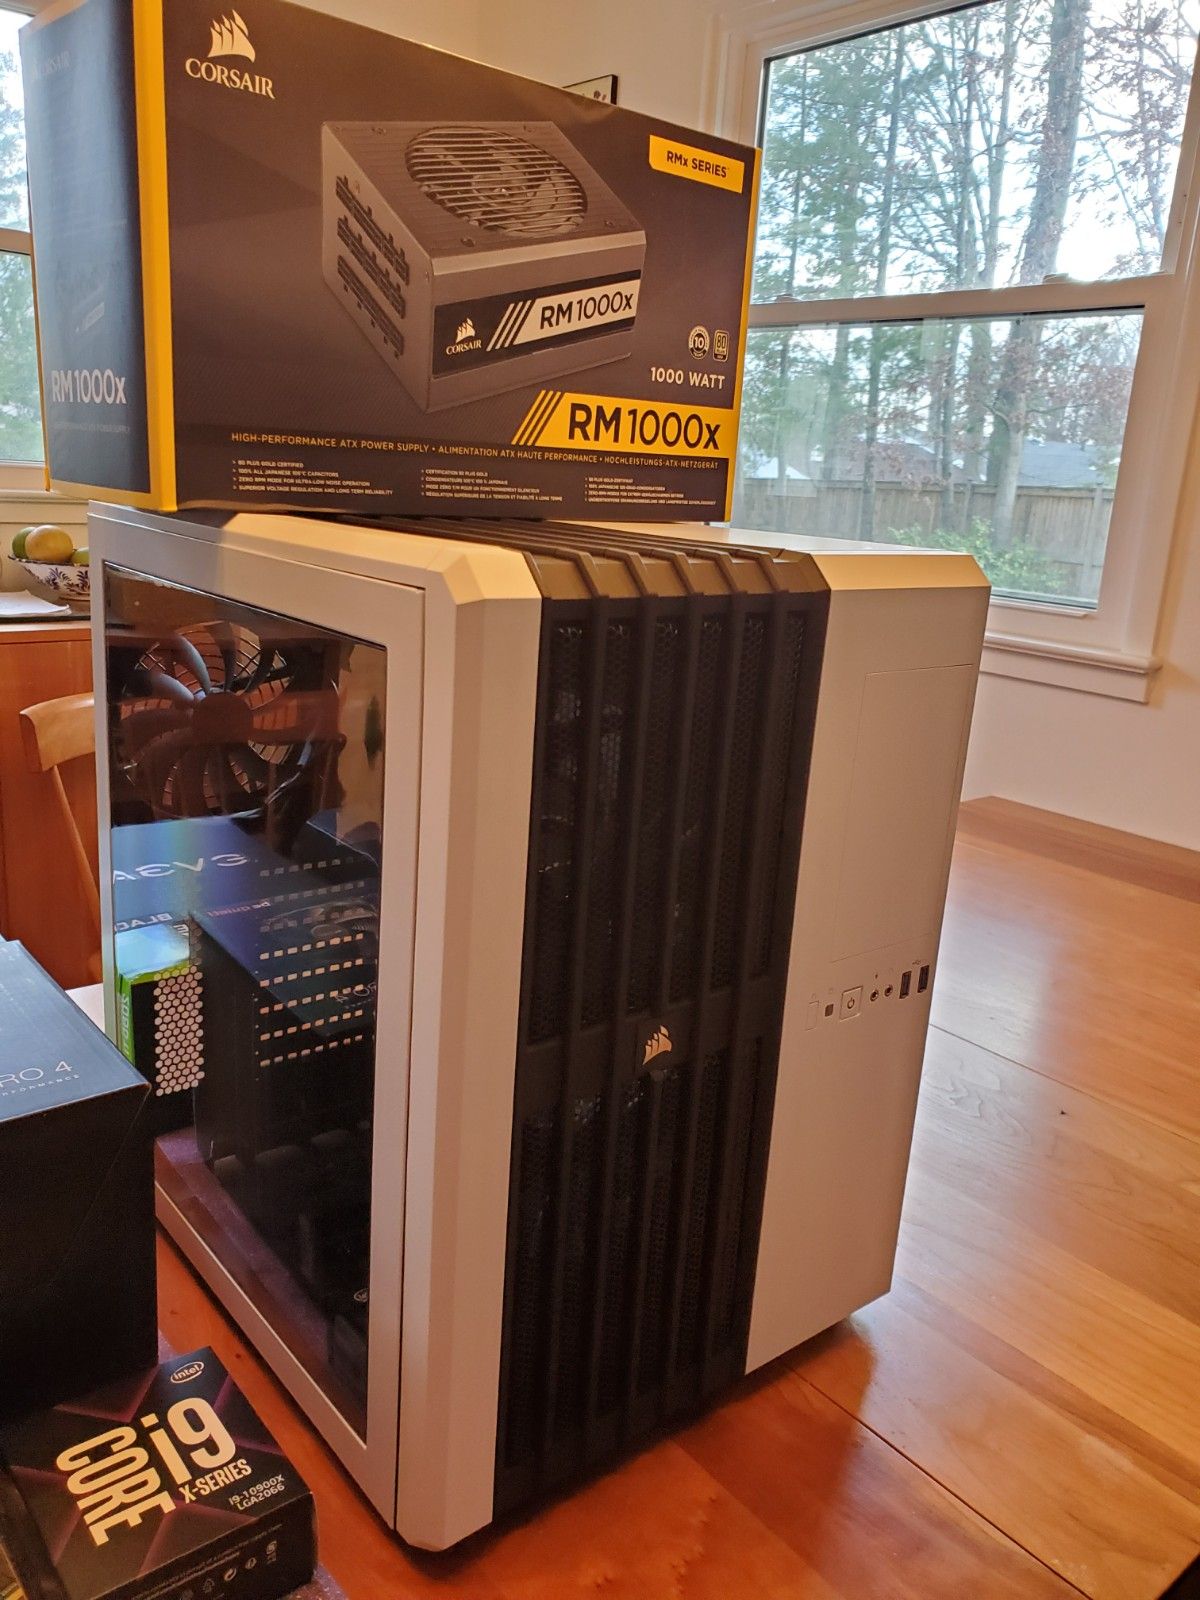
| Case | Cooler Master MasterBox Pro 5 RGB ATX Mid Tower Case | $84.99 @ Amazon |
| Power Supply | Corsair RMx 1000 W 80+ Gold Certified Fully Modular ATX Power Supply | $198.99 @ Amazon |
| Prices include shipping, taxes, rebates, and discounts | ||
| Generated by PCPartPicker 2020-02-09 15:24 EST-0500 |
Install the Motherboard
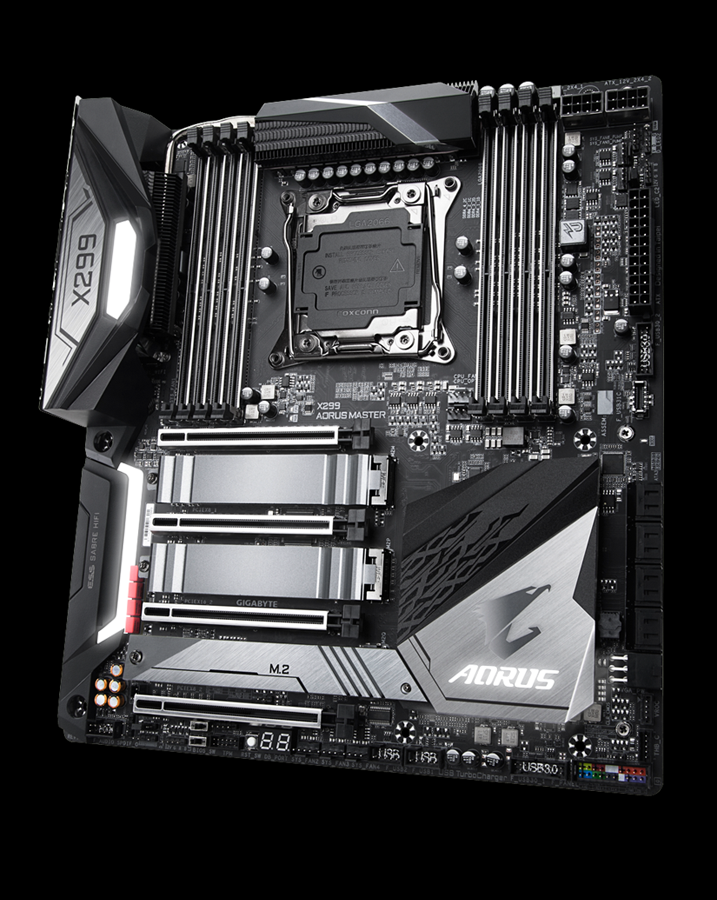
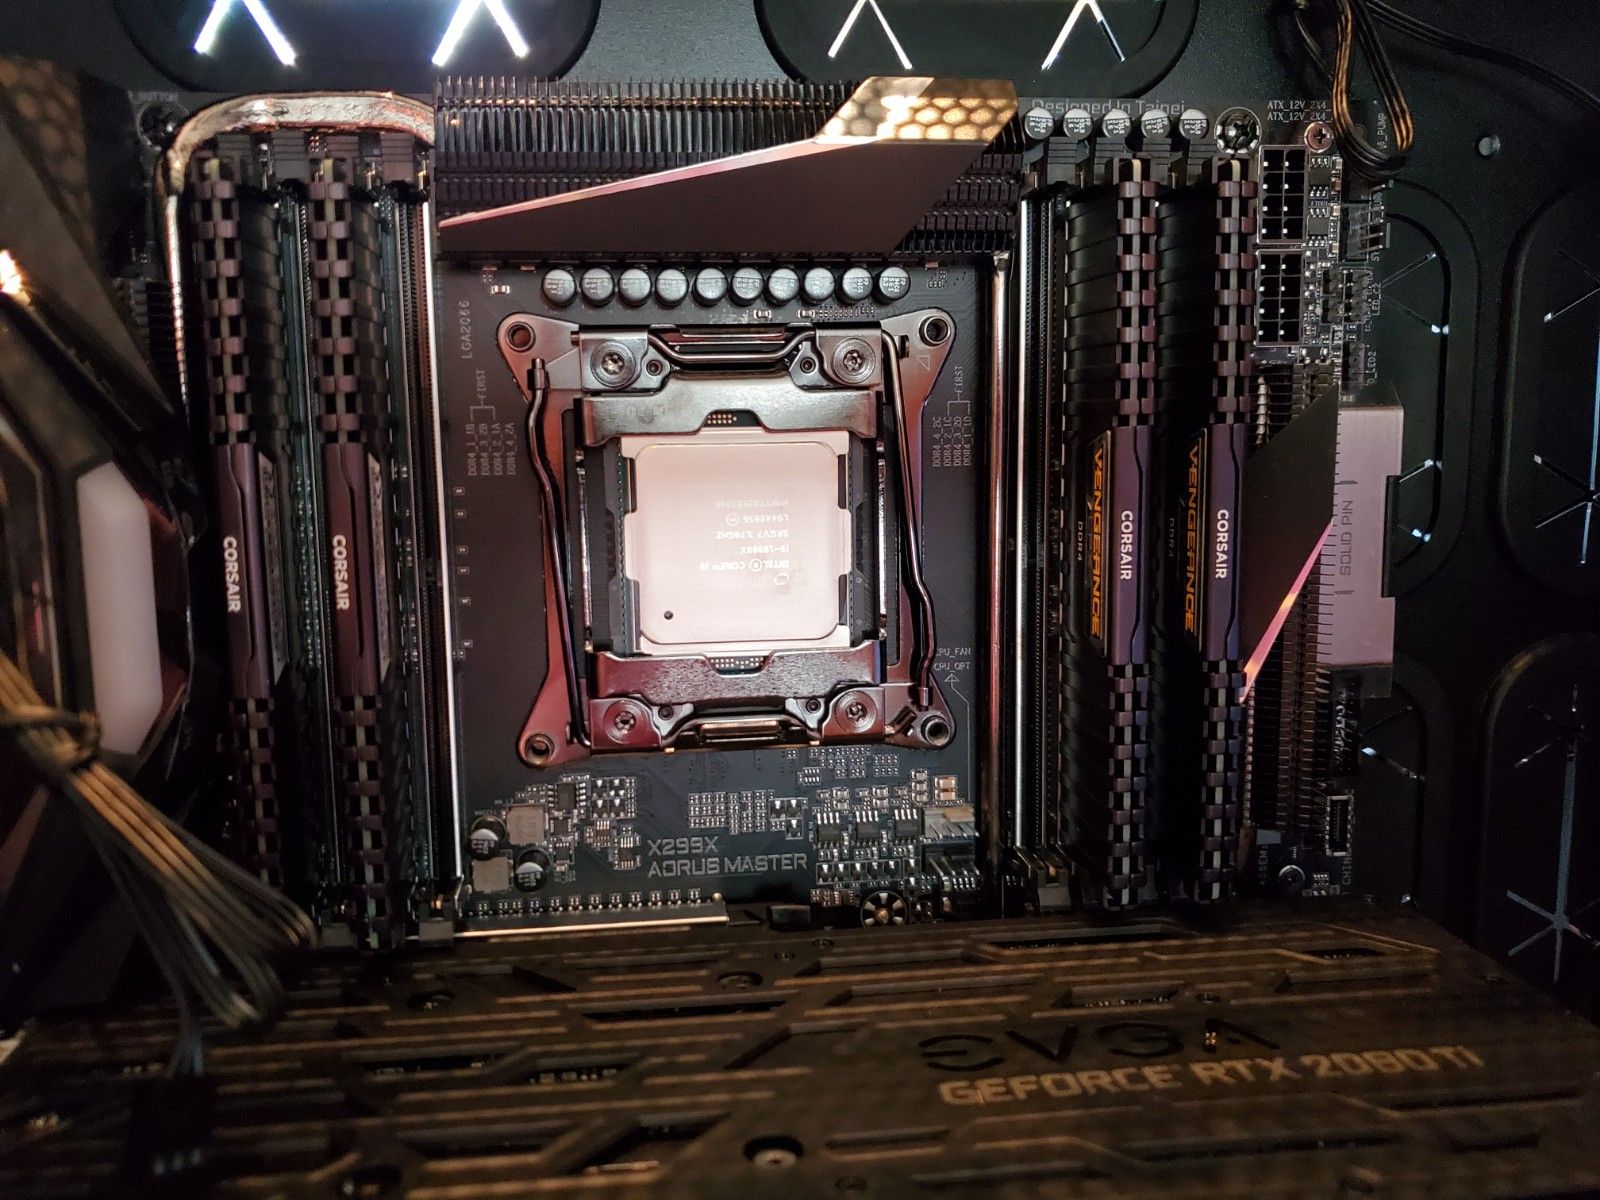
I chose to buy the X299 Aorus LGA 2066 gaming motherboard compatible with an i9 Processor. Ed recommended this, but looking into, the specs are pretty reasonable and the price is fair: https://www.gigabyte.com/us/Motherboard/X299-AORUS-MASTER-rev-10#kf I also think the LED customizations must have made for a cool blue glow on the GPU cards.
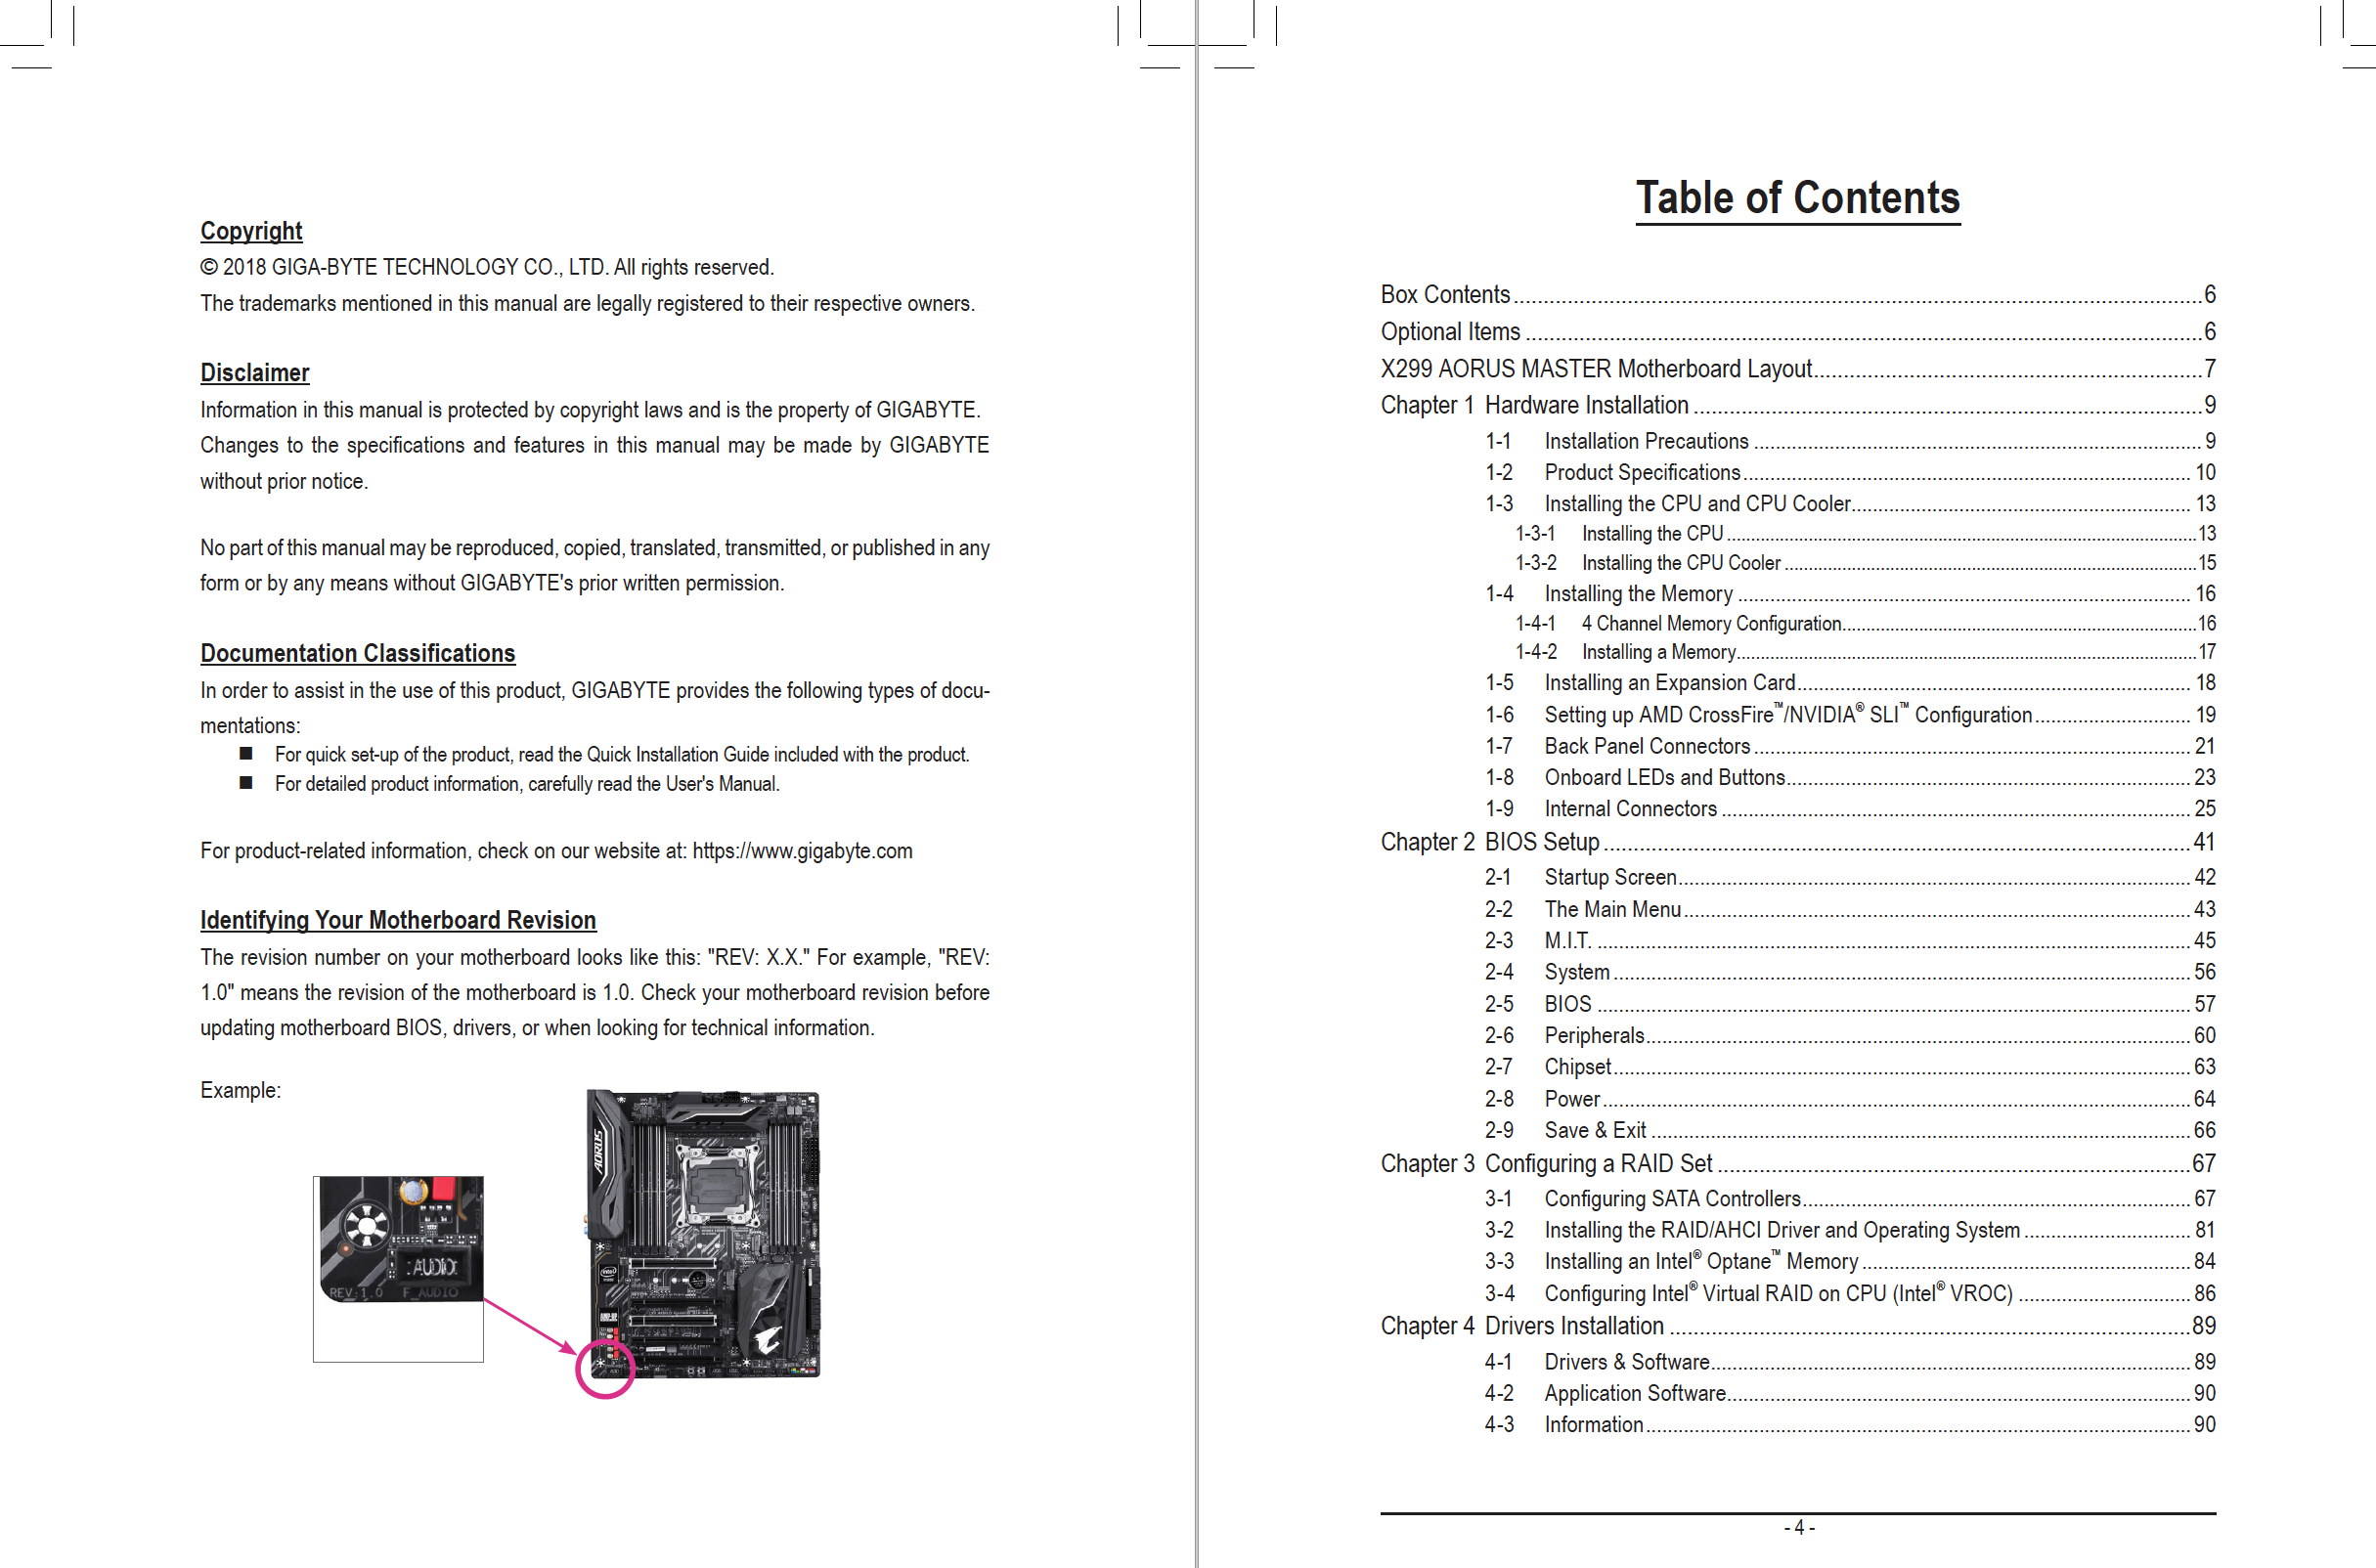
Alright, so for all the installation steps, we pretty much just followed the Aorus installation manual that came right out of the box. I was pleasantly surprised by how relatively easy it was to install everything. All you need is a cup of coffee and a Phillips head screwdriver. We start by installing the motherboard into the case.

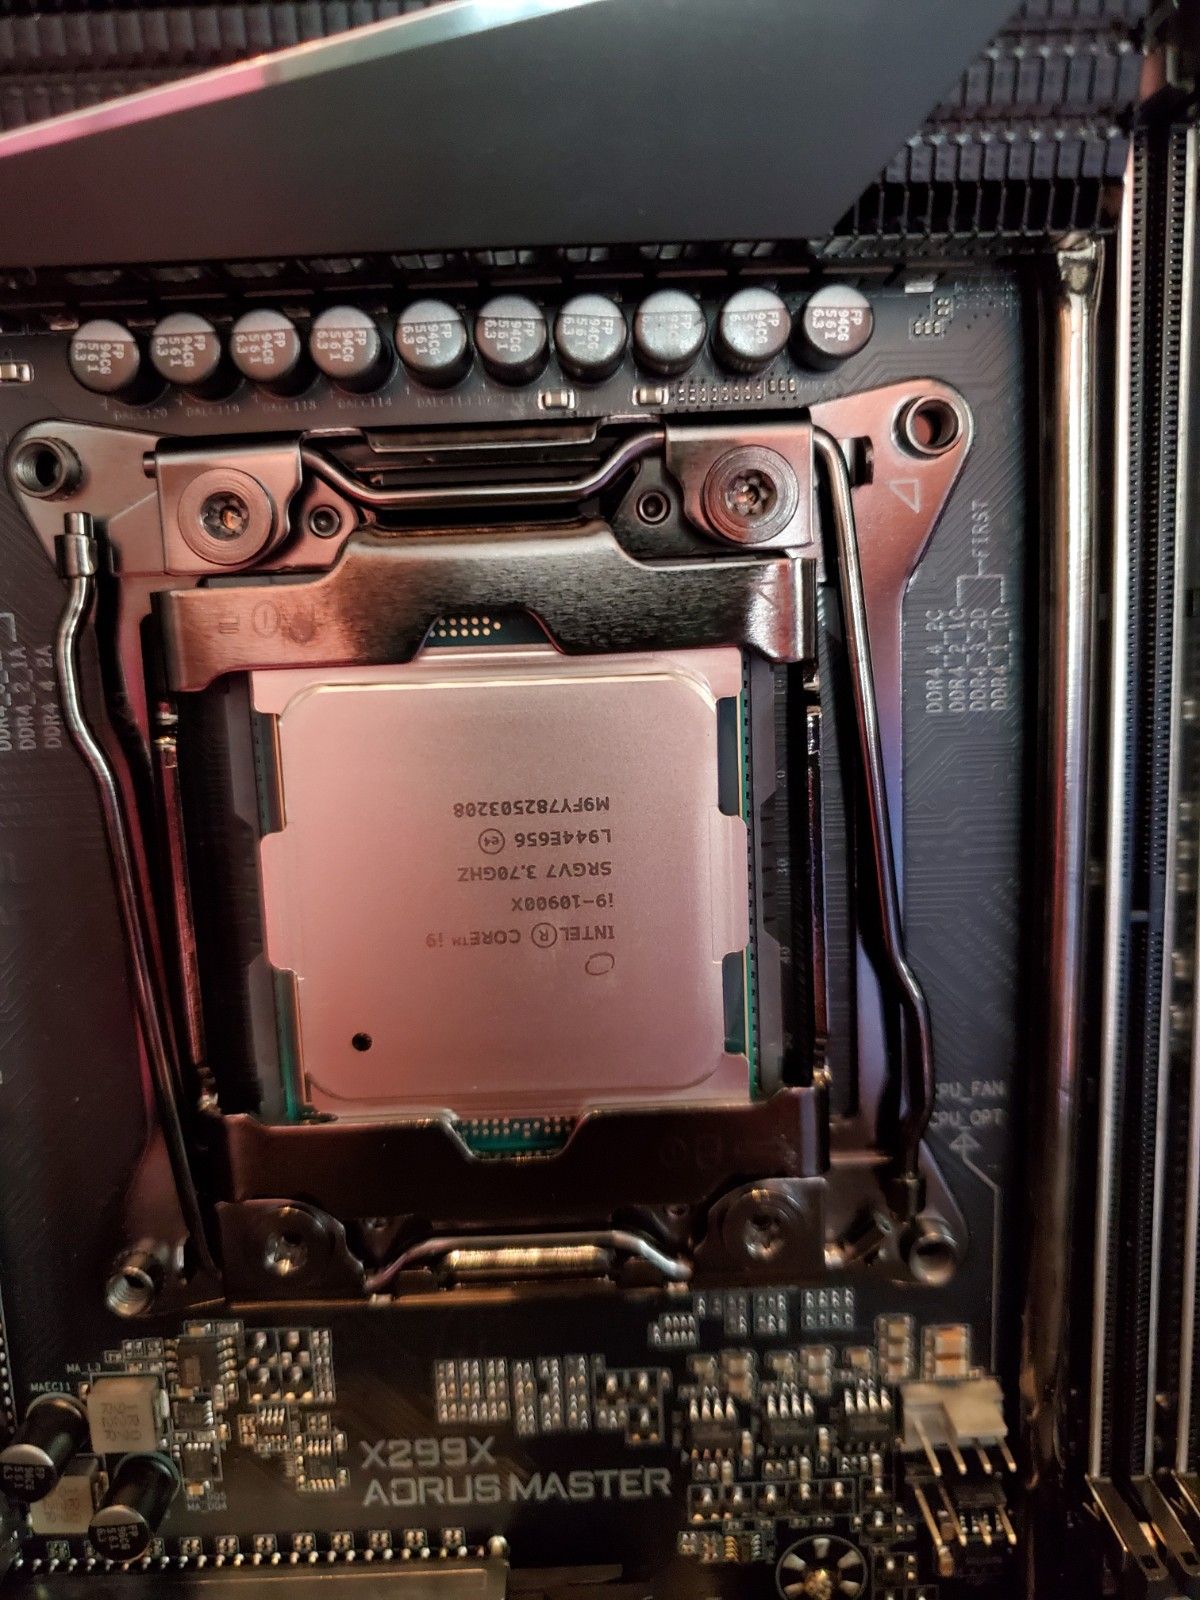
Install the CPU
So super easy. Pull out the manual in the i9 box and just follow these Ikea-like instructions. Mount it right on the motherboard. Done.

Install the Power Supply
Everything else after the motherboard and CPU, is really a matter of your own preference. What we did was install the big stuff first, because we figured that'll take up the most real estate. See some of the tips below about installing the GPU cards. I got overzealous and wanted to install the GPU cards right away. Not a good idea. We ended up installing and reinstalling a few times, since we found our access to certain screws and ability to thread through cables was blocked.
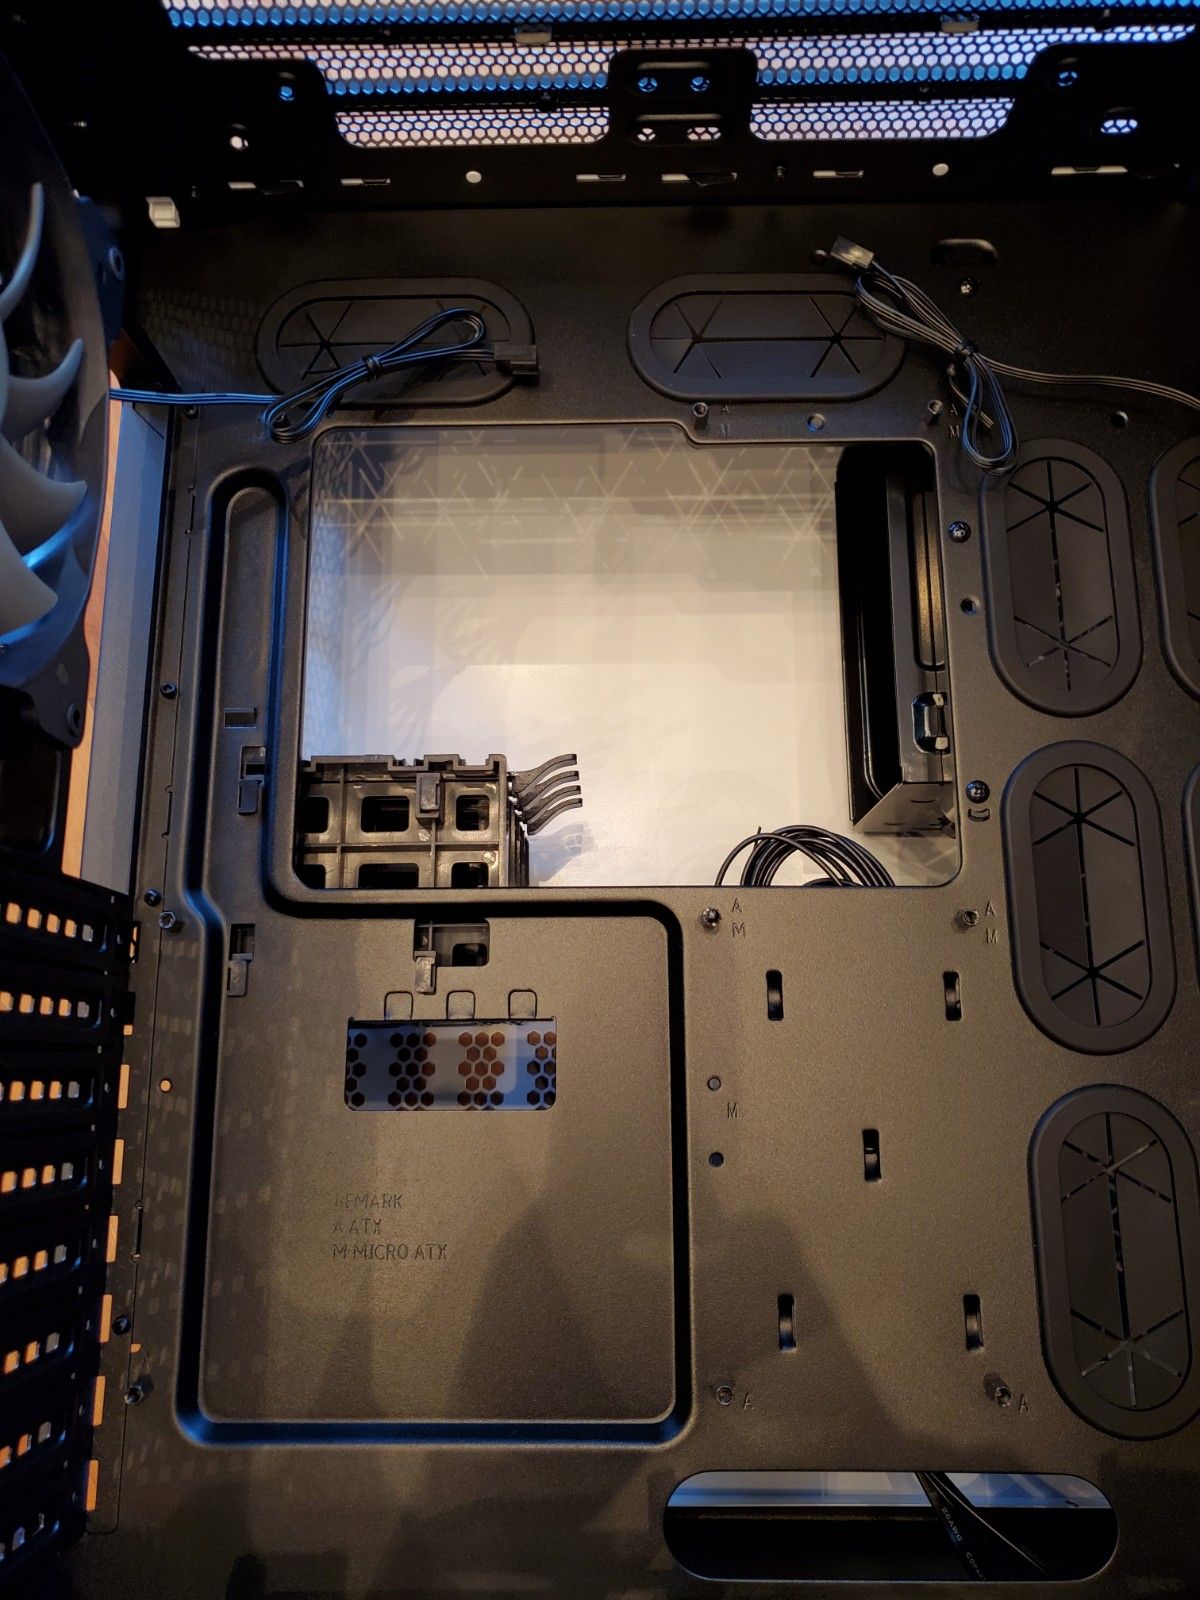
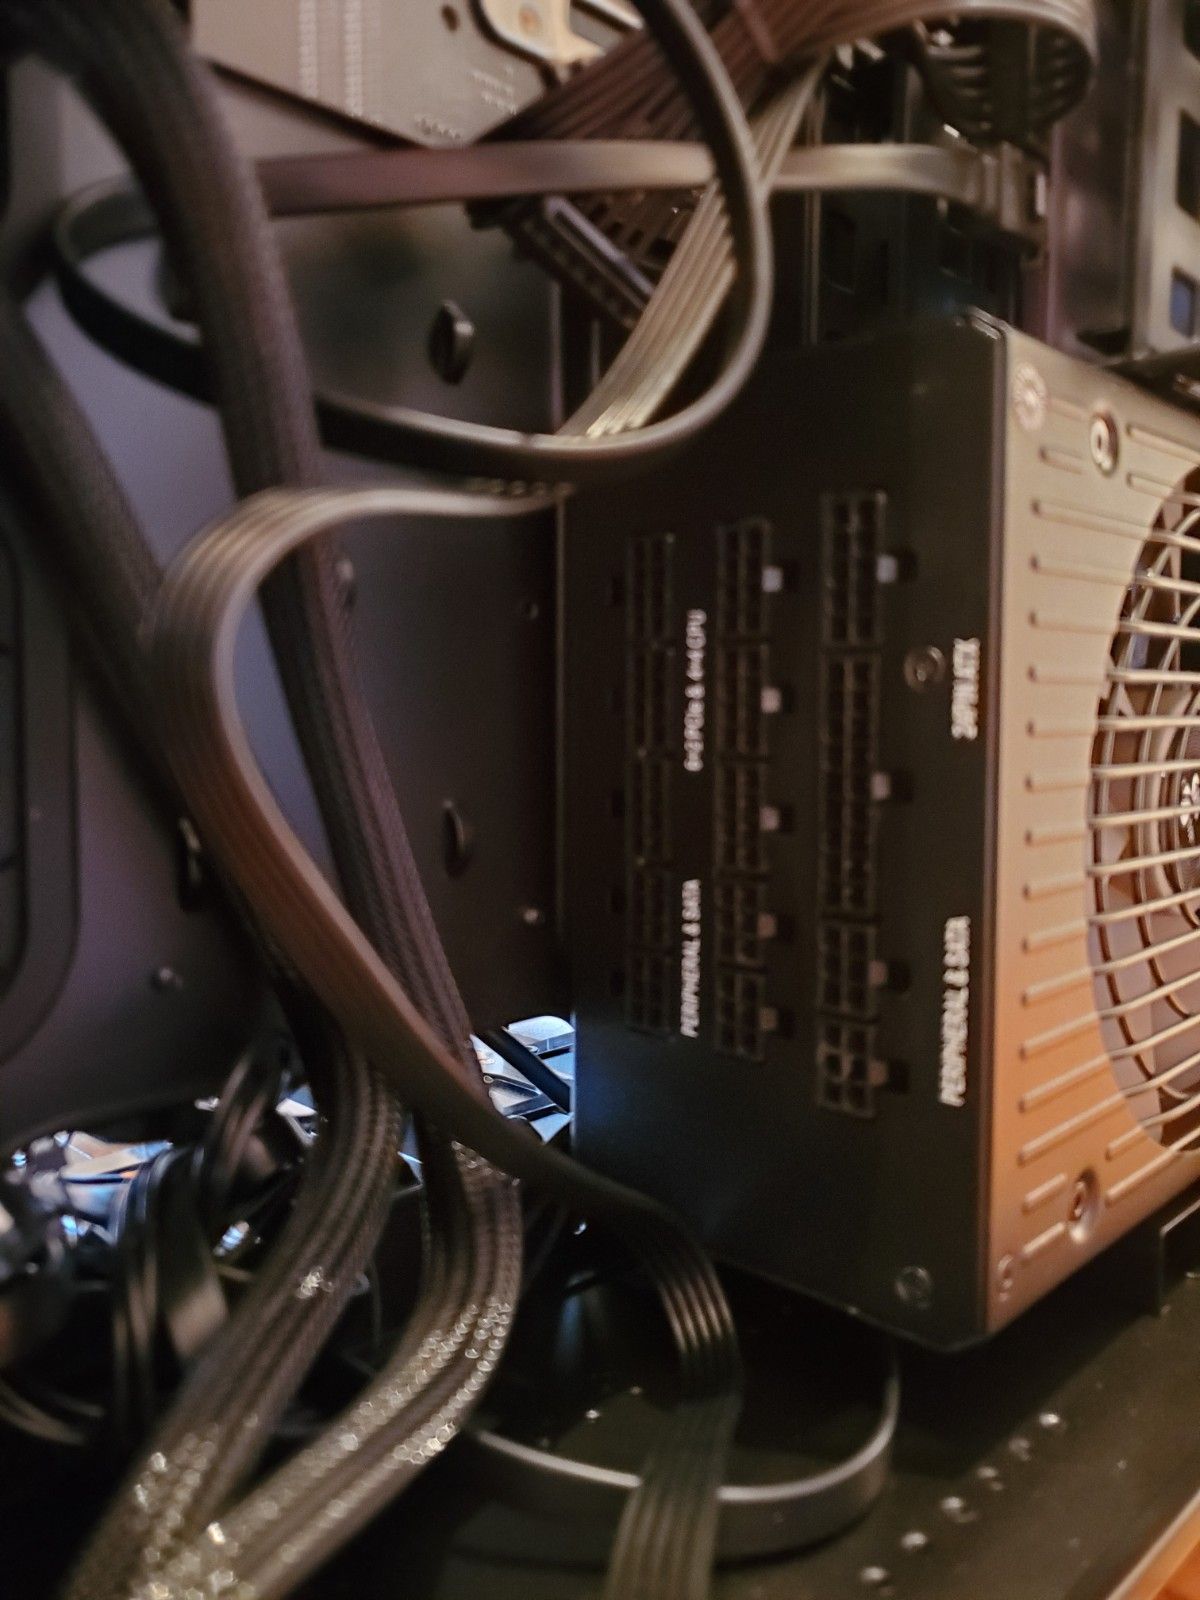
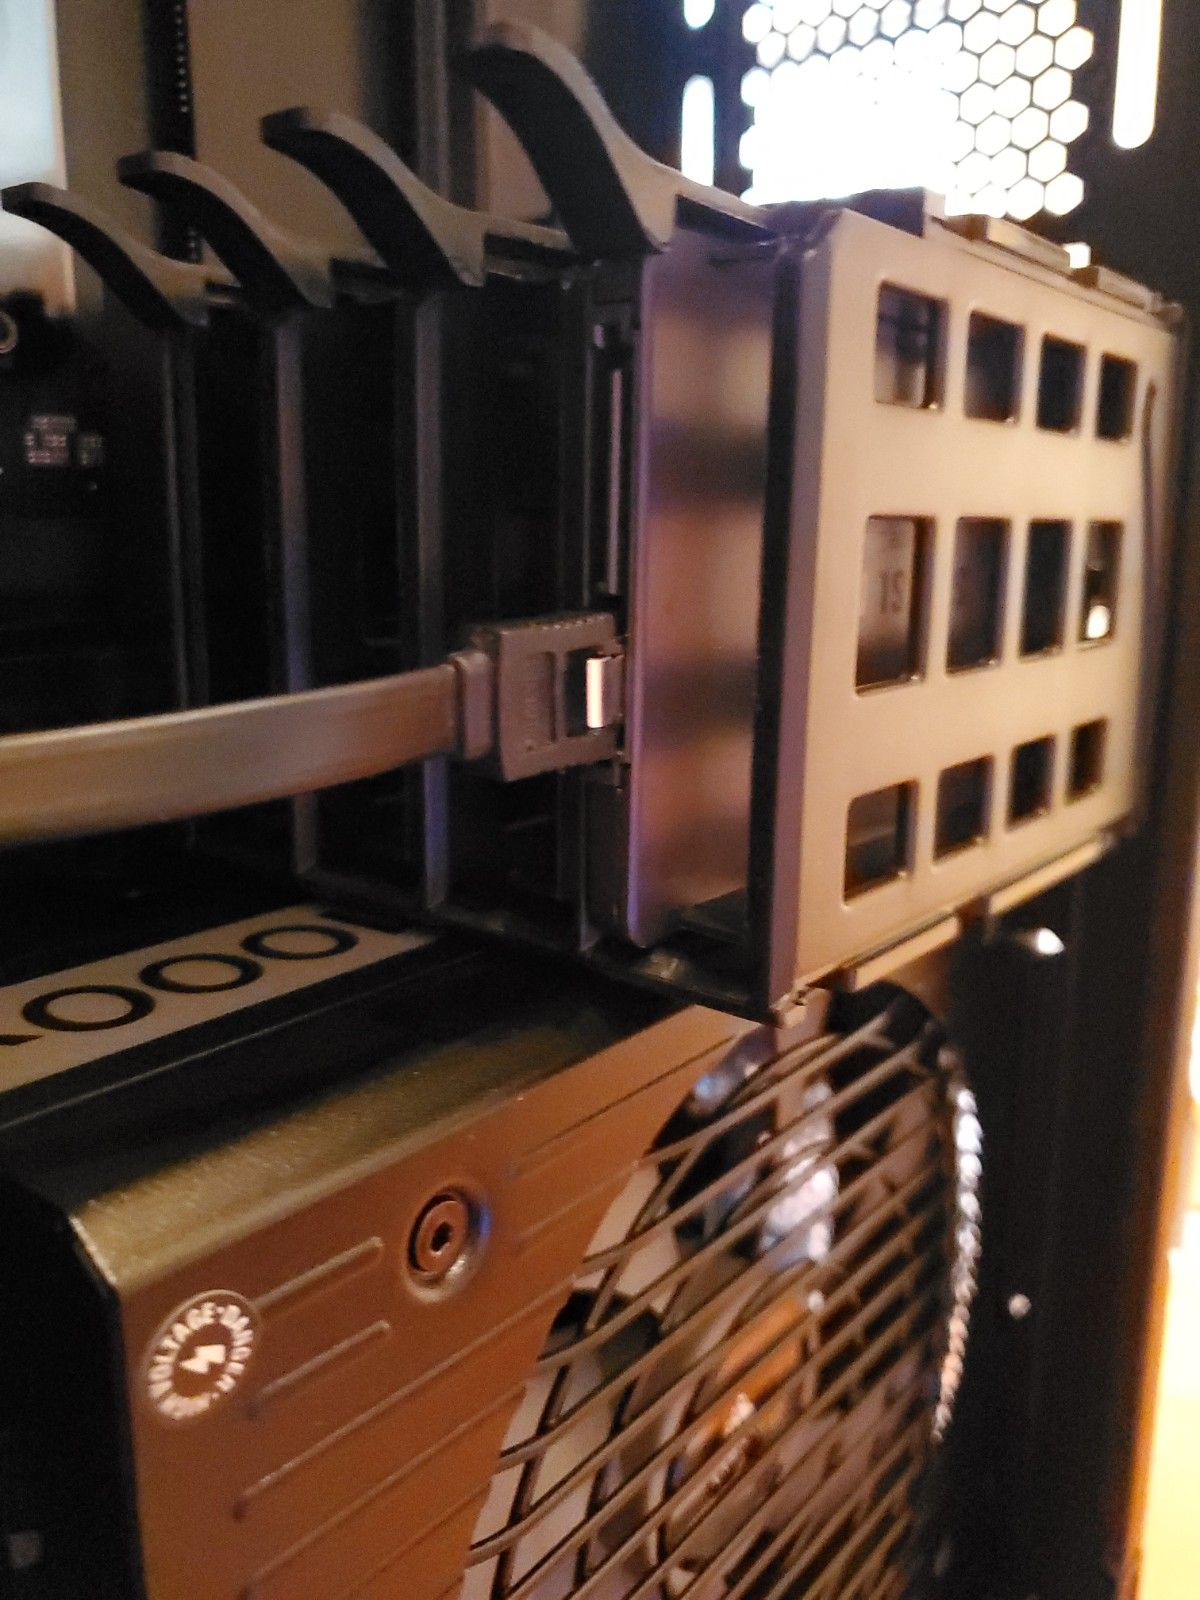
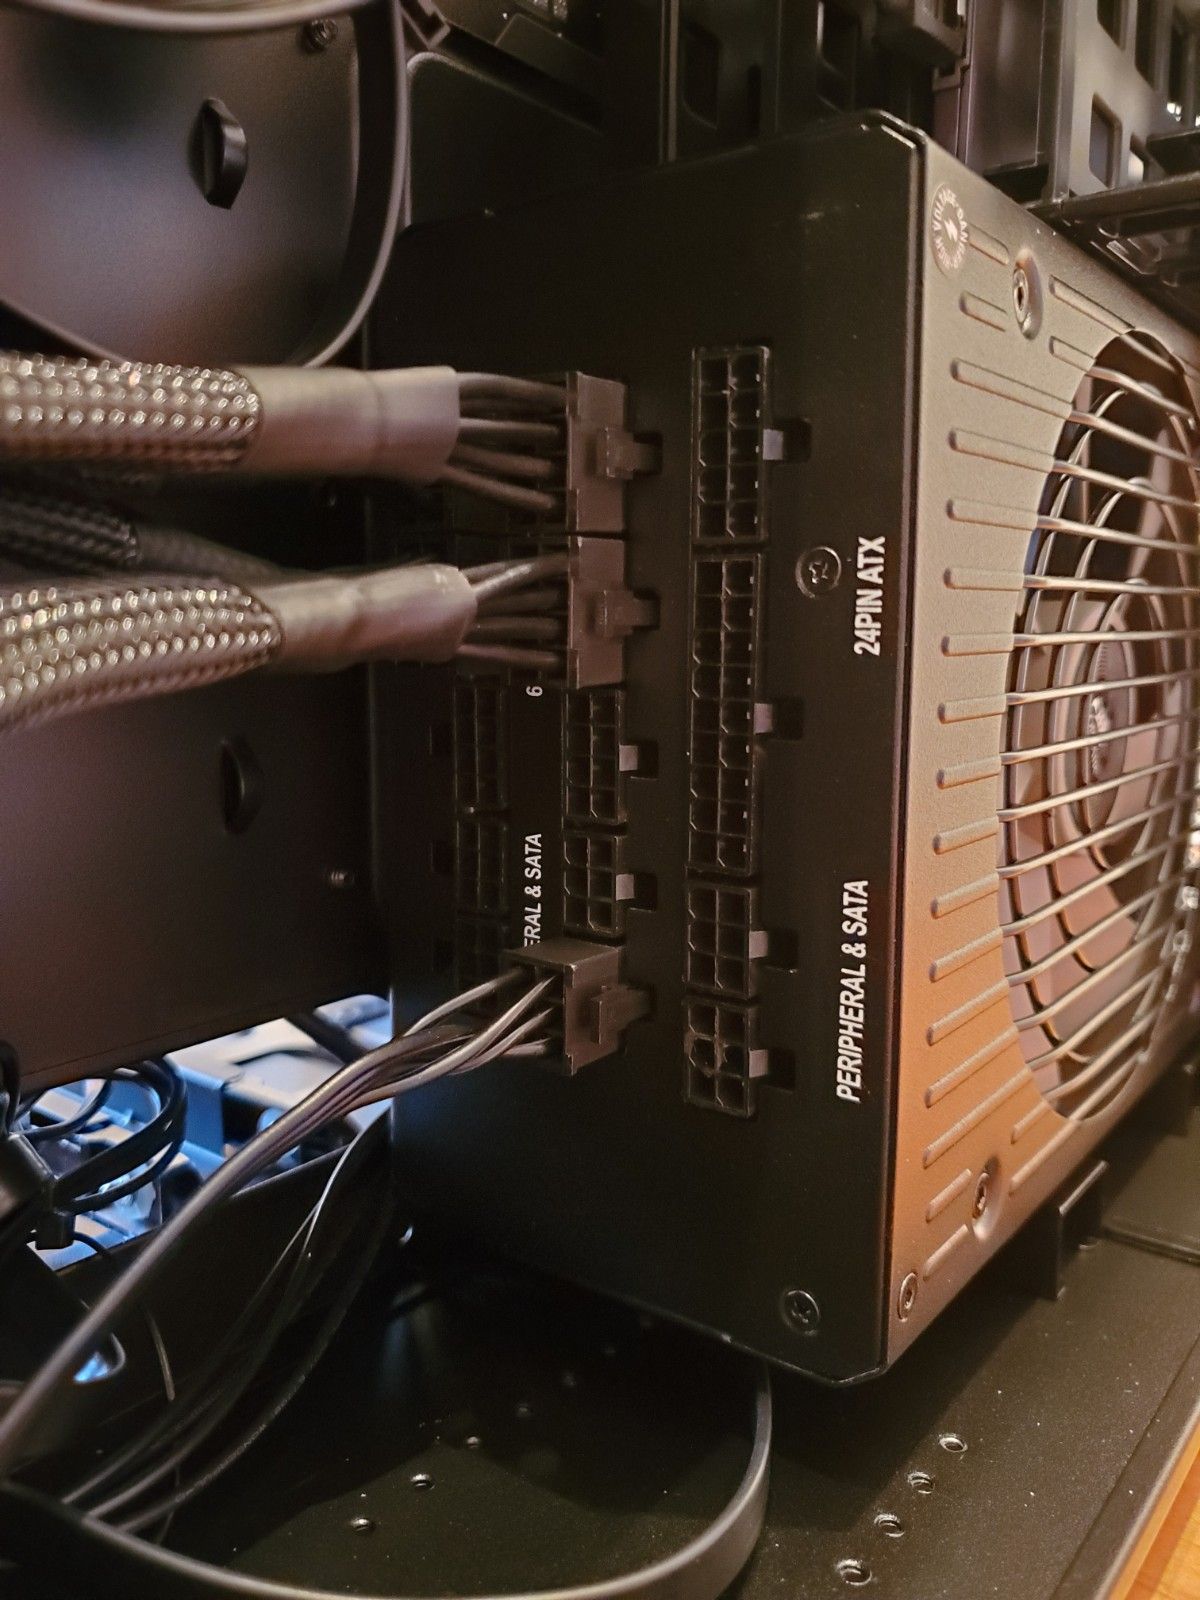
Ok, so here we are on the other side of the case. The bottom with the fan is the Corsair power supply. Sitting on top is the SSD case. We have four bays.
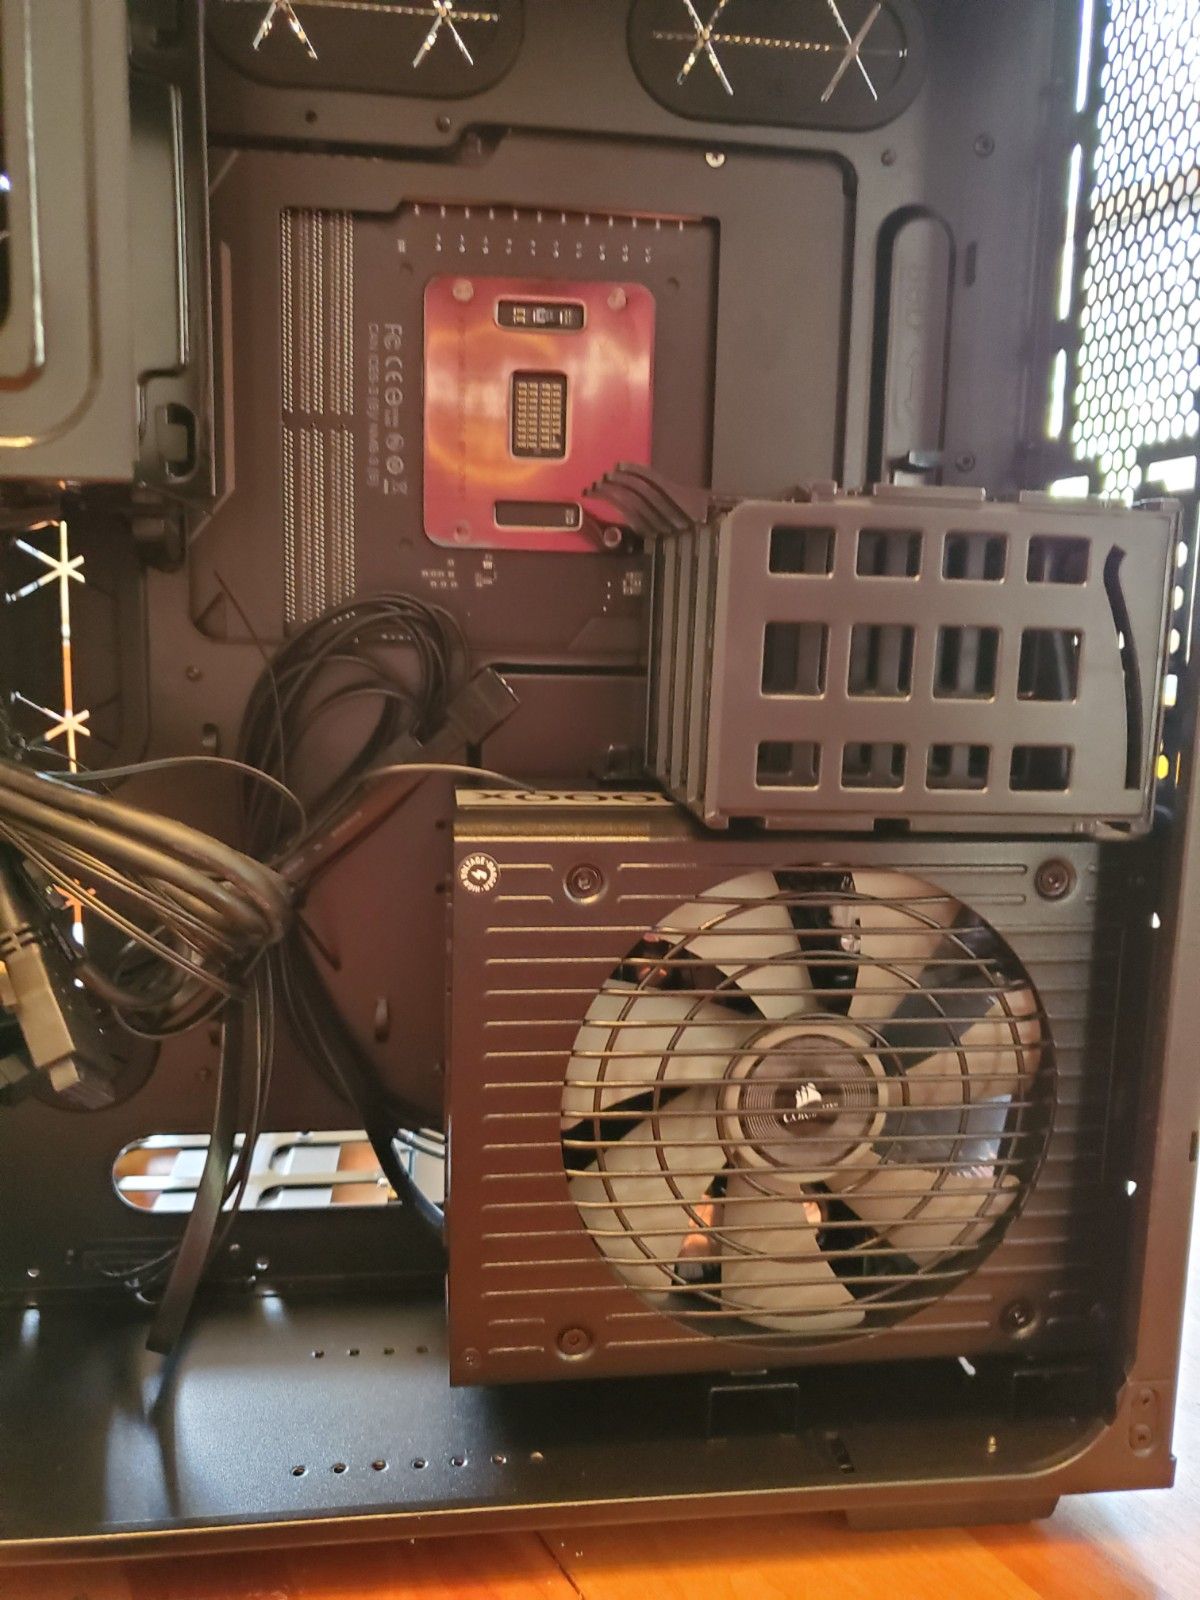
Nothing remarkable here. Just removed a bracket that was preexisting on the case, and screwed in the power supply. When we're ready to plug in the PCIE cables for the GPUs and the motherboard, we'll plug them in here:
Install the Memory
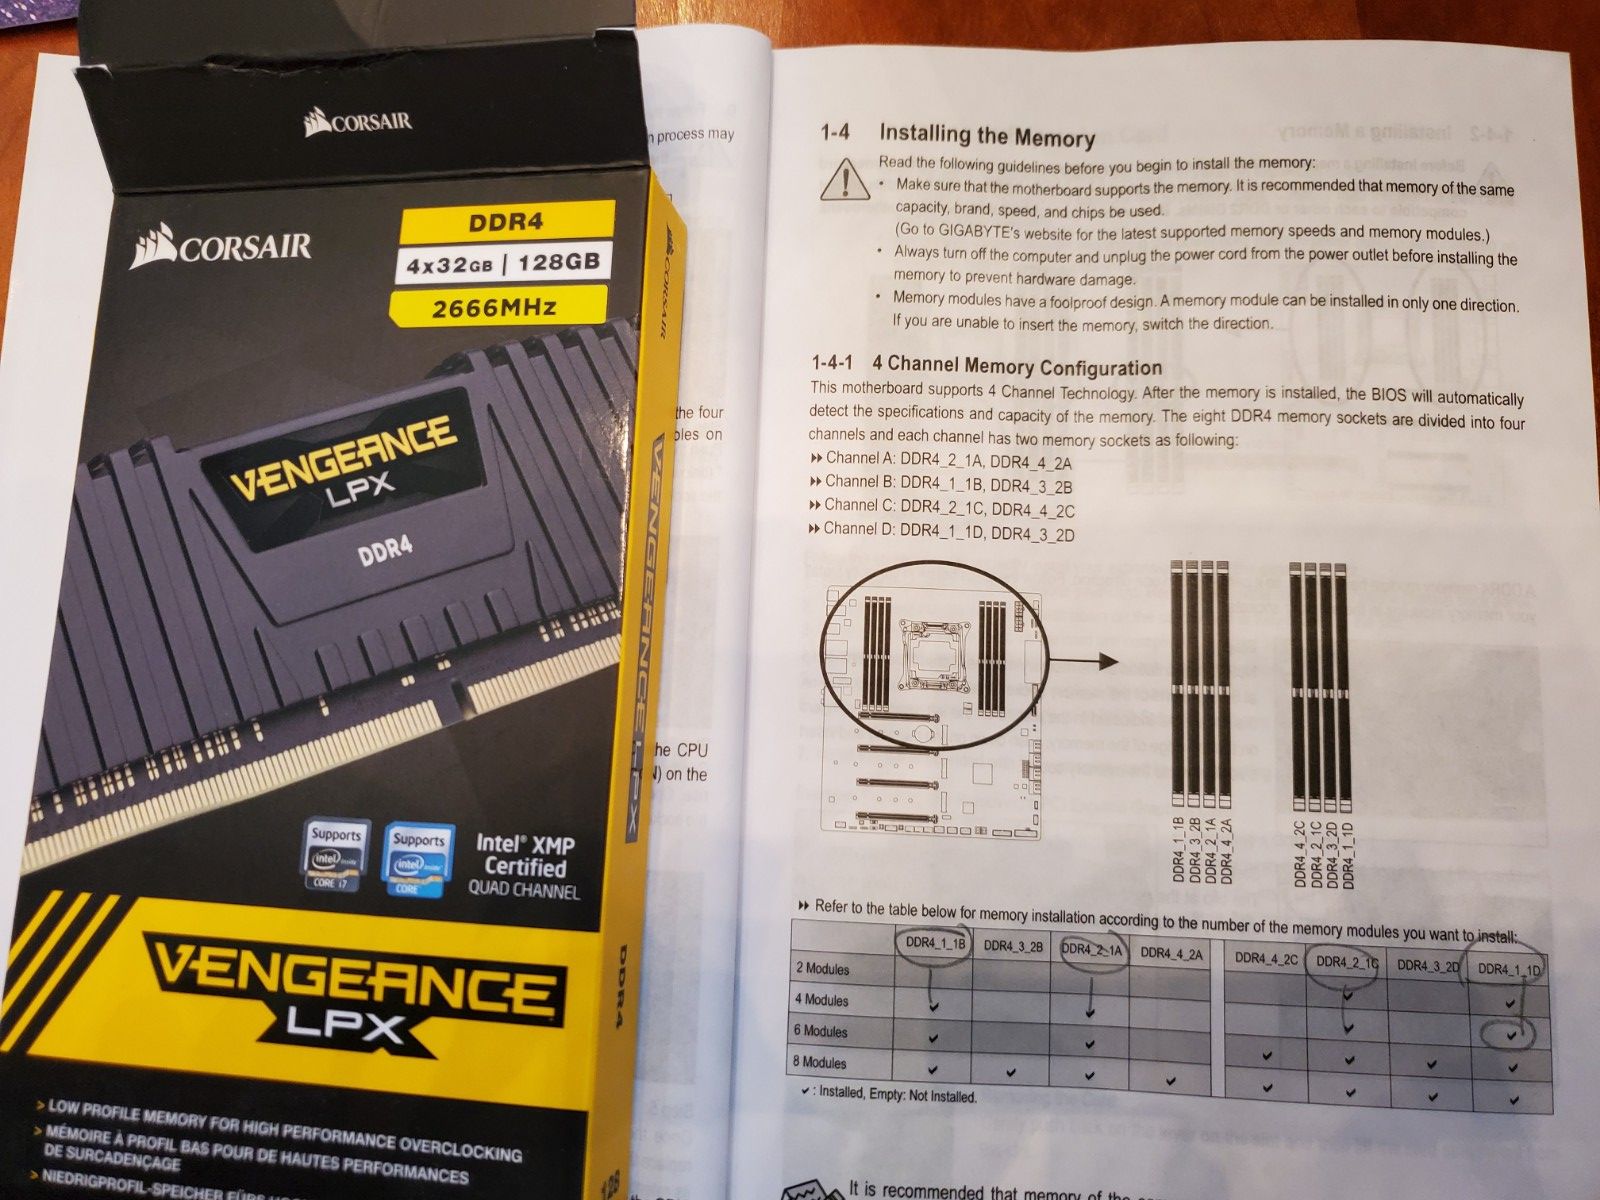
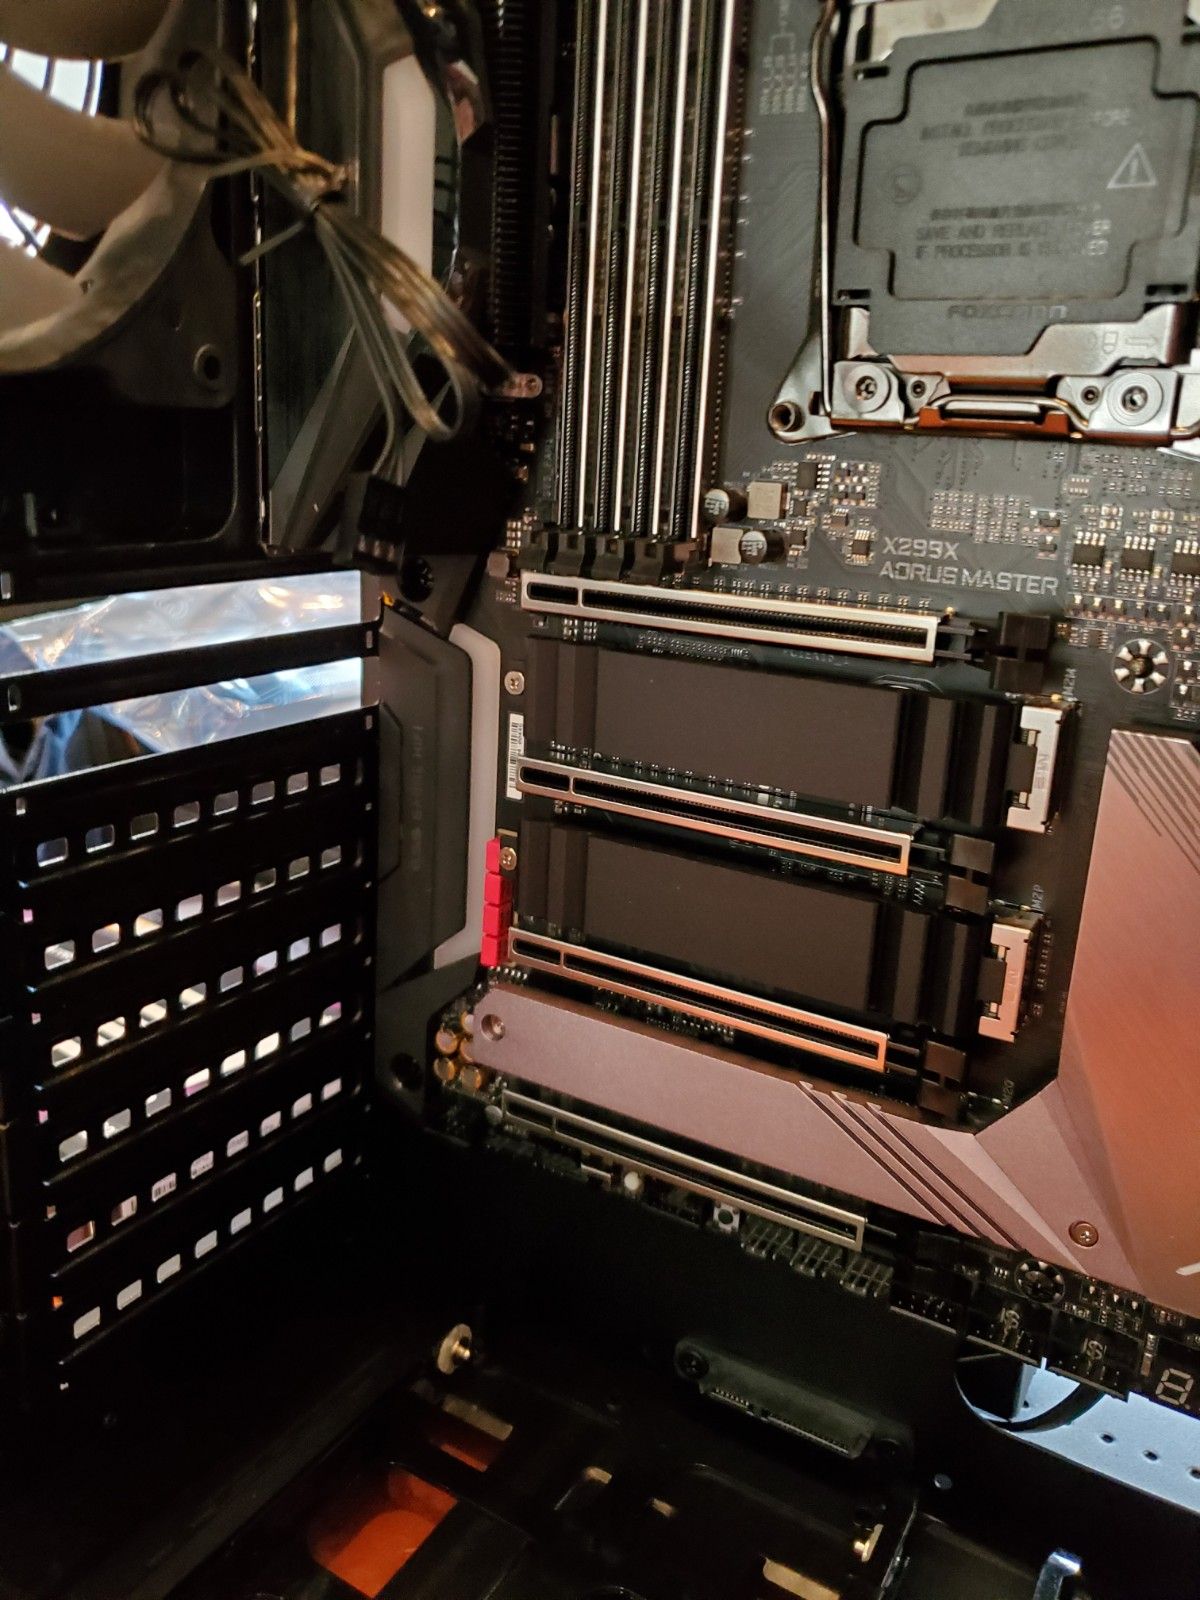
I opted for 4x32 Gb cards for a total of 128 Gb memory. Back to the motherboard side of the case, just pop them onto the board and ensure that the bottom of the case snaps in. Since the memory sticks were so close to the GPU cards, and we were lacking in clearance, this was our first time we had to uninstall the cards in order to securely snap the memory in place.
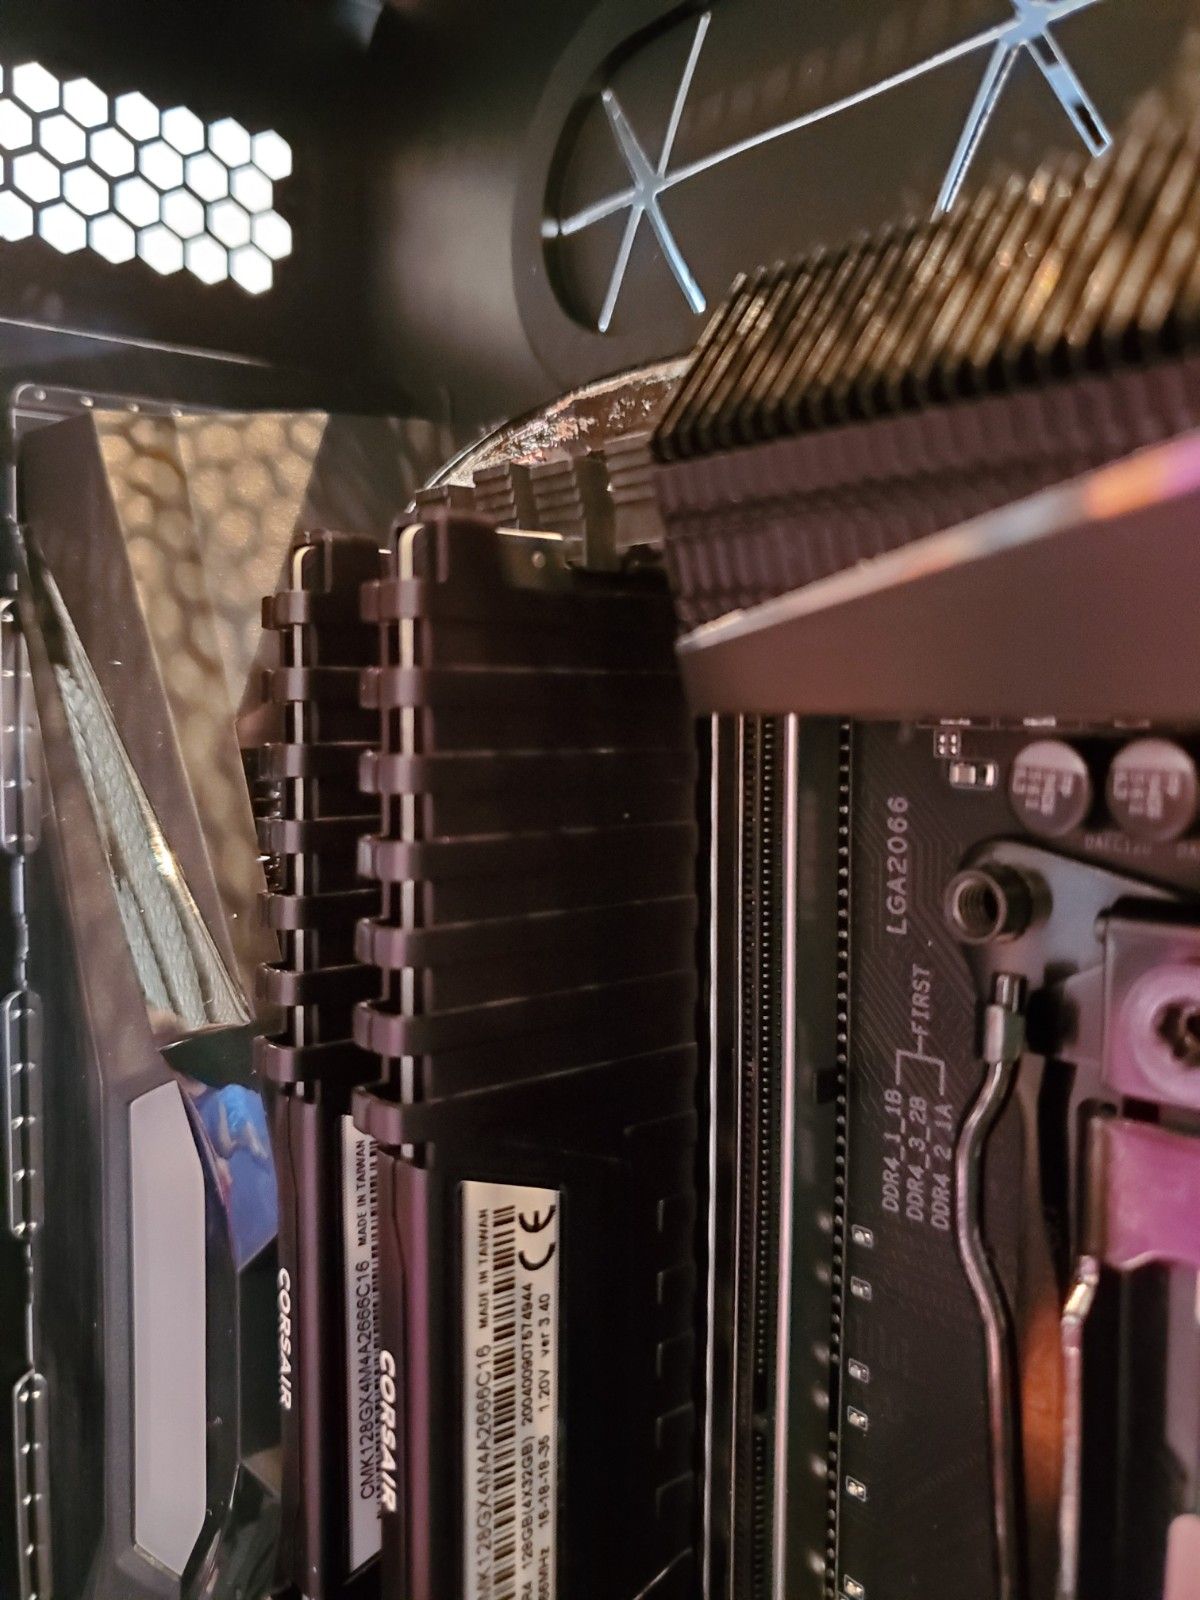
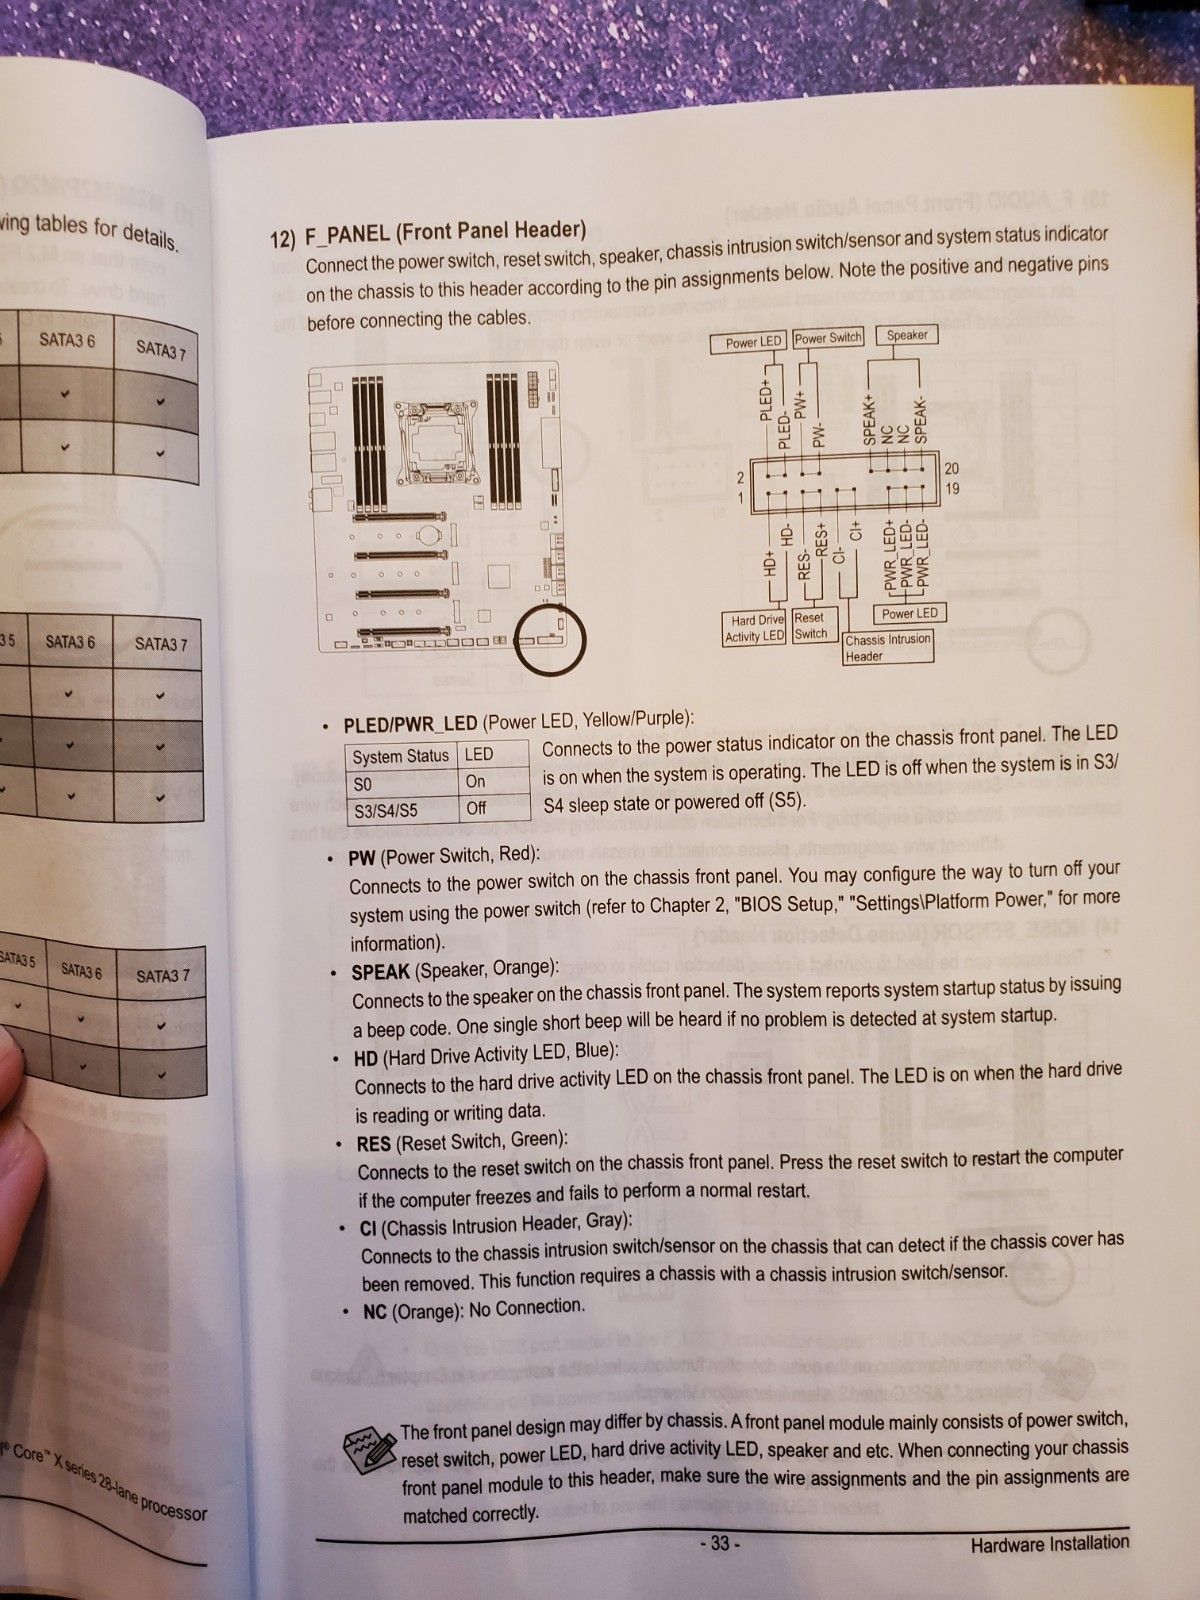
The one part I had some difficulty interpreting was the placement of the RAM. You can see below that I circled the exact sockets on the motherboard to install the DDR4 memory sticks. Since we have 4 memory sticks, I just followed the instructions on the Aorus installation manual.
Install the Storage
Again, another easy thing. Just pop in the solid state drive (SSD). In this case, I opted for 4 Tb!
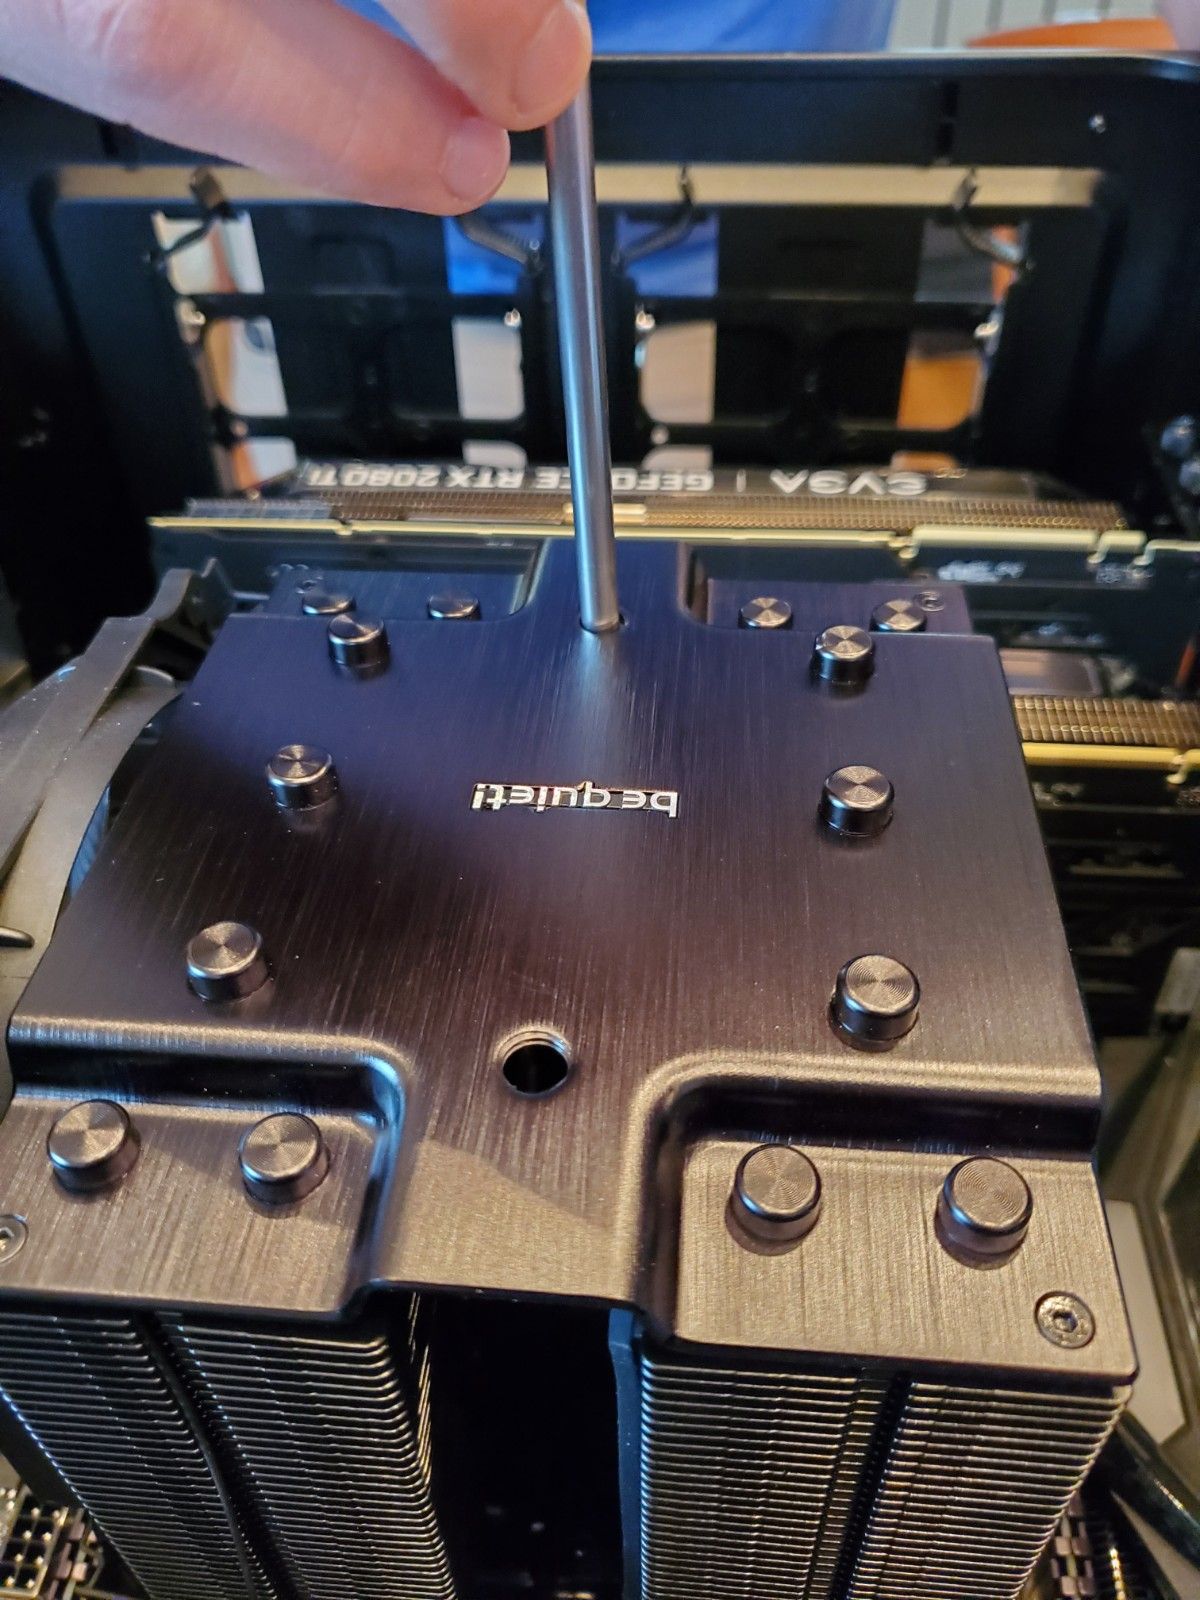
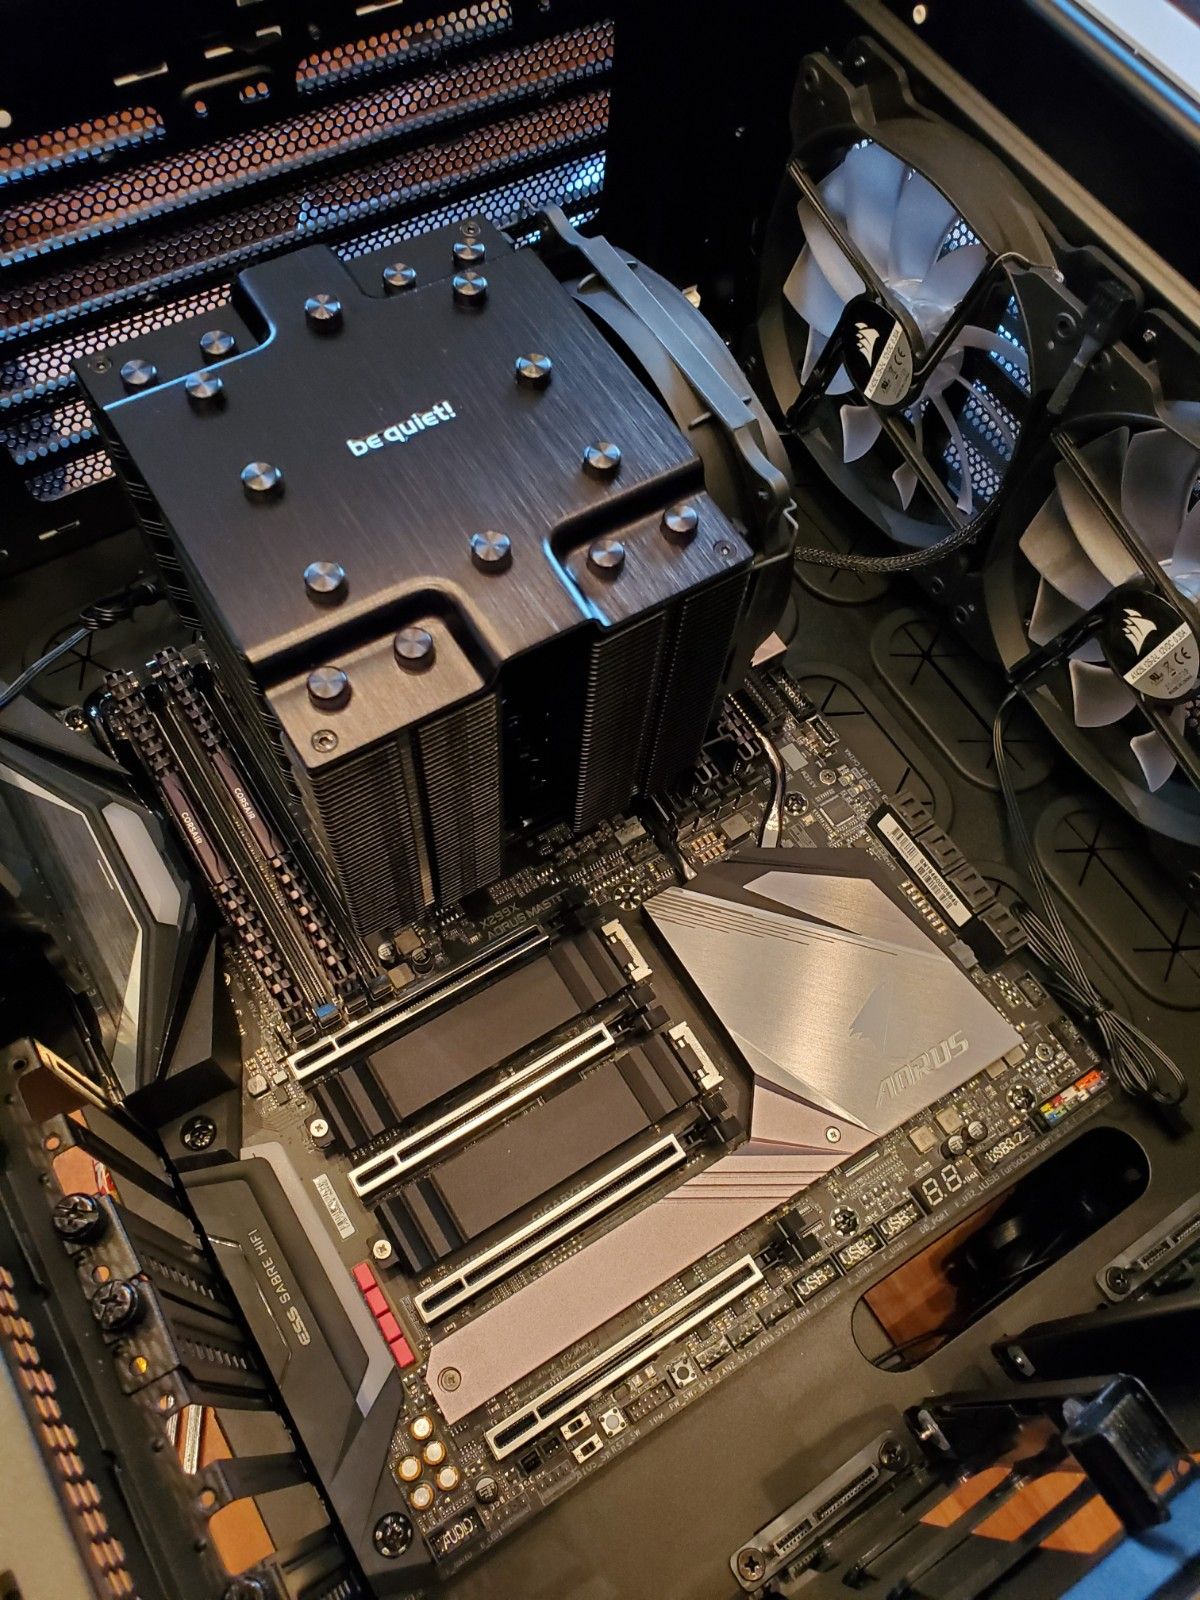
Install the CPU Cooler
This is a big boy and took the longest time to install, due to its size. It has 7 large copper heat pipes, ceramic fins for heat dissipation, and it comes with two fans - one is larger than the other.
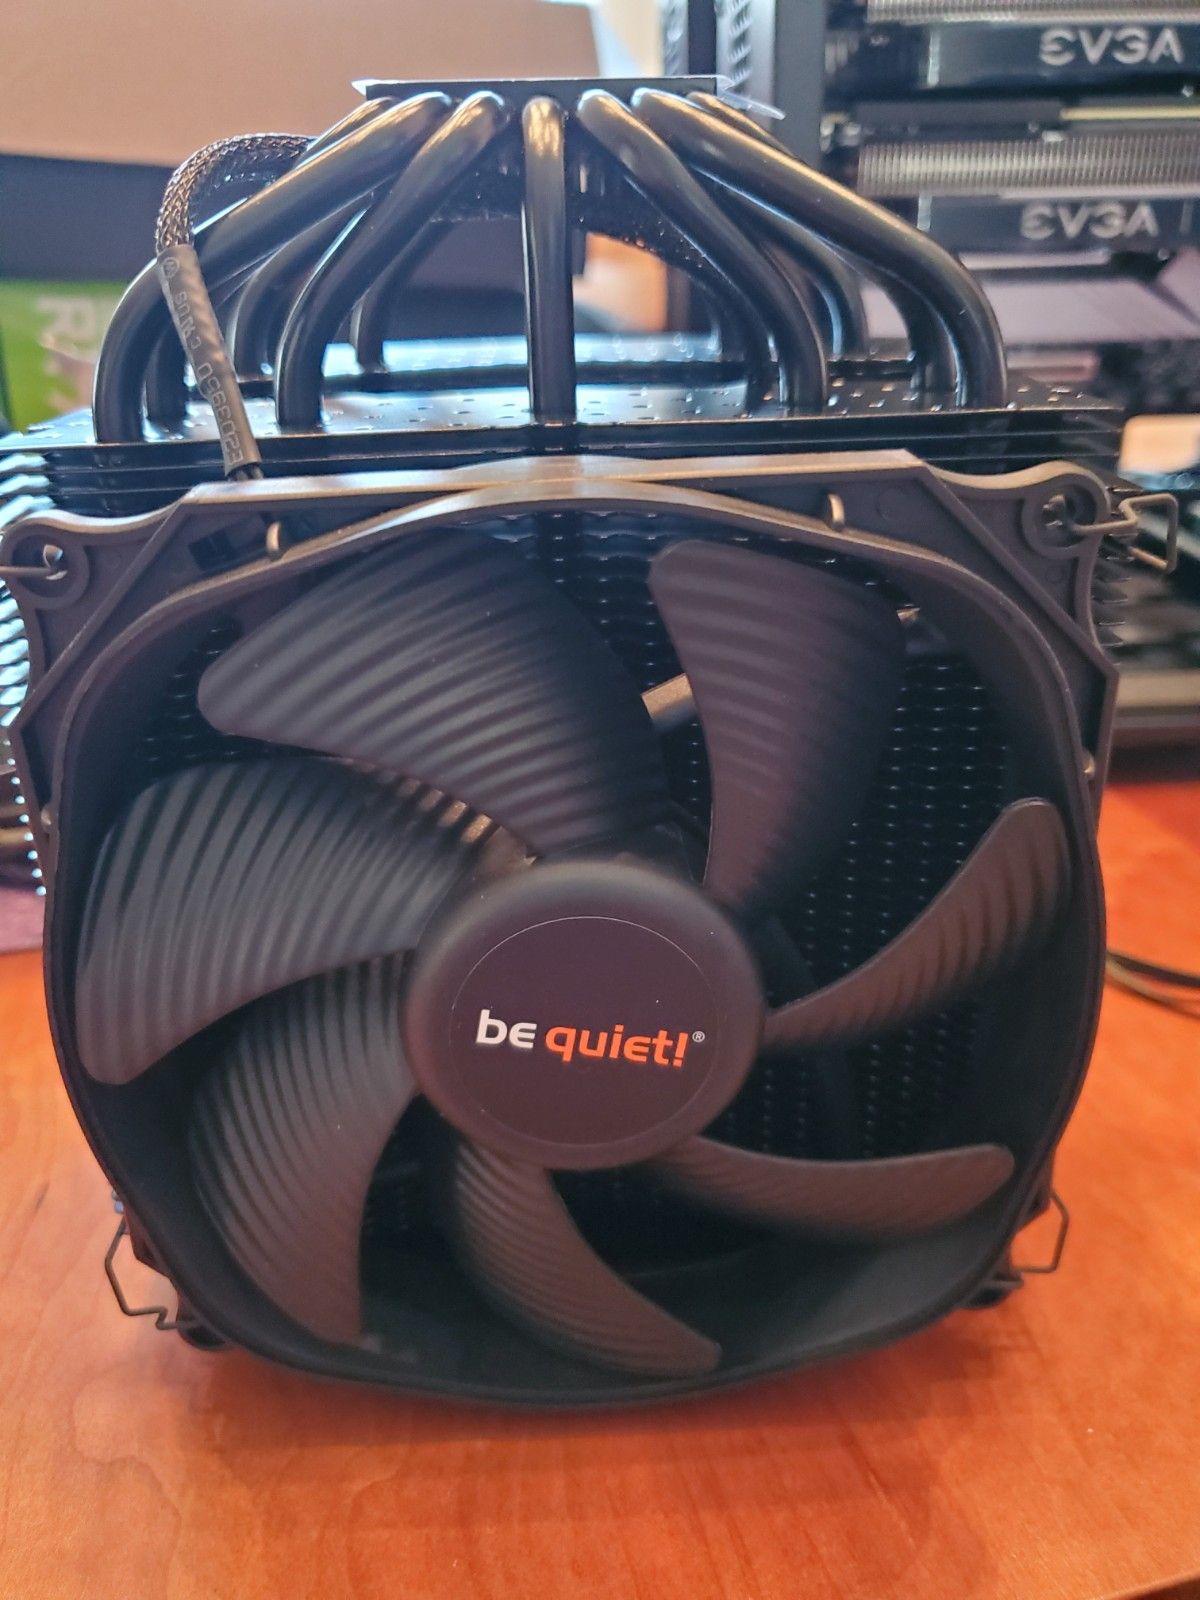
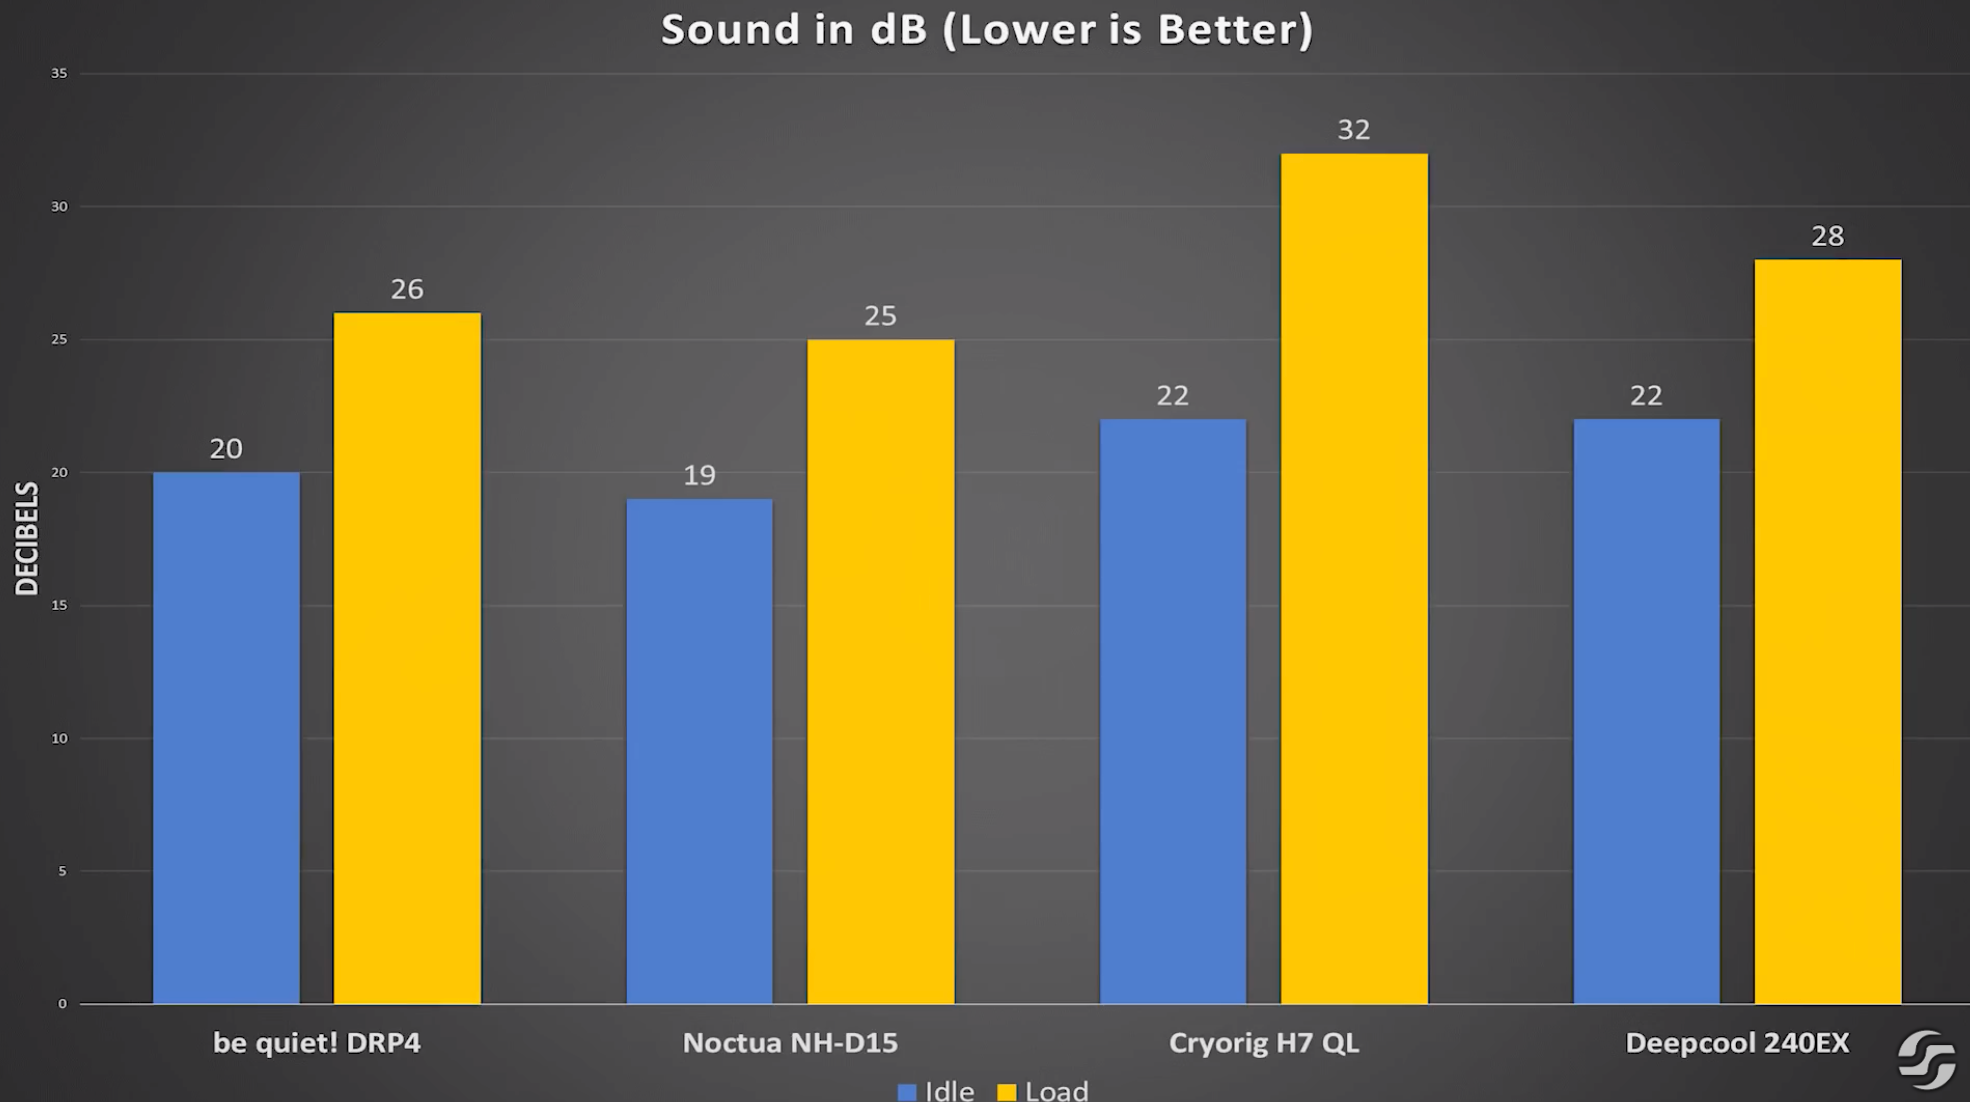
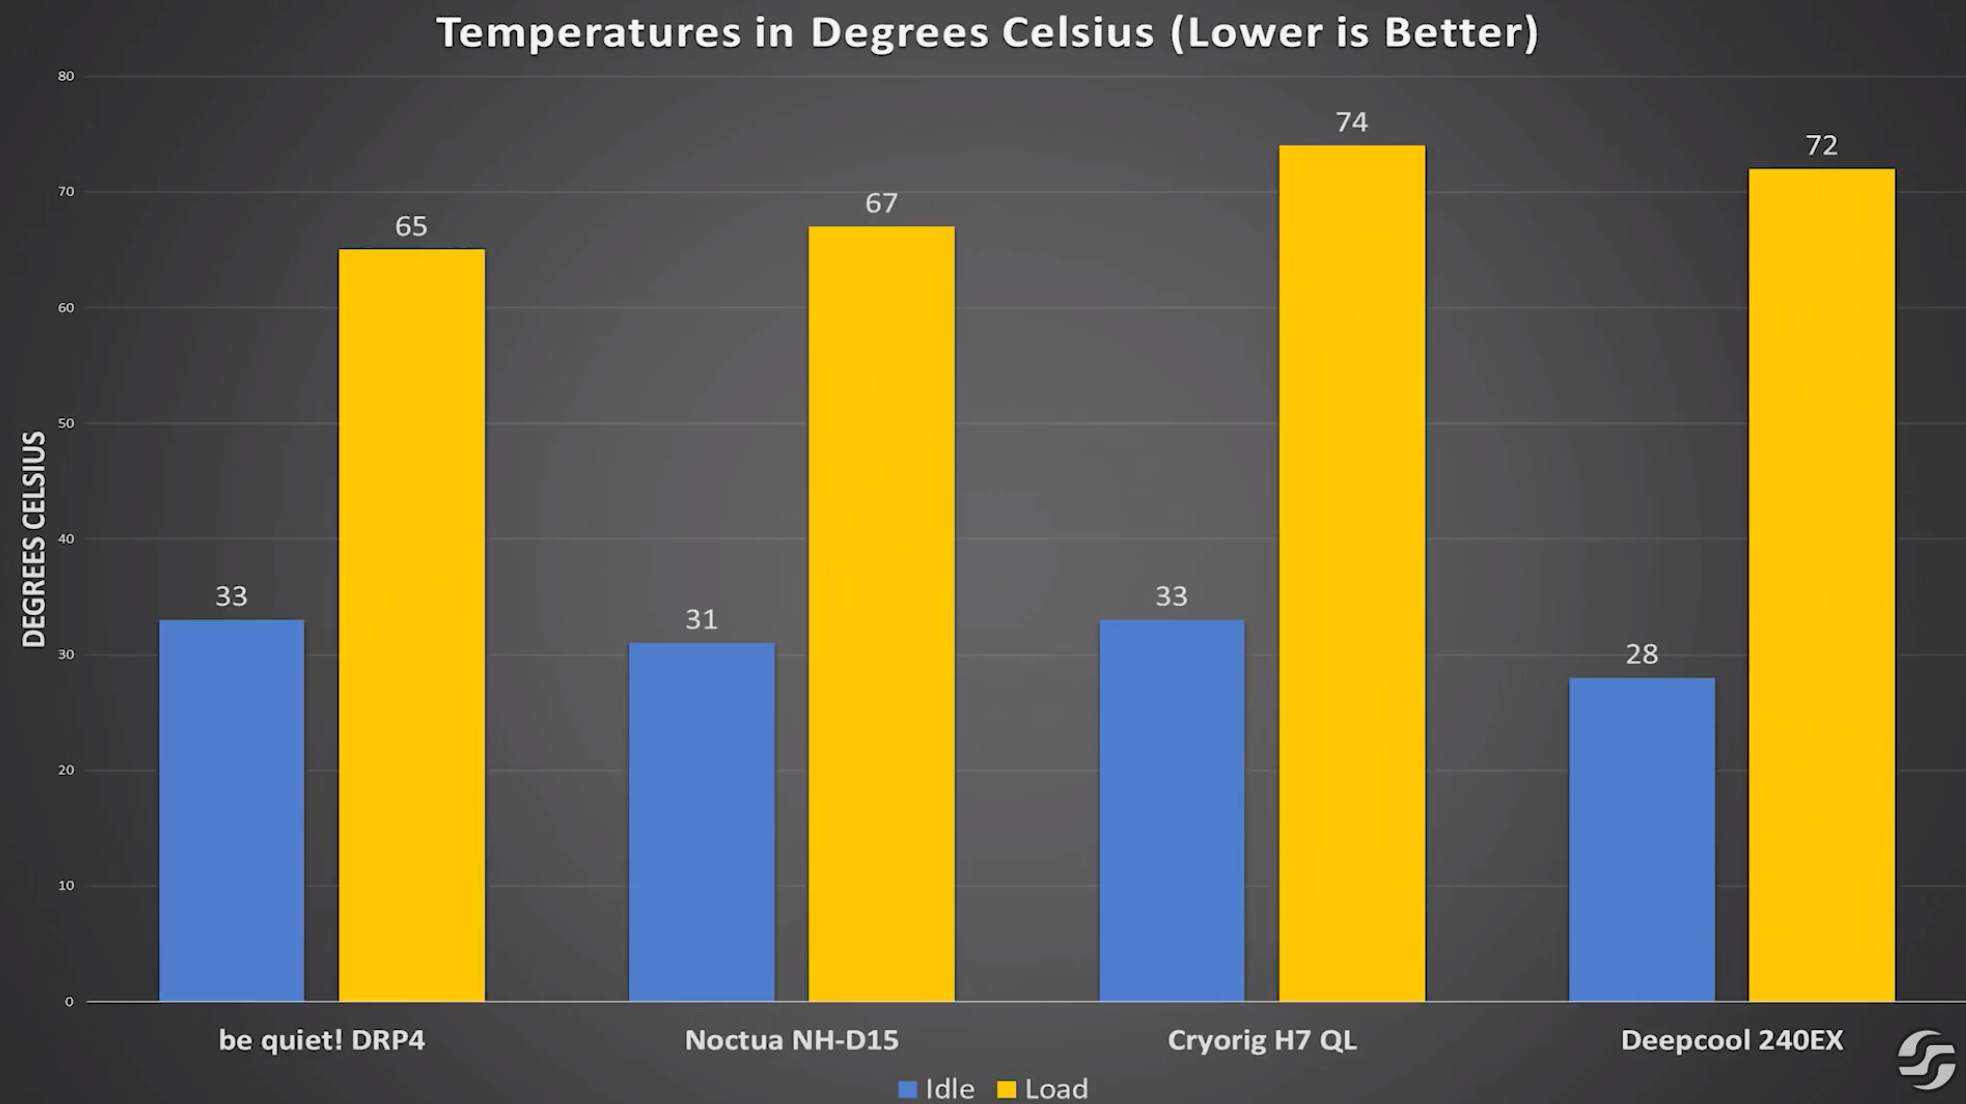
Here's a review of the Dark Rock Pro with some thermal benchmark testing:
First, it comes with thermal paste. Apply the thermal paste in a plus-sign pattern. Do not use toothpaste. No, really, don't.
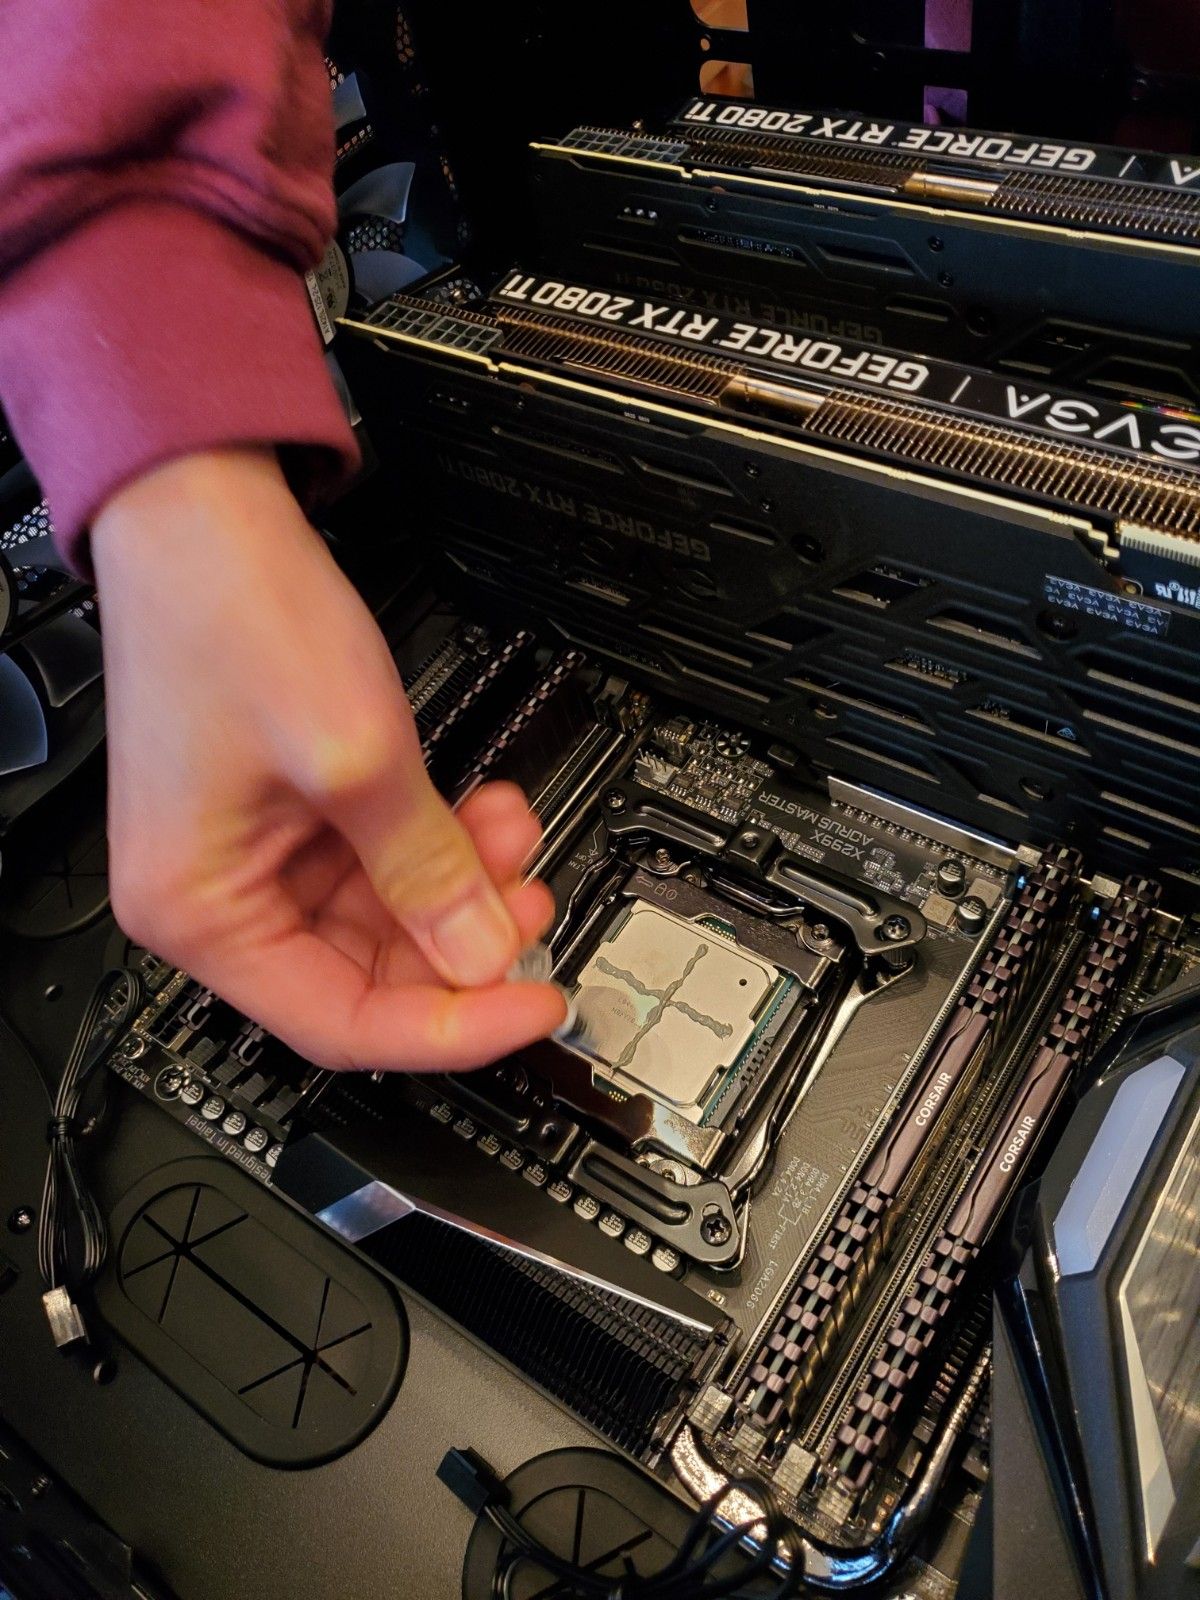
Here's a great explanation of thermal paste, essentially filling in air gaps and conducting heat properly. The conducting material consists of stuff like "arctic silver five", ceramics, or other solutions that have no metal at all to inhibit any conduction.
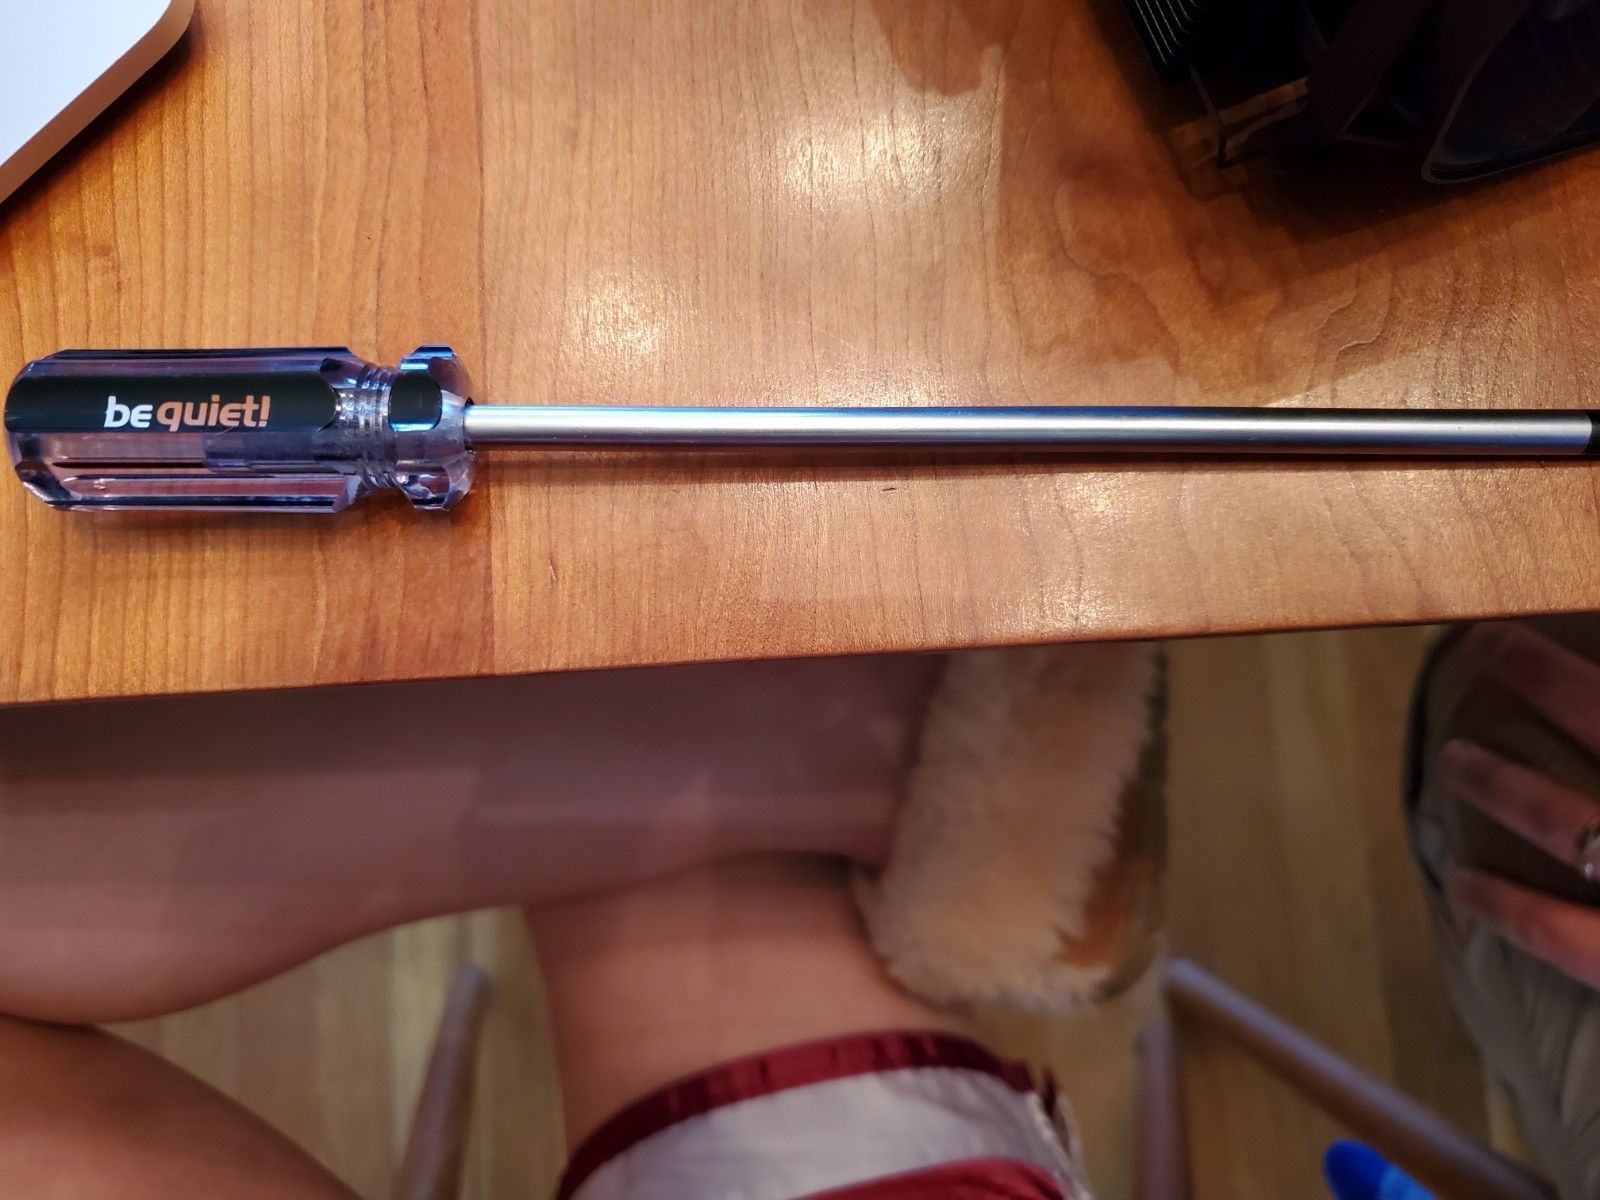
This was really tricky, and I'm glad I had a partner here. The review video talks about some design flaws. Well, I think their remedy was including in the box, a very elongated, magnetic-tip screwdriver. Believe me during the instruction, the length of the tool was really important, because it has to reach the bottom of the chassis to screw in. First time using a flashlight and squinting. A little tedious. Especially since you have to precisely place the screw onto the case first at the bottom, since it doesn't fit in the hole.
Audible testing demonstrates 26 Db at full load and temperature at 65 degrees at highest temperature core, on this guy's benchmark.
Install the GPU Cards
The moment!

At this point, I hope you won't have gone through the steps of installing and uninstalling, like we did. I'd reserve the installation of the GPU cards for the very end. Or at least, near the end once all the equipment has been installed and you have enough real estate.

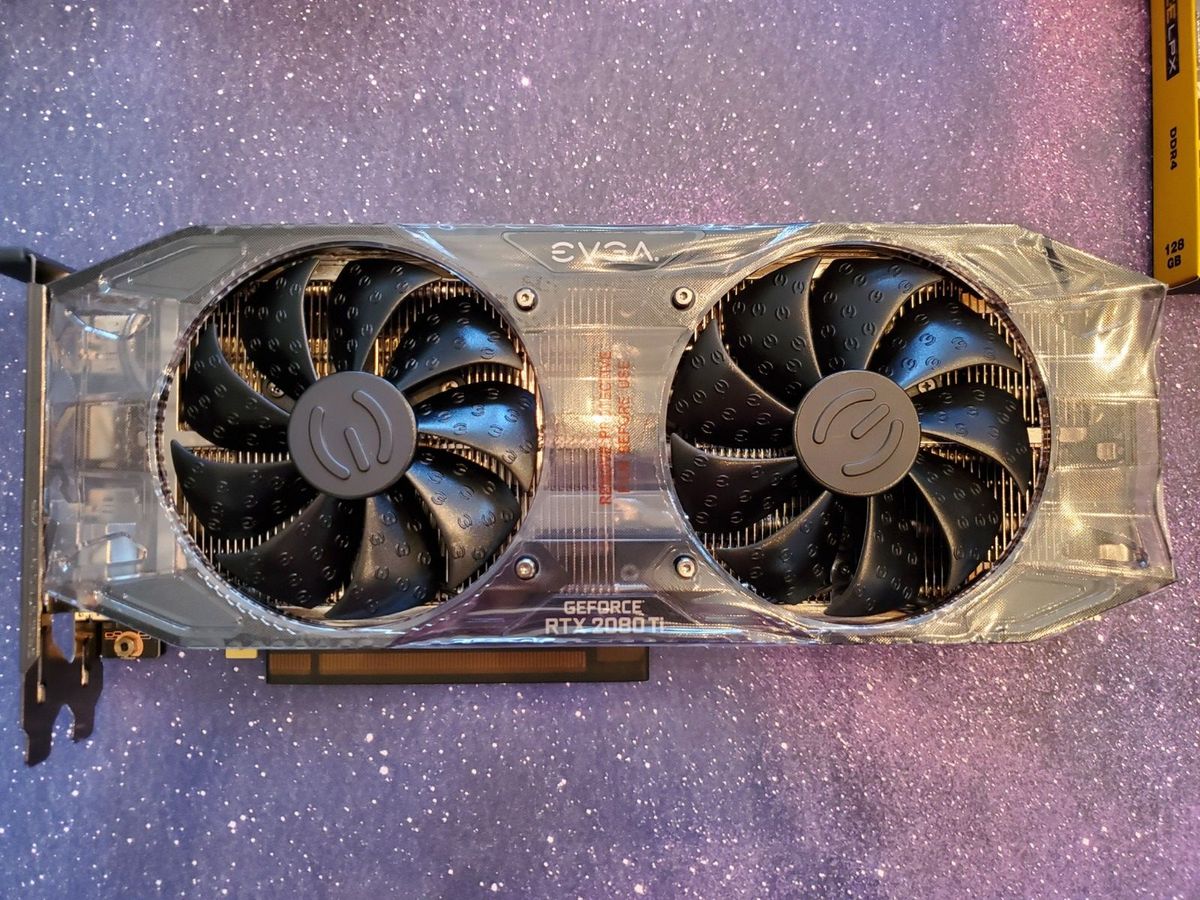
Wow, these are really sparkly and pretty and shiny. Won't lie. Pull off the plastic wrap and the plastic covers.

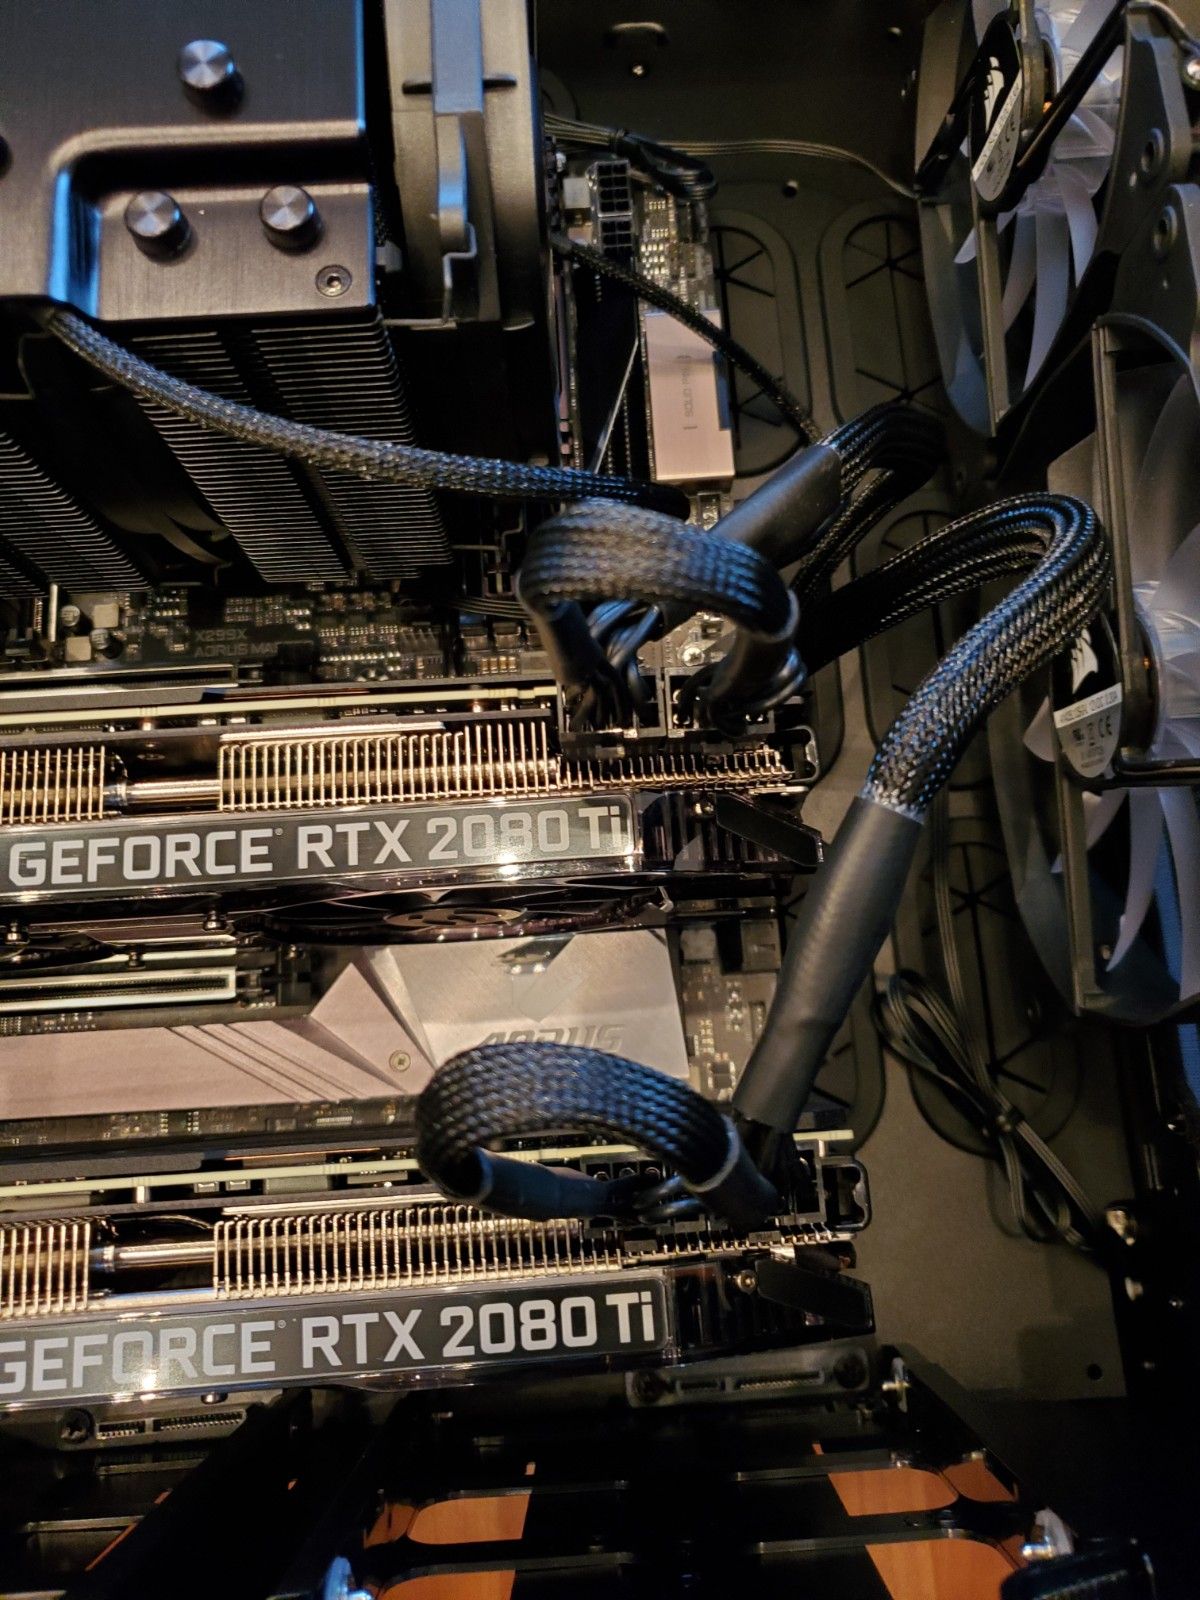
Install the cards by simply pushing them into the sockets, firmly. Mine are at positions 1 and 2, or 0 and 1 if you were to run nvidia_smi
At this point we are drowning in a rat's nest of cables and cords. Connect the PCIE cables for power to each of the GPUs.
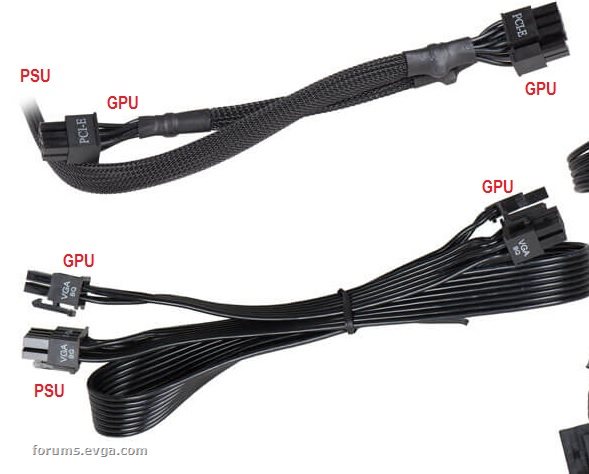
Thread it through and connect them to the power supply on the other side. The bottom PCIE is the motherboard power.
Tips on when to install the GPU cards
Ok, so when we installed these at first, we thought it might be a good idea to "give some extra breathing room" for the cards, and so we separated them at spaces 1 and 3. However this was a bad idea. Later on after our glorious machine was built, it wouldn't turn on! So you actually need to have these cards directly in order, not spaces.

Another lesson learned, that for a CPU cooler of this size, we should have installed the cards last, not first. So we had to remove them in order to install the cooler. Now we can see how little room we actually have to play with.
Connect Power Supply, etc.
Ok, the last part. Connect everything so that it will do important things like turn on. Man, my eyesight really sucks, so this was a lot of flashlight holding.
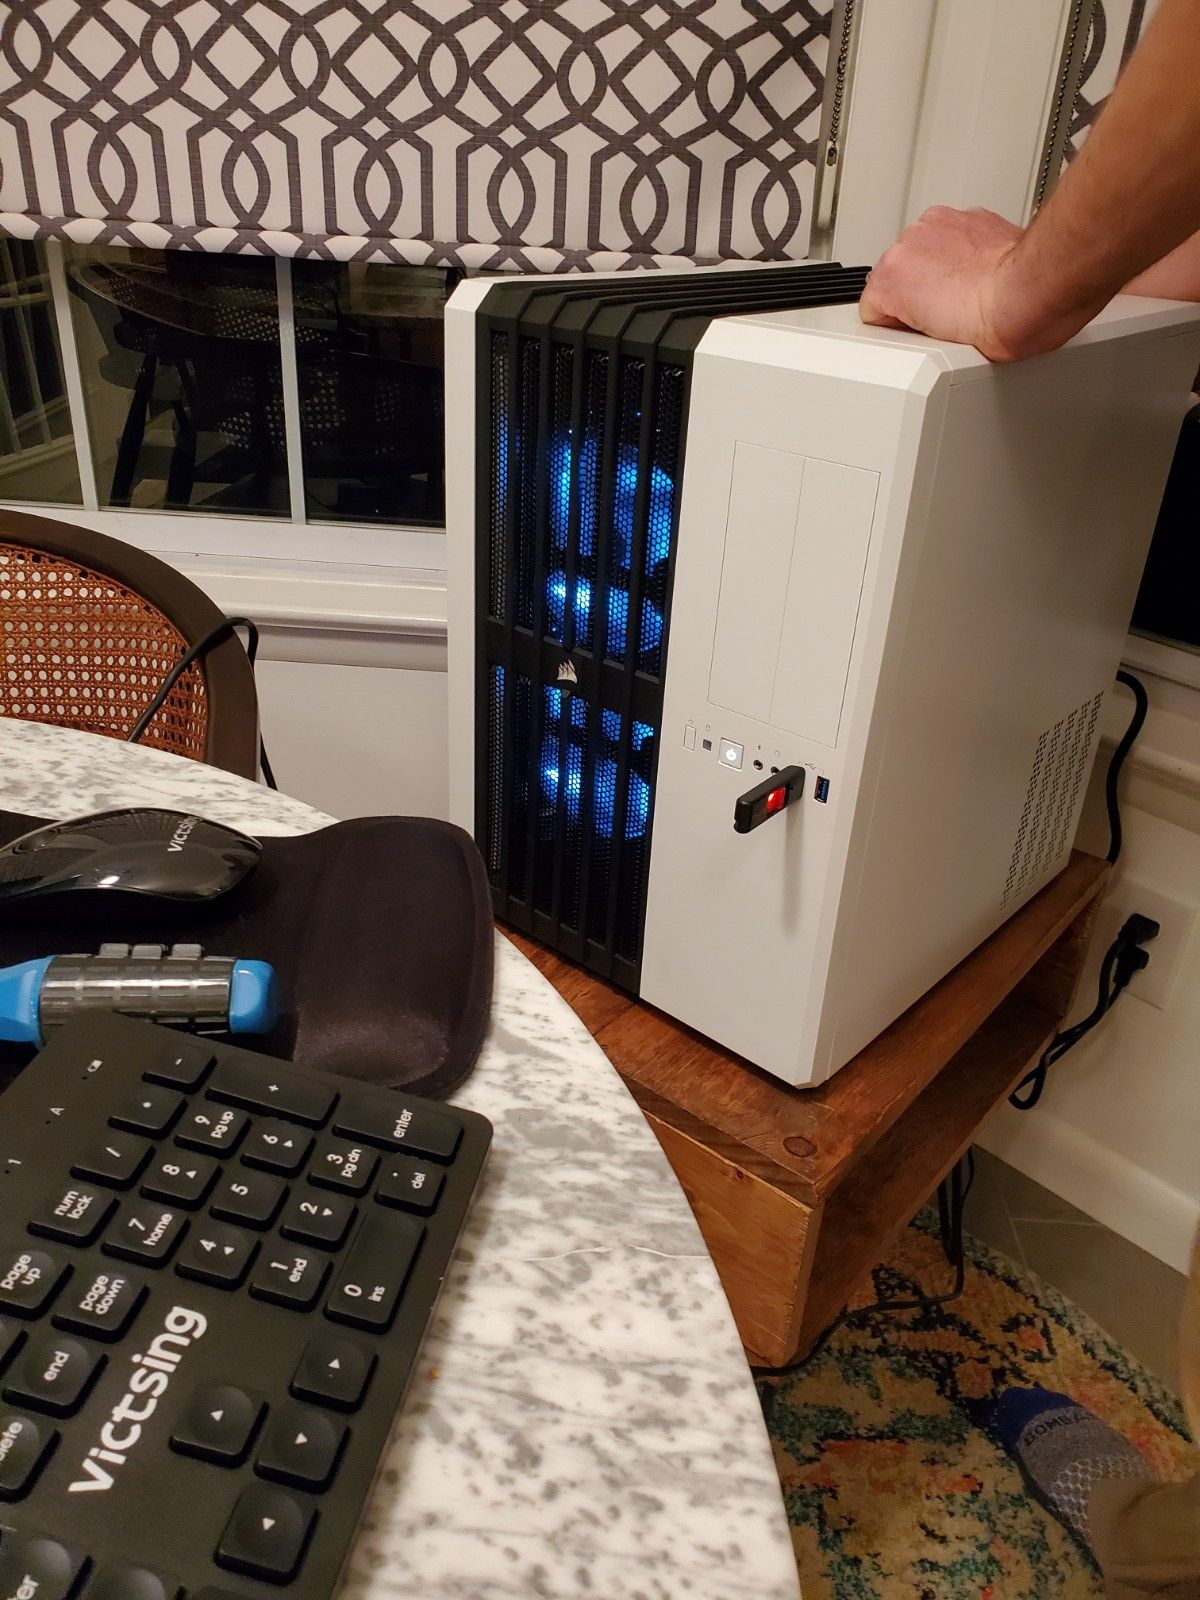
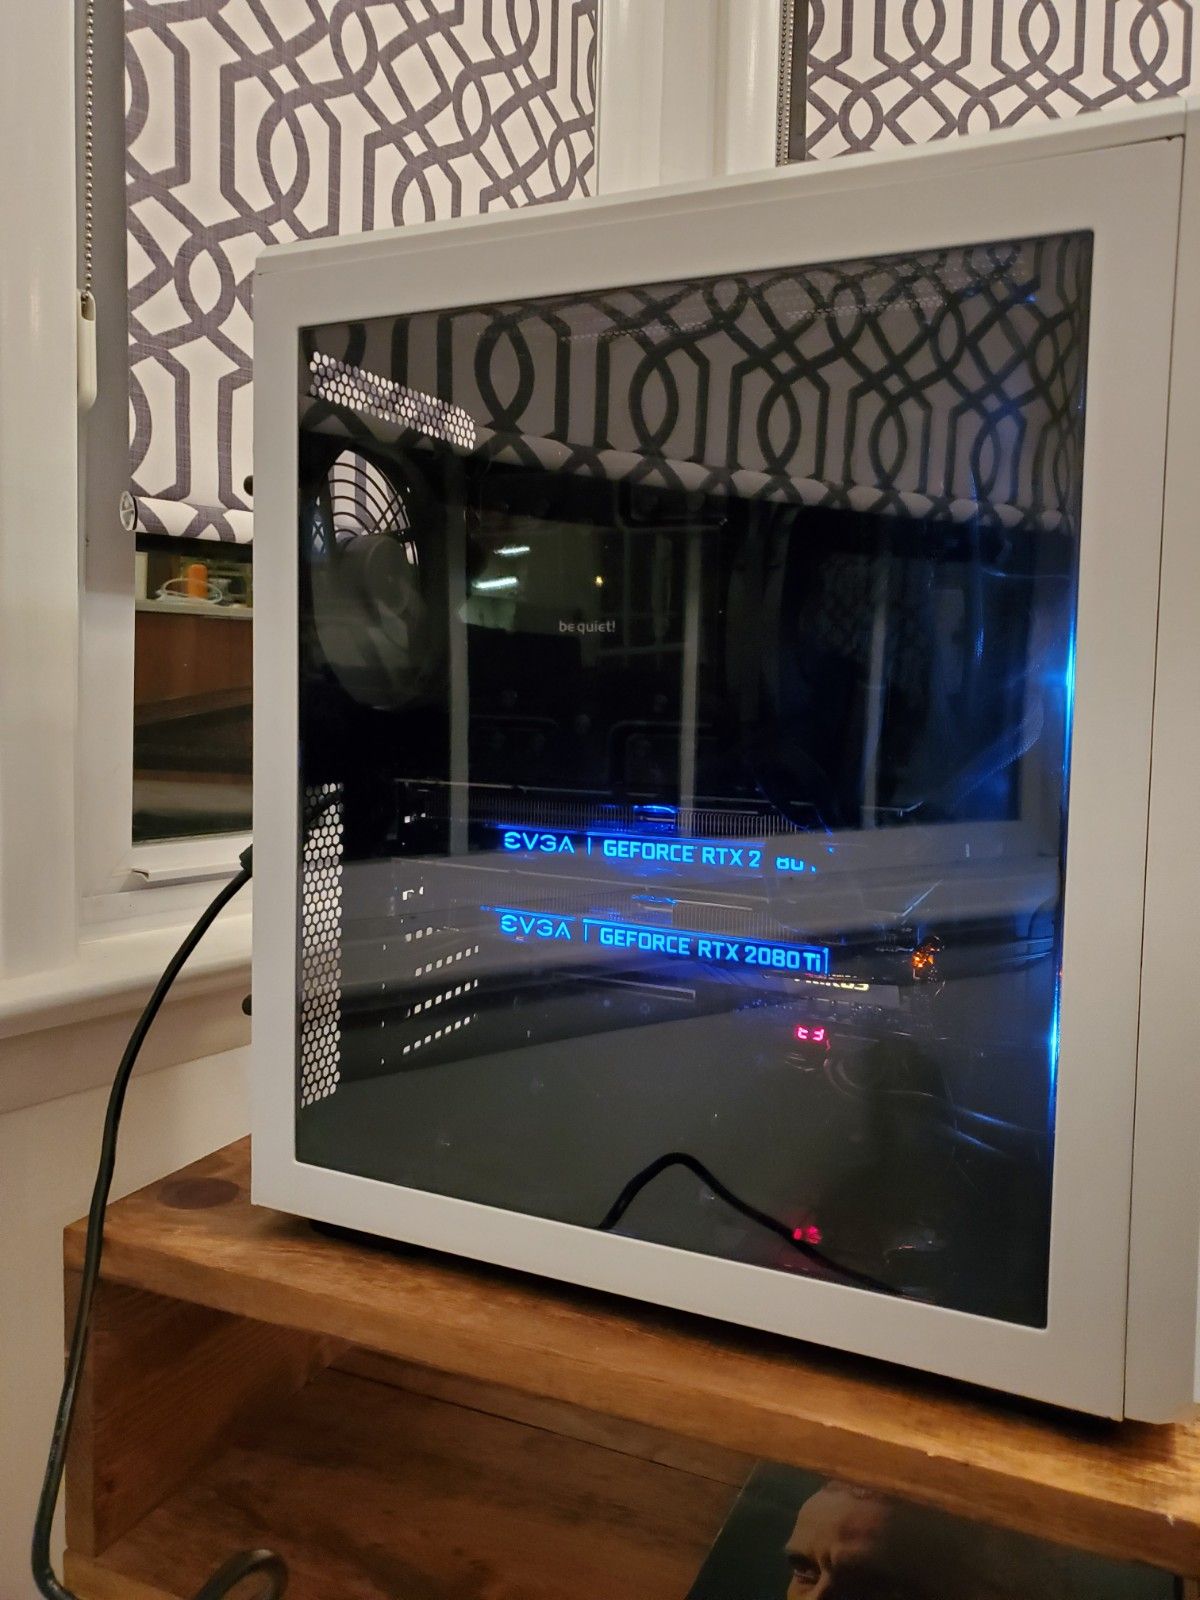
The Final Product!
I downloaded Ubuntu 18.04 LTS on a thumb drive and installed it after booting up the machine. Don't worry, I won't keep this machine in my kitchen. It's just temporary since, remember, my basement flooded? Ideally, you want to keep this in a cool, dry environment - new basement.
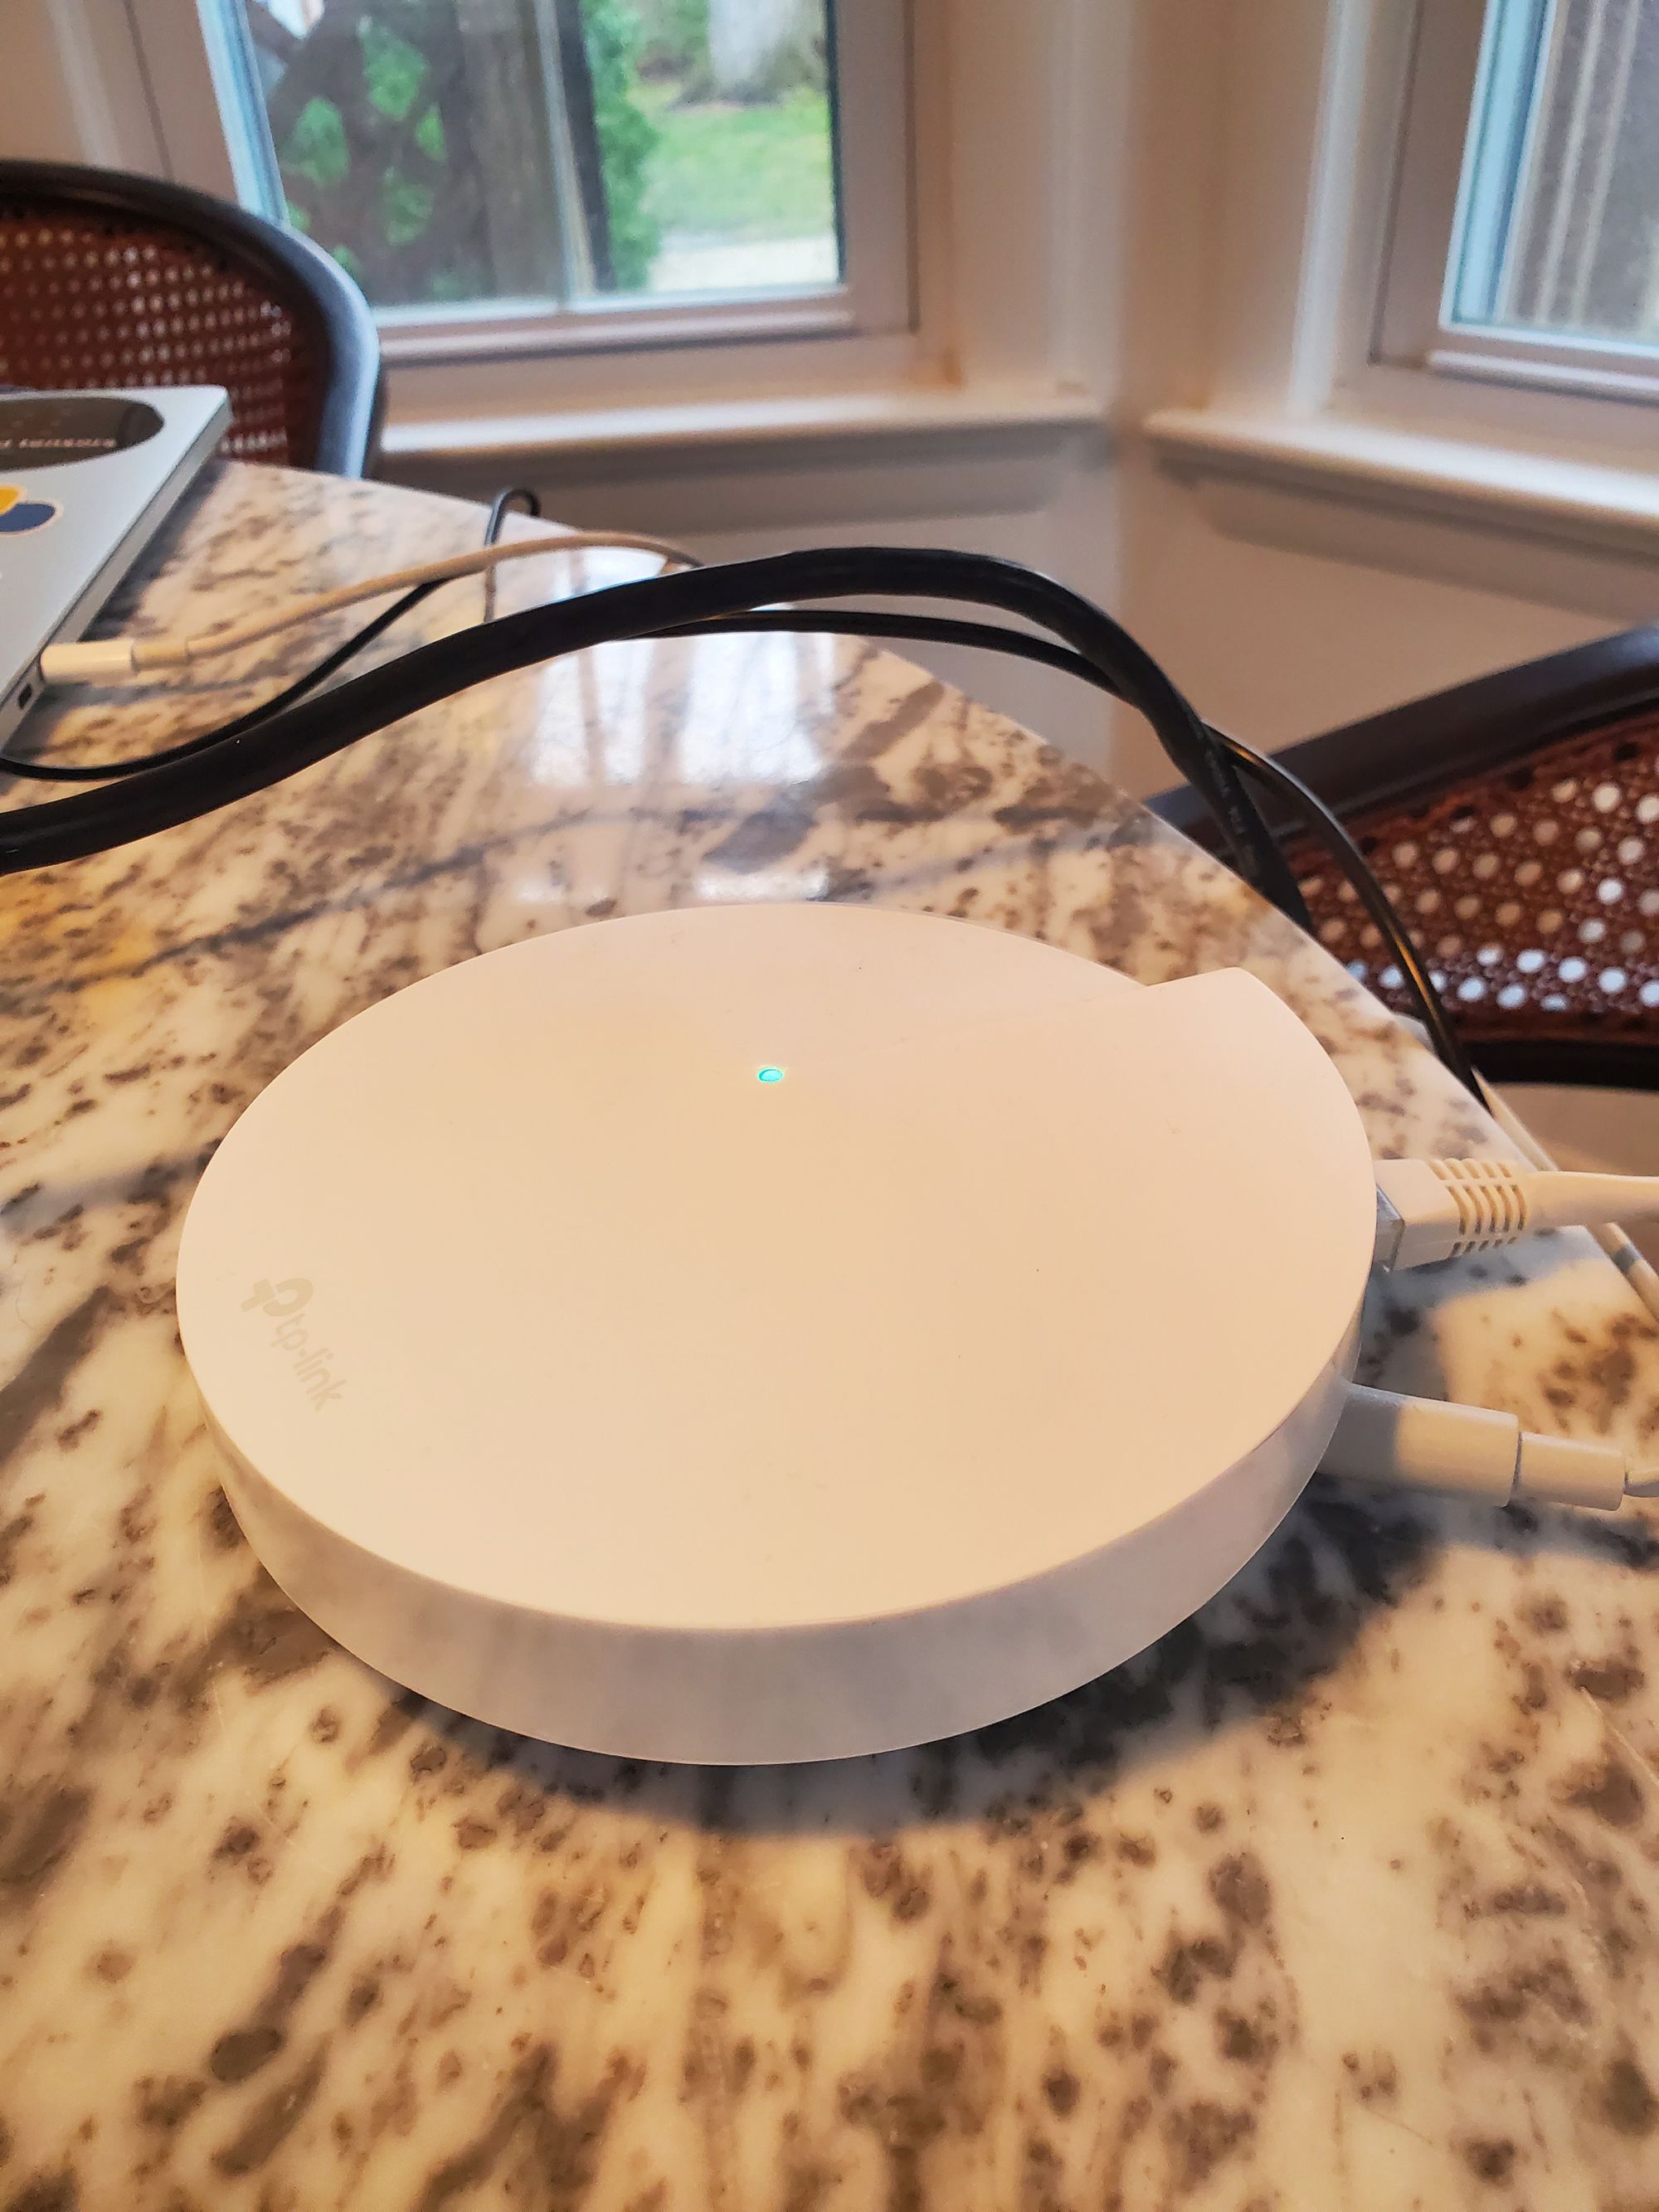
At this point, the only problem I've really been dealing with is getting Ubuntu to see the Aorus built-in wifi adapter. I've installed dkms, etc., but it still won't see it on the network. So, I'll have to reserve that for later. For right now, I physically connected a router as ethernet which is giving me blazing fast download. I might actually just keep this as my configuration since anything else will be a lot slower.
Conclusion
Thanks for making it this far. Below I provide a few links that I found upon Google searching 'building your own GPU machine'. I haven't read them, but on the outset, they seem like good resources if you want to explore more. In my next post, I'll describe all the configurations to set this up.
Other online resources
- How to build the perfect Deep Learning Computer and save thousands of dollars. https://medium.com/the-mission/how-to-build-the-perfect-deep-learning-computer-and-save-thousands-of-dollars-9ec3b2eb4ce2
- How to create your own deep learning rig: A complete hardware guide. https://hackernoon.com/how-to-create-your-own-deep-learning-rig-a-complete-hardware-guide-7cdc71e174aa
- Building Your Own Deep Learning Computer And Saving Money on Cloud Services. https://towardsdatascience.com/building-your-own-deep-learning-computer-and-saving-money-on-cloud-services-c9797261077d
- Build a super fast deep learning machine for under $1,000 https://www.oreilly.com/learning/build-a-super-fast-deep-learning-machine-for-under-1000
- The $1700 great Deep Learning box: Assembly, setup and benchmarks https://blog.slavv.com/the-1700-great-deep-learning-box-assembly-setup-and-benchmarks-148c5ebe6415