Setting up the NVIDIA Jetson TX2

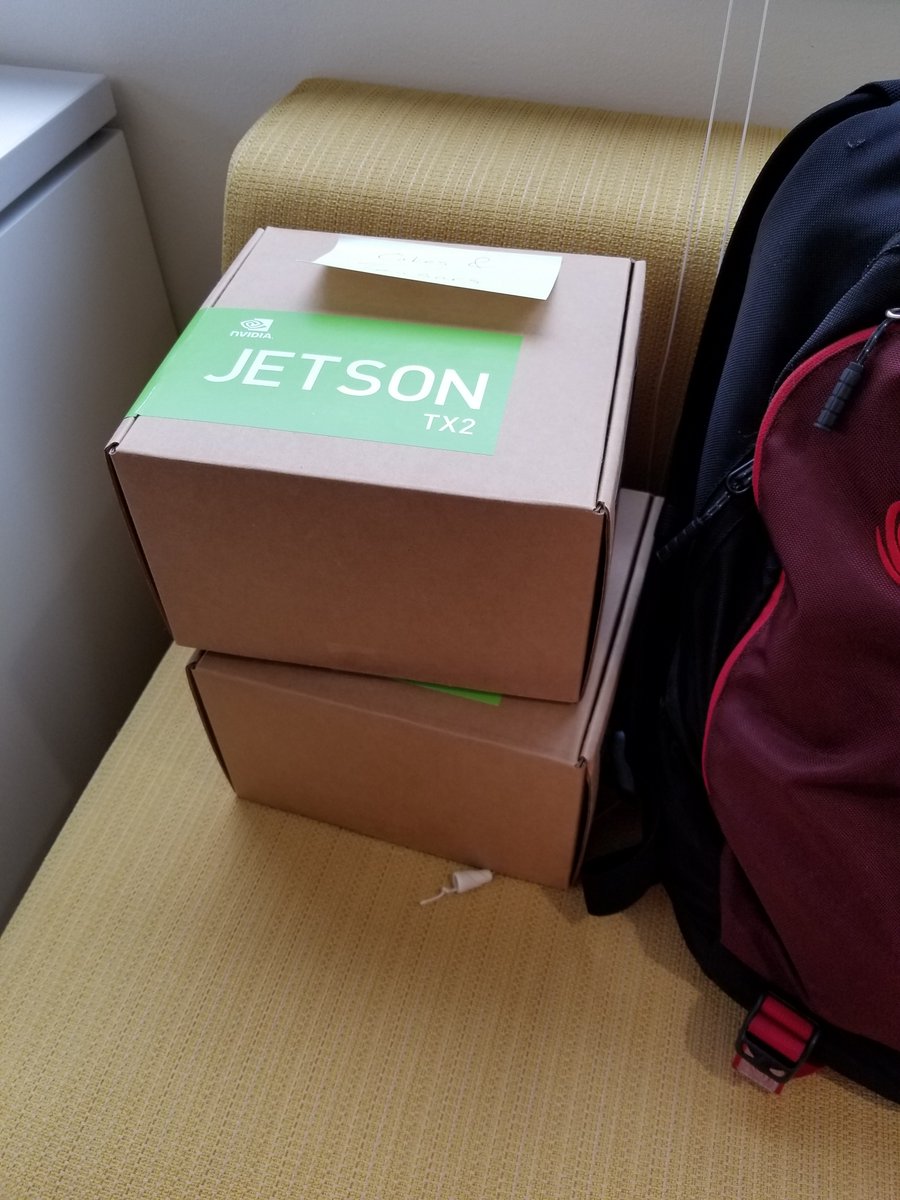
I'm starting to do a lot more with GPUs. At my company, I'm one over several data scientists that routinely access our cluster of 4 Titan cards. It's an older cluster, but we're upgrading across the country including bringing online a DGX-1 Volta class. I'm also really lucky to get not one, but two, NVIDIA Jetson TX2's to tinker around with this year.
The Jetson, per the NVIDIA website is a: "7.5-watt supercomputer on a module brings true AI computing at the edge. It's built around an NVIDIA Pascal™-family GPU and loaded with 8 GB of memory and 59.7 GB/s of memory bandwidth", and is "ideal for intelligent edge devices like robots, drones, smart cameras, and portable medical devices."
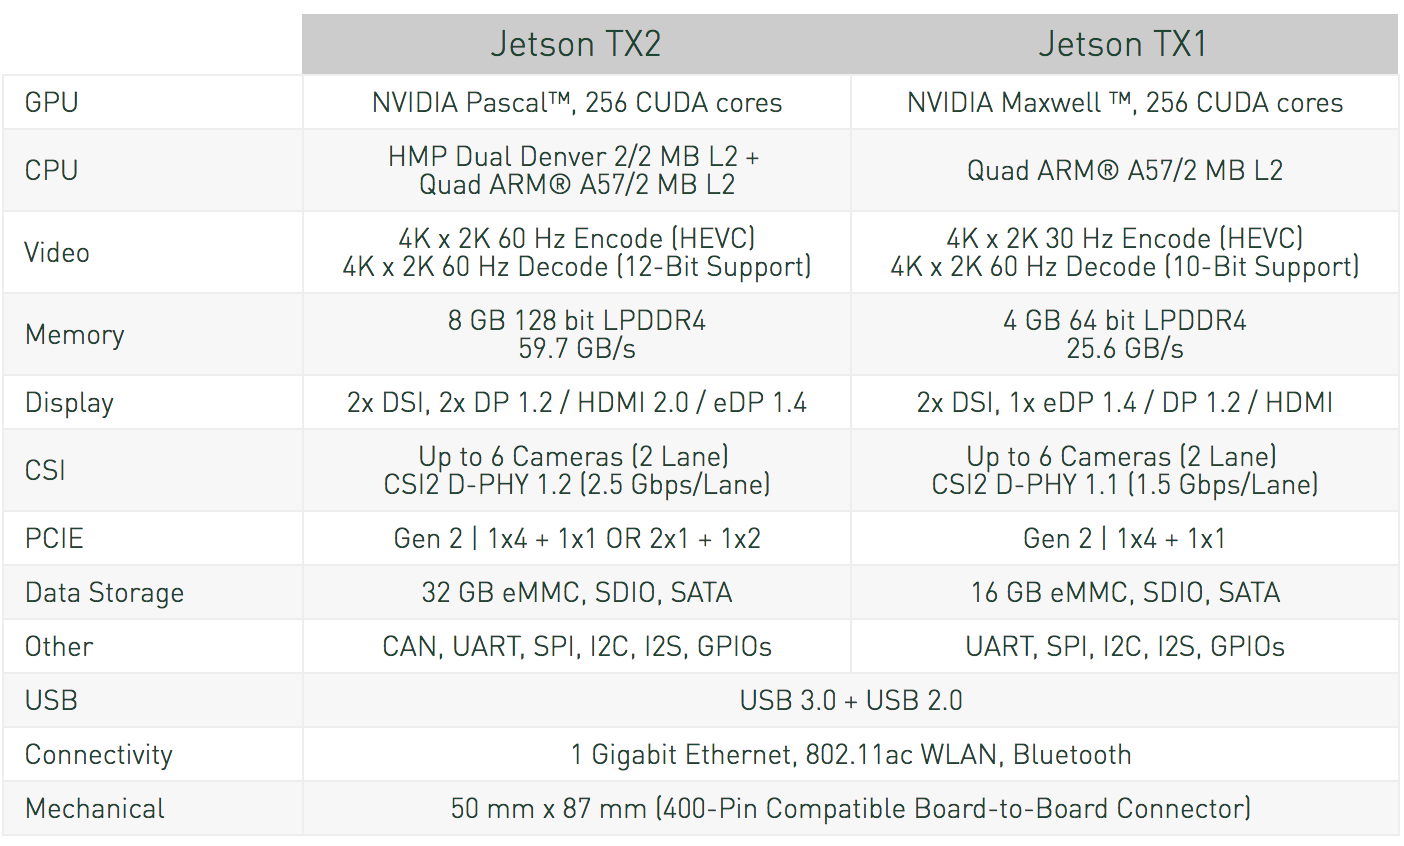
Here's how it stacks up against the Jetson TX1. Basically, it uses the Pascal GPU architecture versus the Maxwell; has greater CPU processing, more memory, a better display, and more data storage.
This blog post walks through a few lessons learned in the installation of the TX2. I used two primary resources to install everything required on the TX2, based on what others recommended.
Recommended Online Instructions and Videos
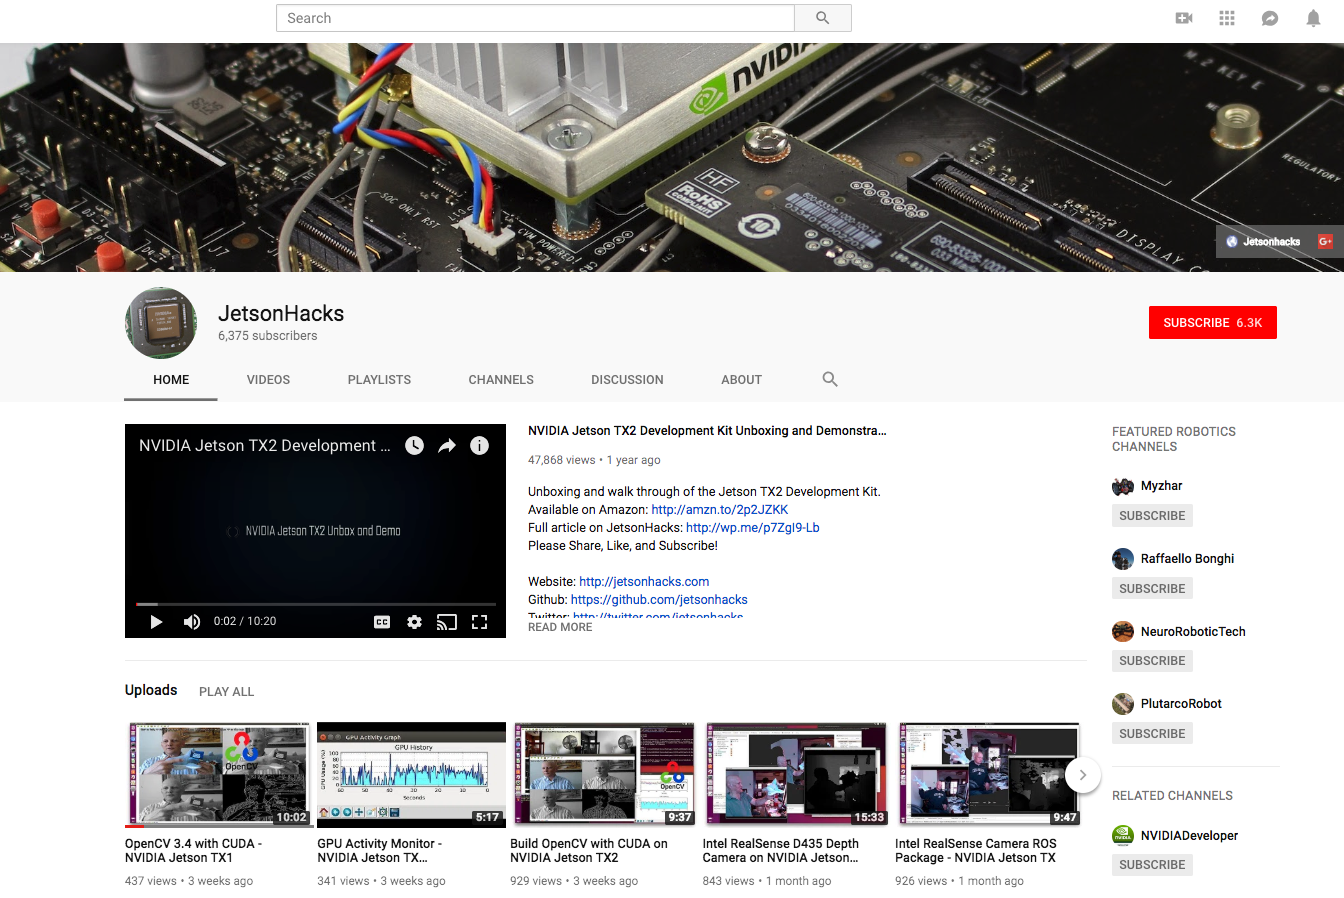
When you begin to install the Jetson SDK and flash the Jetson, the below online tutorials and guides are what you need to get the job done. I would first start with downloading the Developer Kit User Guide, watching the Unboxing and Demonstration YouTube then keep the second YouTube video up and use it to guide you during each step. JetsonHacks does a superb job - but please note, these are for SDK 3.0 as opposed to 3.2 which you'll be installing today.These YouTube videos come from the Jetson Hacks YouTube Channel and in my opinion, are the best and well-documented tutorials on not only how to get the Jetson flashed, but also how to run a few models using all the Jetson packages.
Hooking Everything Up
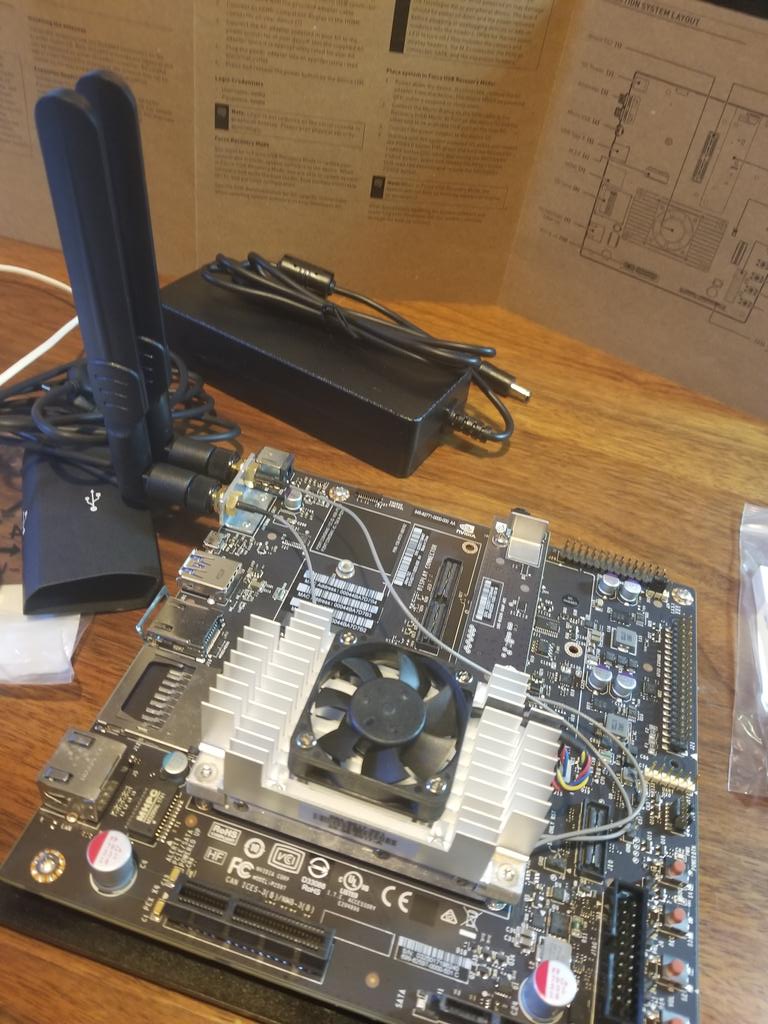
When you unpack the Jetson you'll notice the NVIDIA Quickstart Guide, it's the cardboard-colored pamphlet. I used this pamphlet first, to get oriented to what all the components were and the connection system layout.
At this point, it's important to note the overall setup requirements before beginning to flash the Jetson. I made the diagram below to describe the set up that I used and that's described in the Jetson Hacks YouTube videos. After you finish flashing the Jetson (aka Target), you no longer need to use the Host and can just use the Jetson since it operates as a small computer (like a Raspberry Pi.
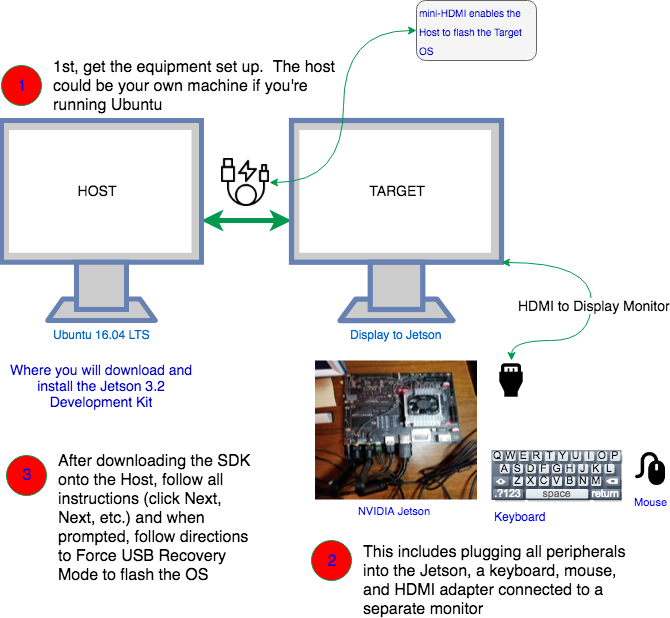
If you plan to use your own machine, you'll need to make sure it's an Ubuntu 16.04 OS. If, like me, you're using a MacBook Pro, then you'll need to either partition your hard drive to run Linux - or, like me, you might have an old Linux machine lying around.
Installation and Flashing the OS
Remember! You need to run either Ubuntu 14.04 or 16.04. I had Ubuntu 18.04 installed, but realized I needed to delete the entire version and reinstall. I got some help from a friend who used this link: https://askubuntu.com/questions/662669/how-to-install-ubuntu-on-a-laptop-with-windows-10, to download version 16.04 onto a bootable thumb drive from his Windows machine, which I then used to install Ubuntu 16.04 onto the Linux machine.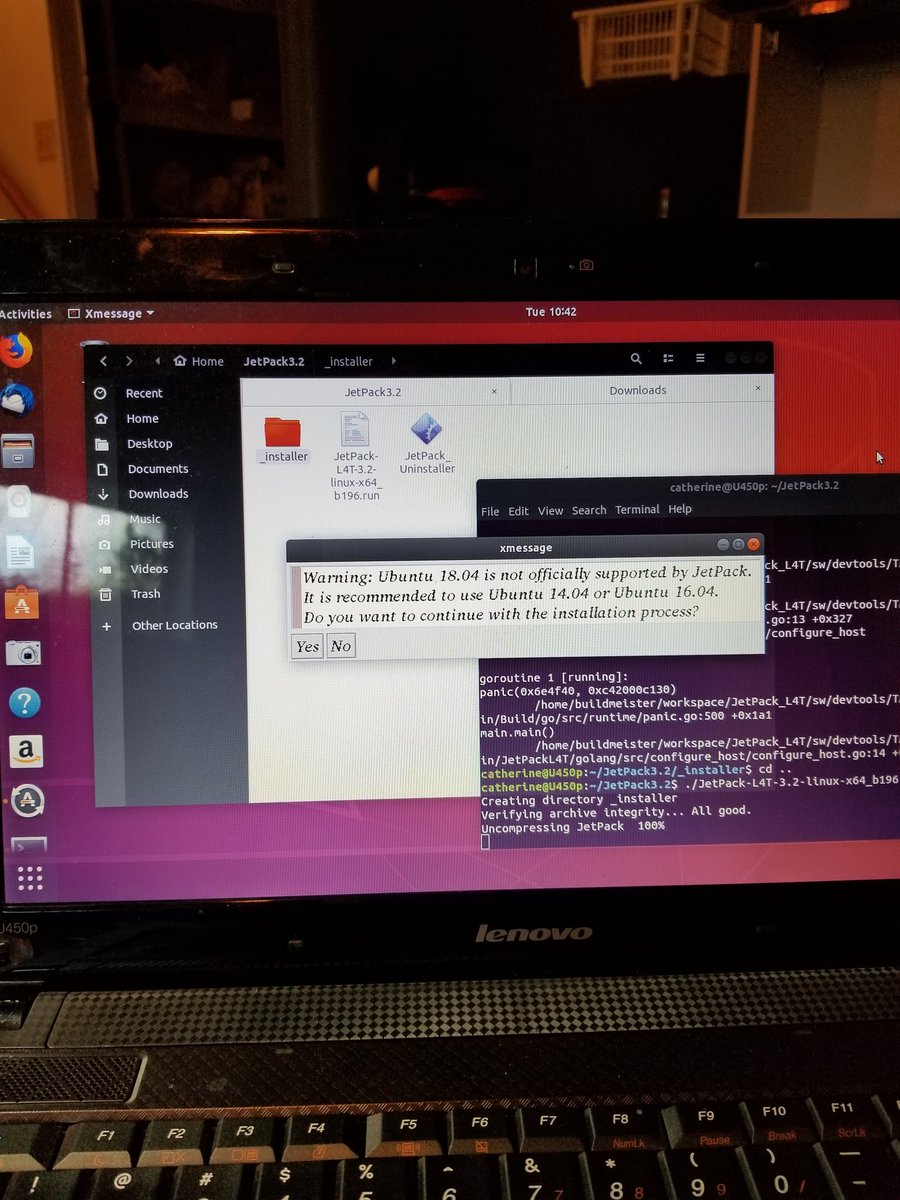
Installation and Flash
I didn't follow the Developer Kit User Guide to a T. I rather used it for guidance and debugging when I ran into a problem. I mainly relied on the excellent documentation from the tutorial at JetsonHacks here https://www.youtube.com/watch?v=D7lkth34rgM&t=235s. As a result, I'll outline key parts of the video with my own screenshots to show you any tips in the installation part.Again, my recommendation is to play this video, and install everything minute by minute.
Minute 0:20 - Hooking Everything Up
He talks about how the Host and the Target are setup, refer to my diagram above.Minute 1:00 - Install the Jetpack 3.2 on the Host
At this point, you're on your Host. Now remember, on the video he's installing JetPack 3.0. There is a new release, so you need to install JetPack 3.2. So the first thing you need to do is Register on the NVIDIA Website. After you register, you can then download the Jetpack 3.2 for the TX2 at https://developer.nvidia.com/embedded/jetpack. It took the JetsonHacks author 1 hour to download, it took me about 30 minutes.Minute 1:35 - Download it into a Local Folder
Suffice it to say I followed this video exactly. I didn't deviate at all from the syntax or recommended steps. This even includes making a separate file folder for the SDK installation called `JetPack3.2`JetPack-L4T-3.2-linux-x64.run.crdownload
This also includes at Minute 1:43 to follow the directions to change Execution Permissions on the File
Minute 2:13 - Run the Installation File
Open up a Terminal.cd into the JetPack3.2 folder
catherine@U4450p:~/JetPack3.2$ ./JetPack-L4T-3.2-linux-x64.run
Minute 2:20 - Follow the Directions
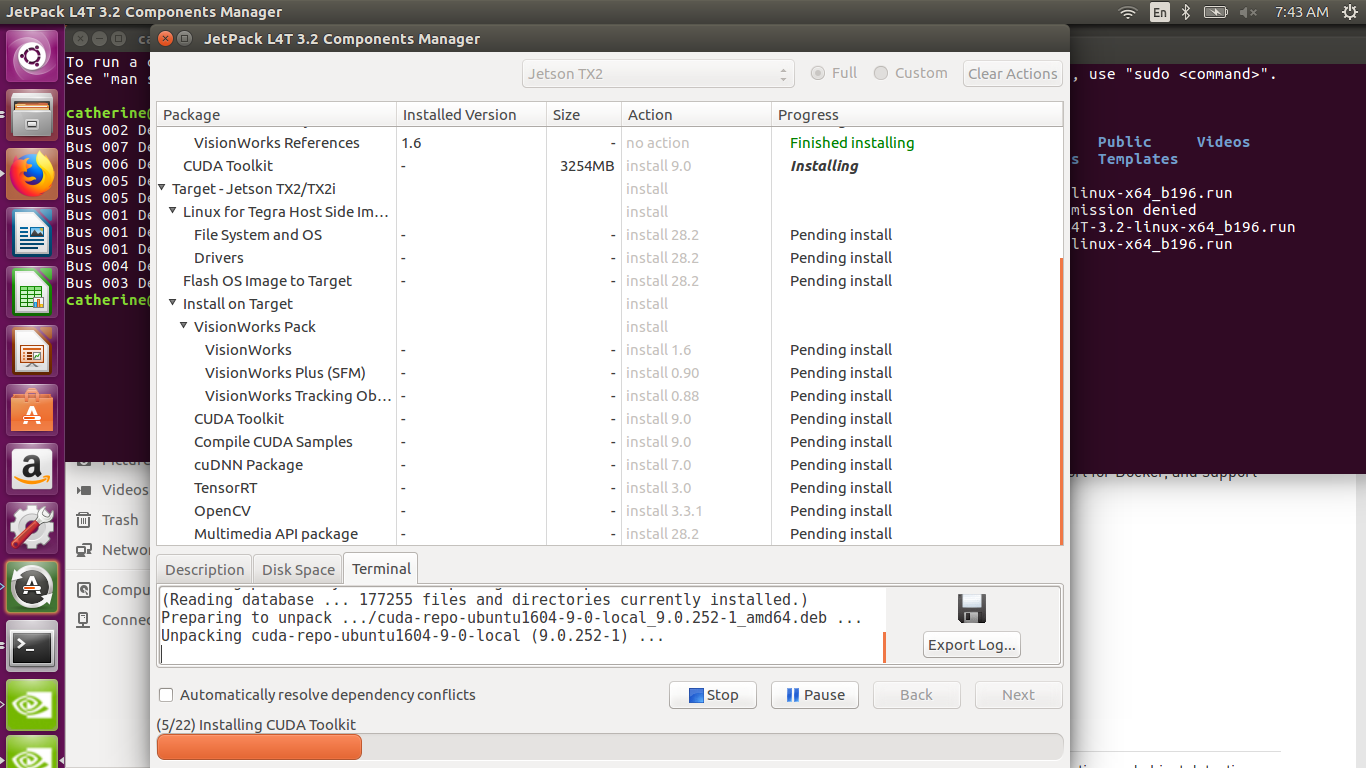
At this point you should follow all his directions and install the `Full Installation` which installs everything you need on the Host and on the Target. At Minute 3:35 he notes it takes about 27 minutes to install, and then at 4:05 he notes about 8 minutes for the Host packages install. That's correct - it'll take about this long to install the whole SDK on your Ubuntu machine. Here's a couple of screenshots during the installation process.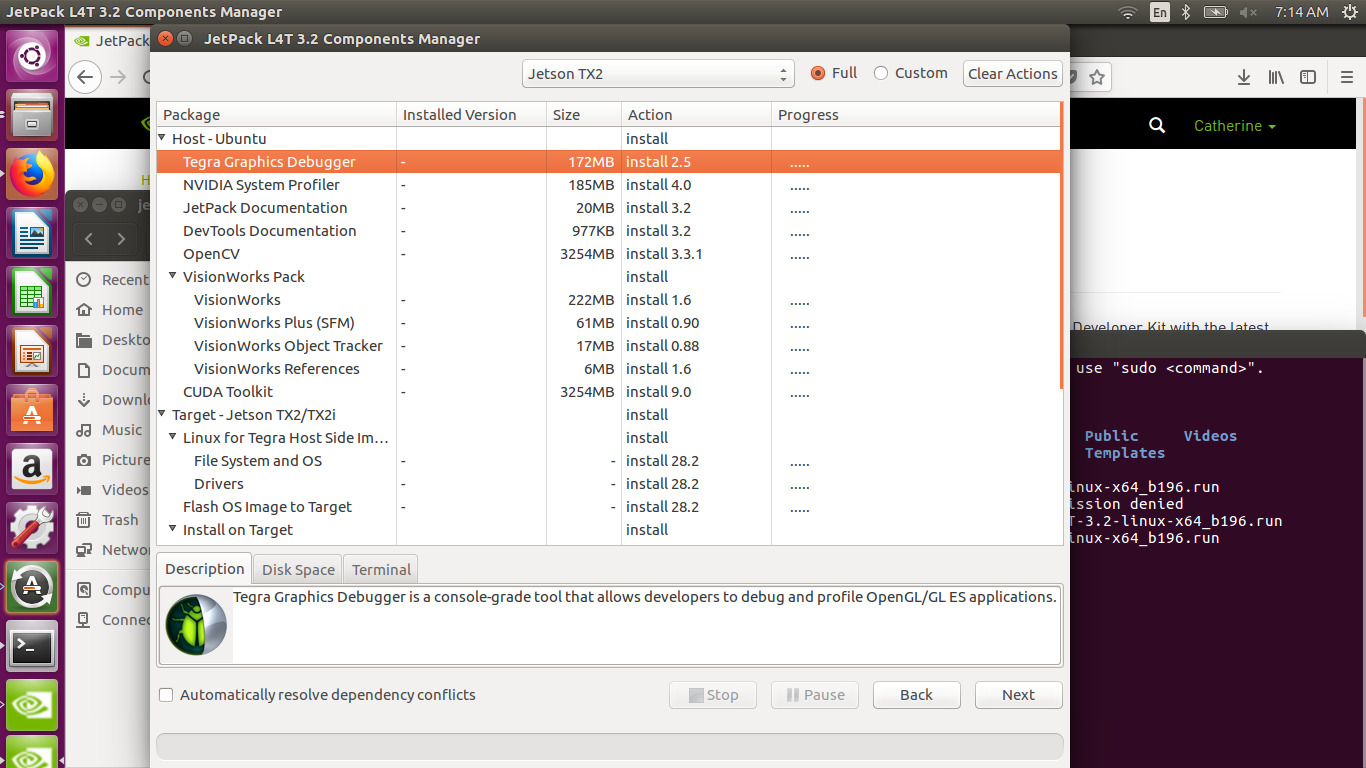
Minute 4:23 - Network Layout
You should probably select the default which is through the Router. 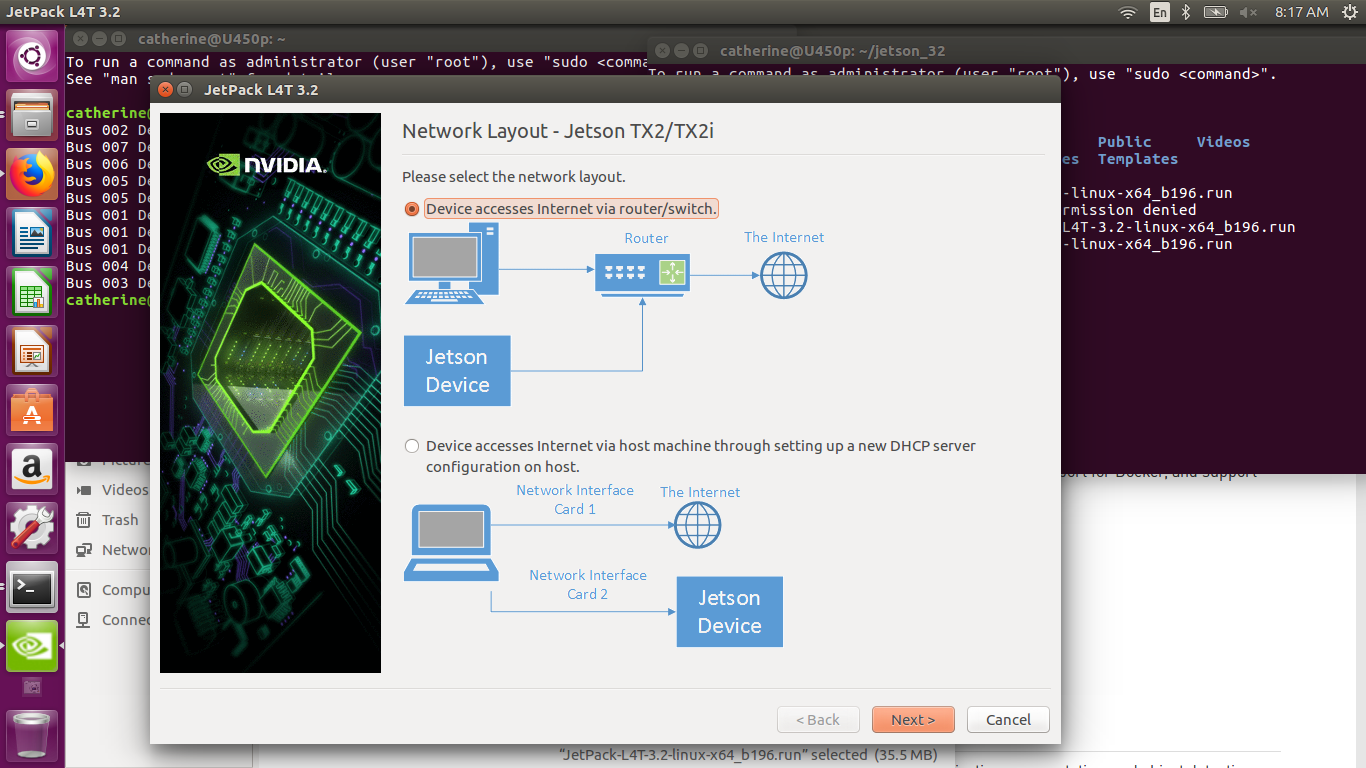 I had some personal problems that I found out were connected to my home Router. Essentially, I was connecting the Jetson via hardwire ethernet to a router that connects multiple ethernet cables (like six) to my TV, the WiFi router, a local server, and other appliances.A colleague helped me troubleshoot the problem and connected to the "tegra-ubuntu" ("192.168.1.2") by disabling DHCP on the Jetson and assigning a static IP address. As the Jetson rebooted during the install process, we found that a variable IP address crashed the installation. We directed the Jetson to a IP in the high range of the router to avoid an inadvertent conflict with another device, but you could also setup temporary DHCP reservation on the router for the Jetson if you wanted to be doubly sure of a avoid an address conflict.
Minute 4:46 - Post Installation - Force Recovery Mode
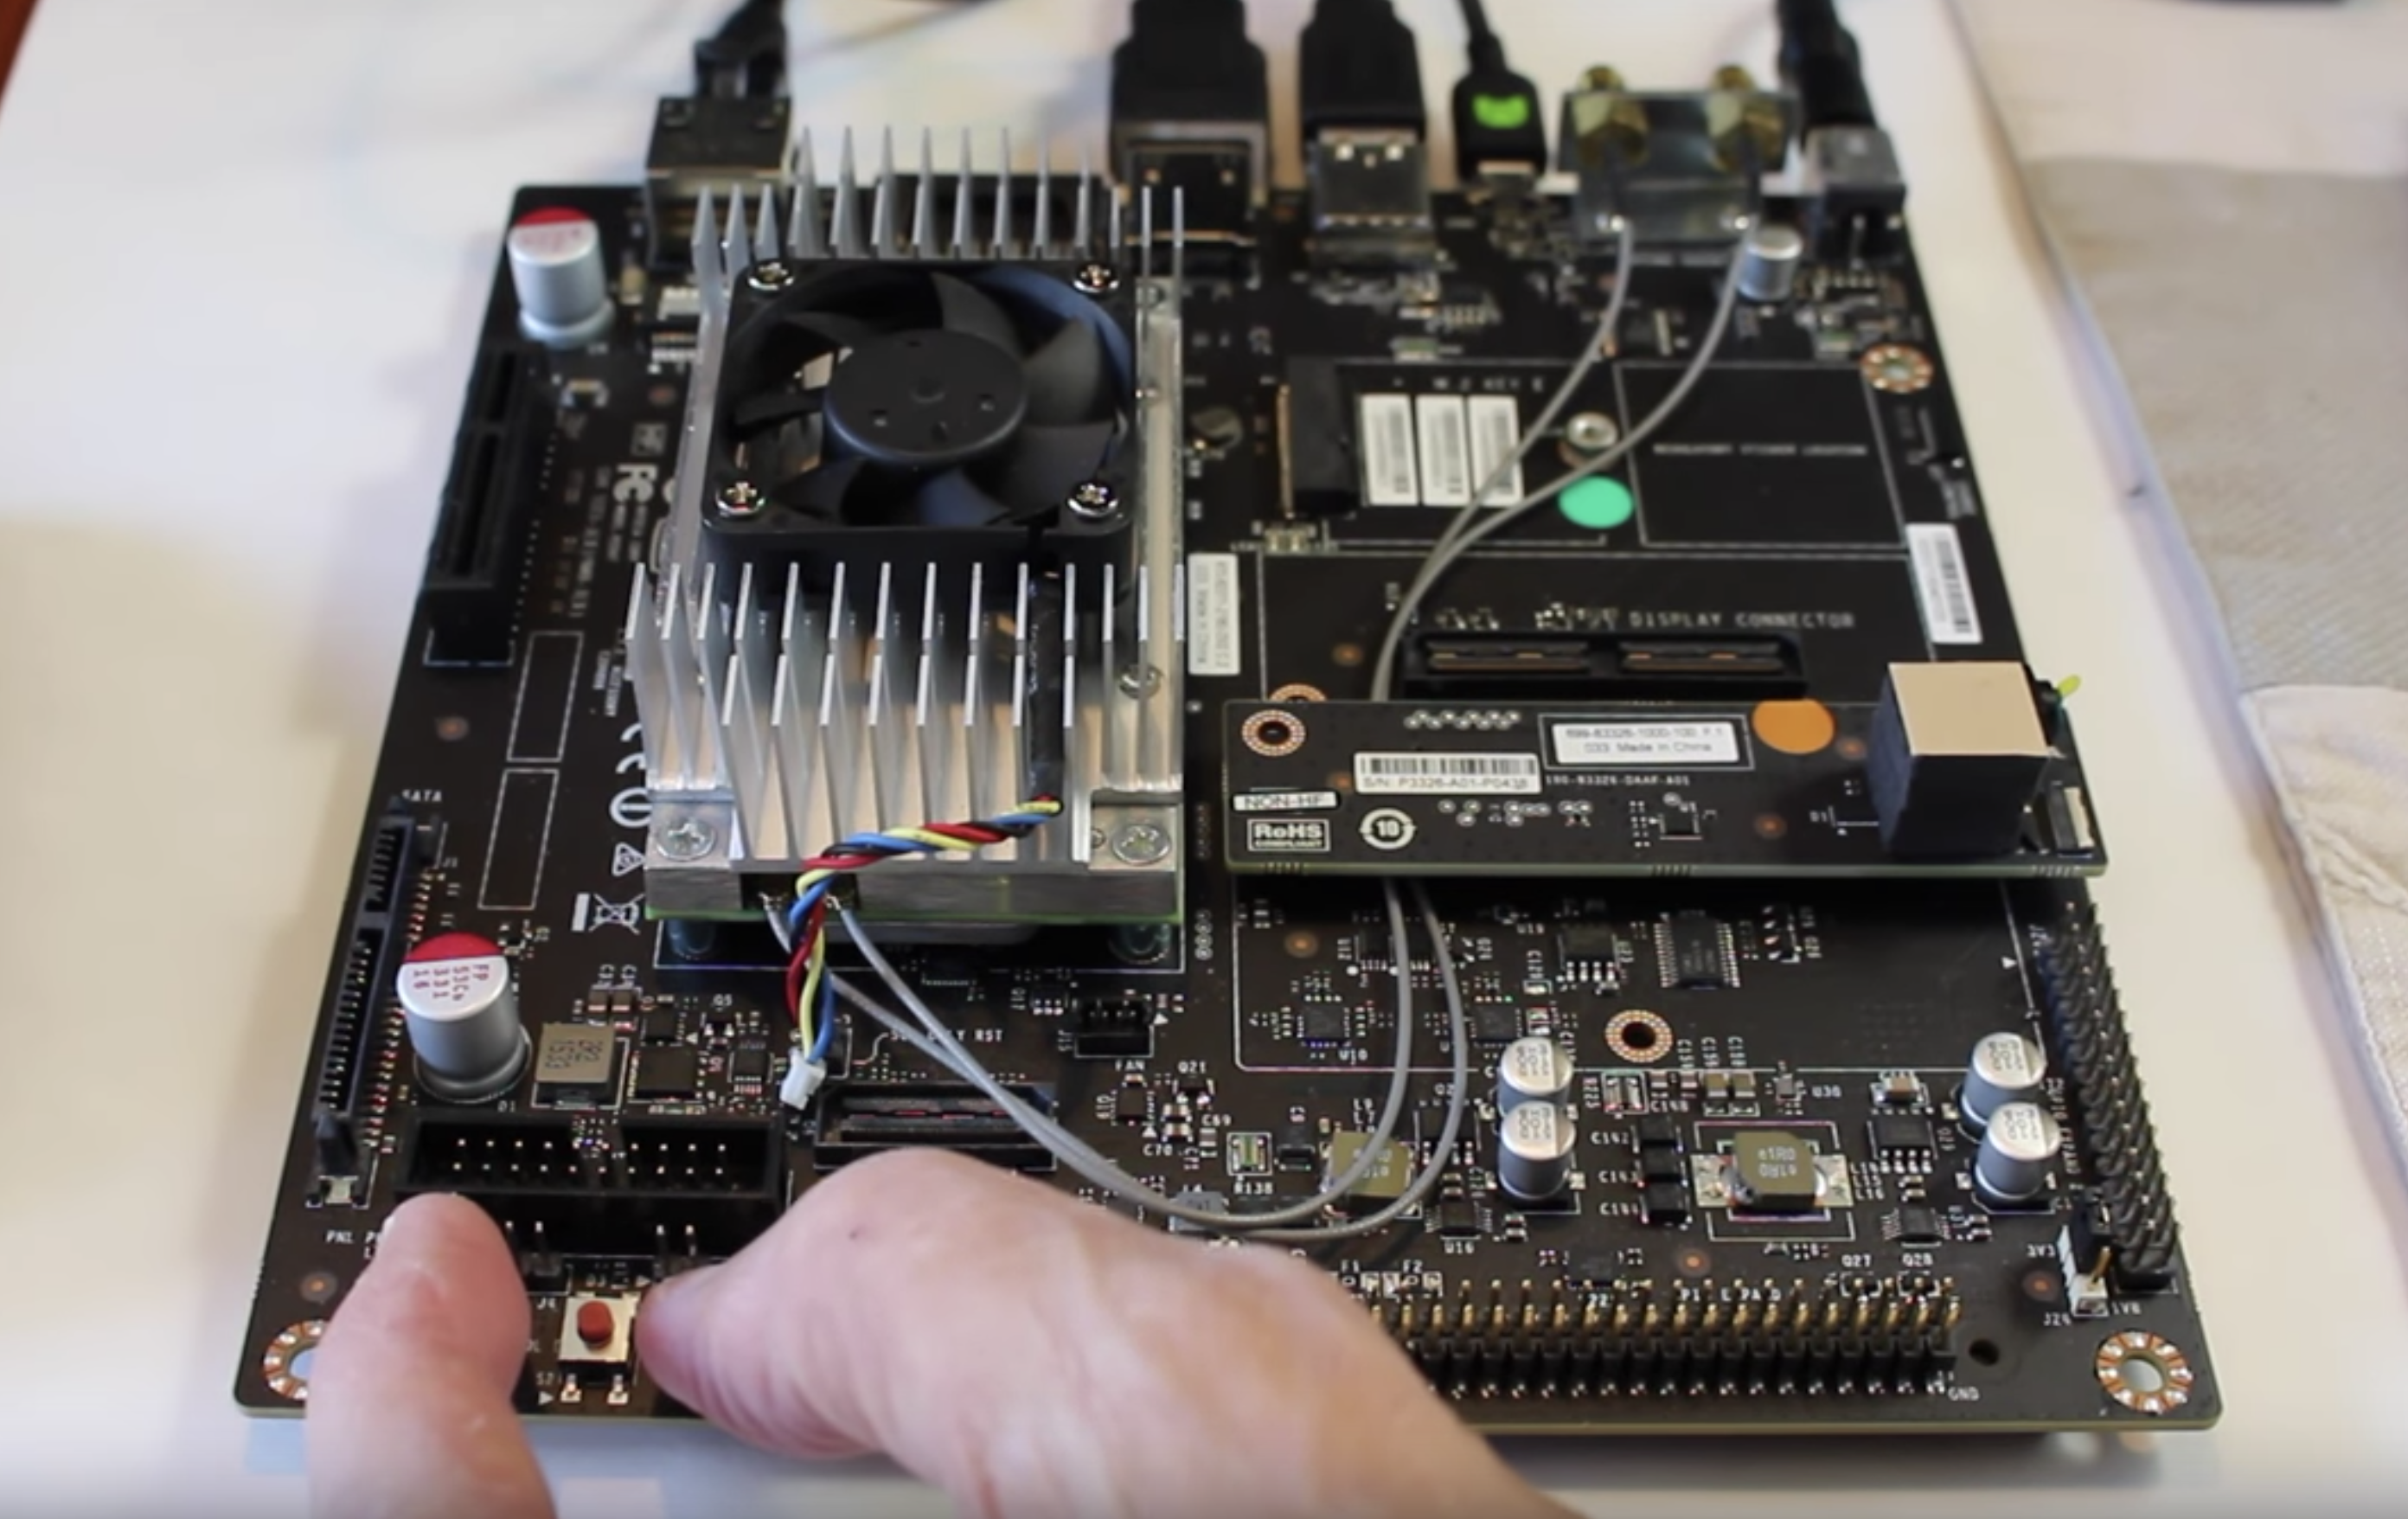
Now all the software has been installed. Follow the directions on Terminal. If you were like me and got excited and powered on the Jetson, it's time now to turn it off. So, unplug the AC adapter. Make sure via Step 2, the provided Micro-B plug is connected to the Host (just like my diagram above). Now, this is a little bit tricky sounding to follow step 4, but it's really quite simple. He shows you in the video at Minute 4:49.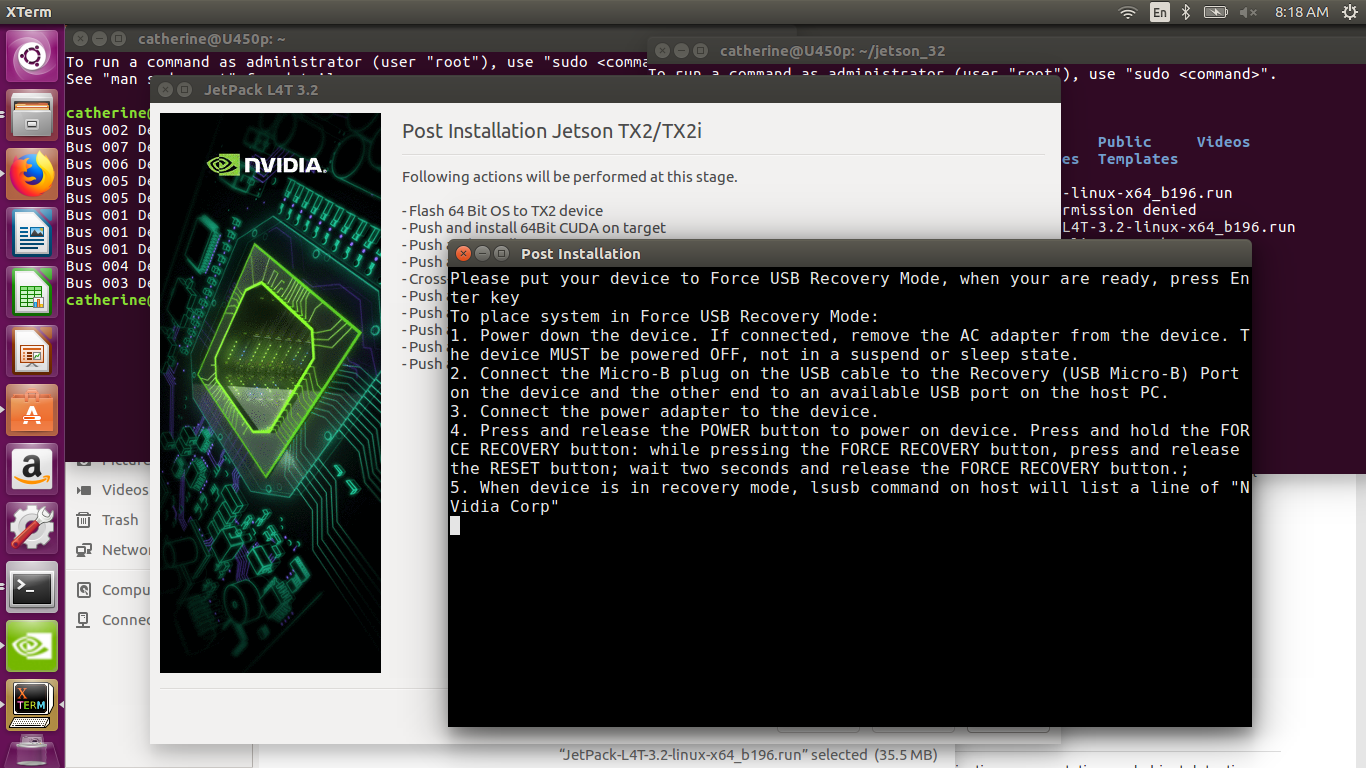
Step 4 at Minute 6:26:
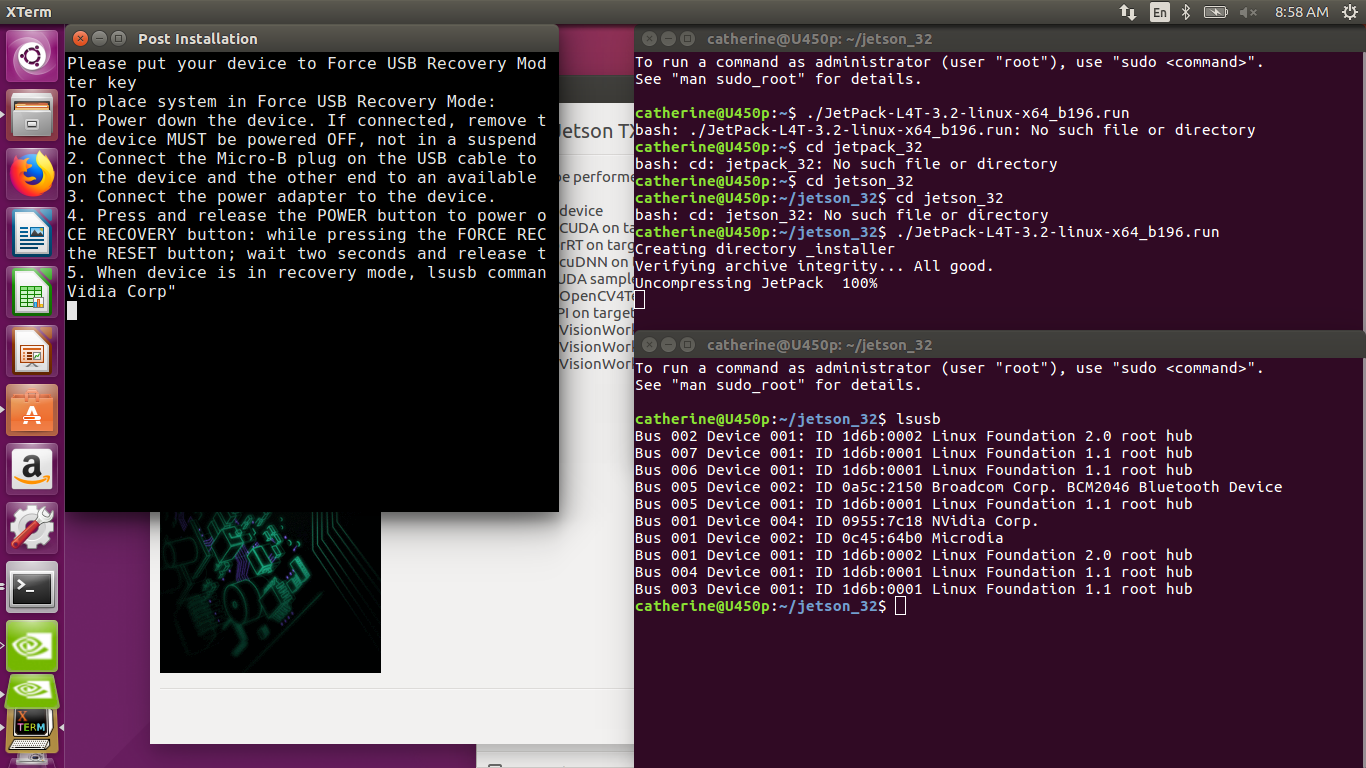
Minute 6:39 - Ready to Flash!
Open up a new Terminal and enter: `lsusb` Note: the bottom Terminal window is the new window.catherine@U450p:~/jetson_32$ lsusb
The ID 0955:7c18 is the Jetson. Press enter.
Minute 7:16 - Building root and flashing
Now the root is being built and he notes it takes about 7 minutes. Here 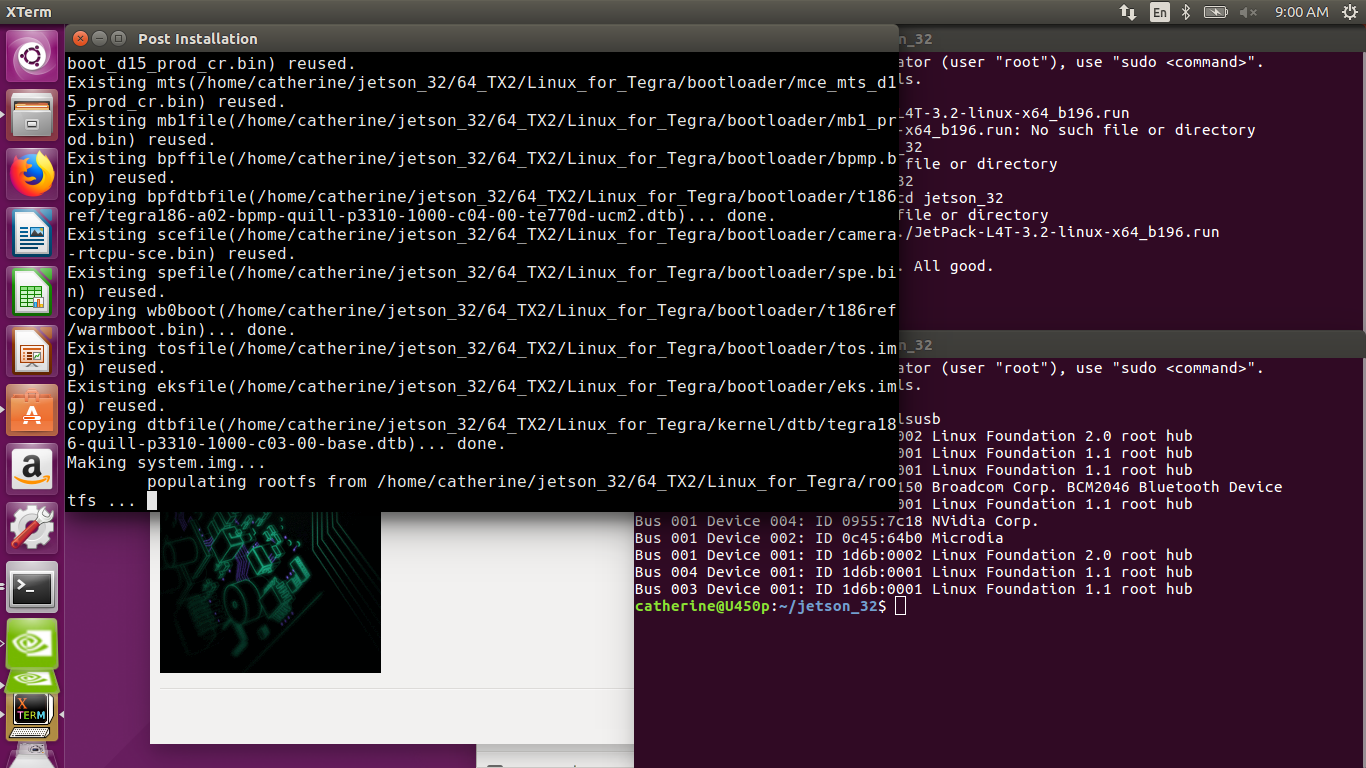  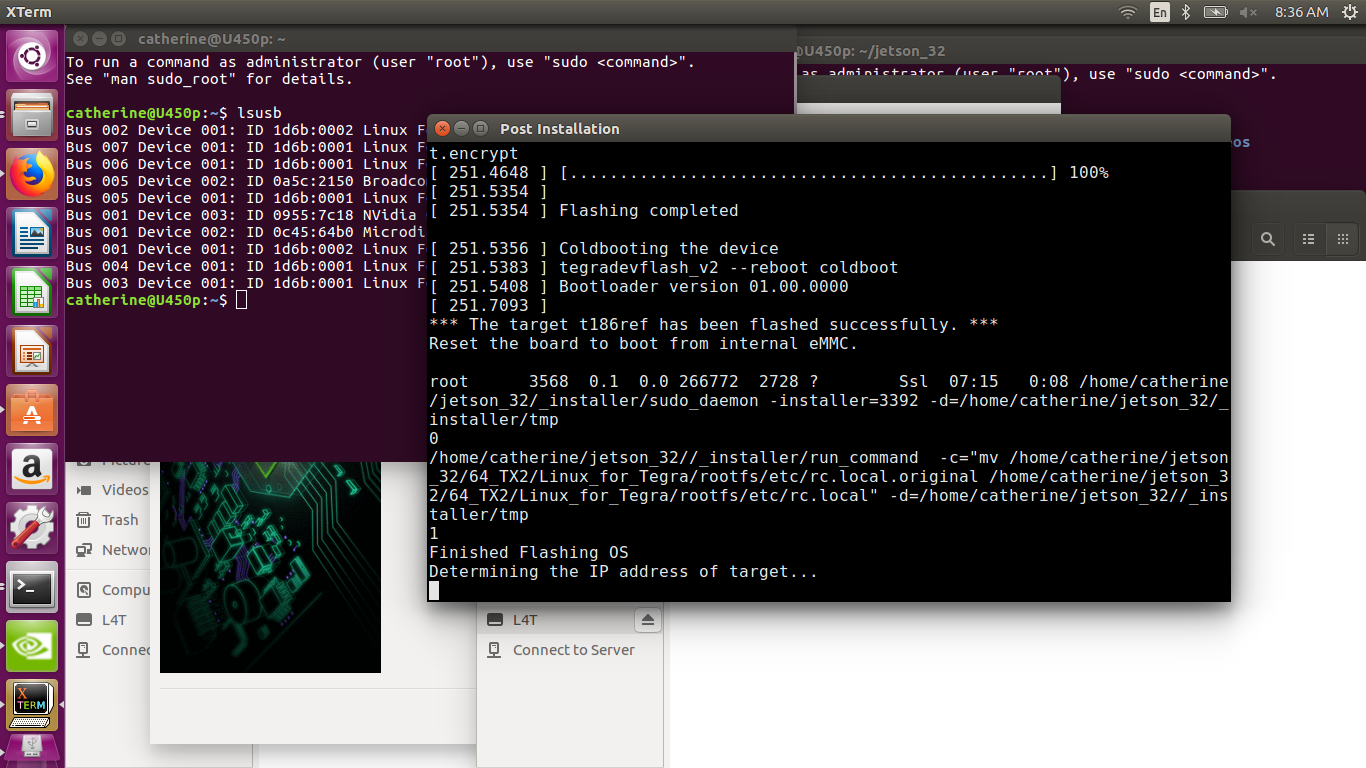 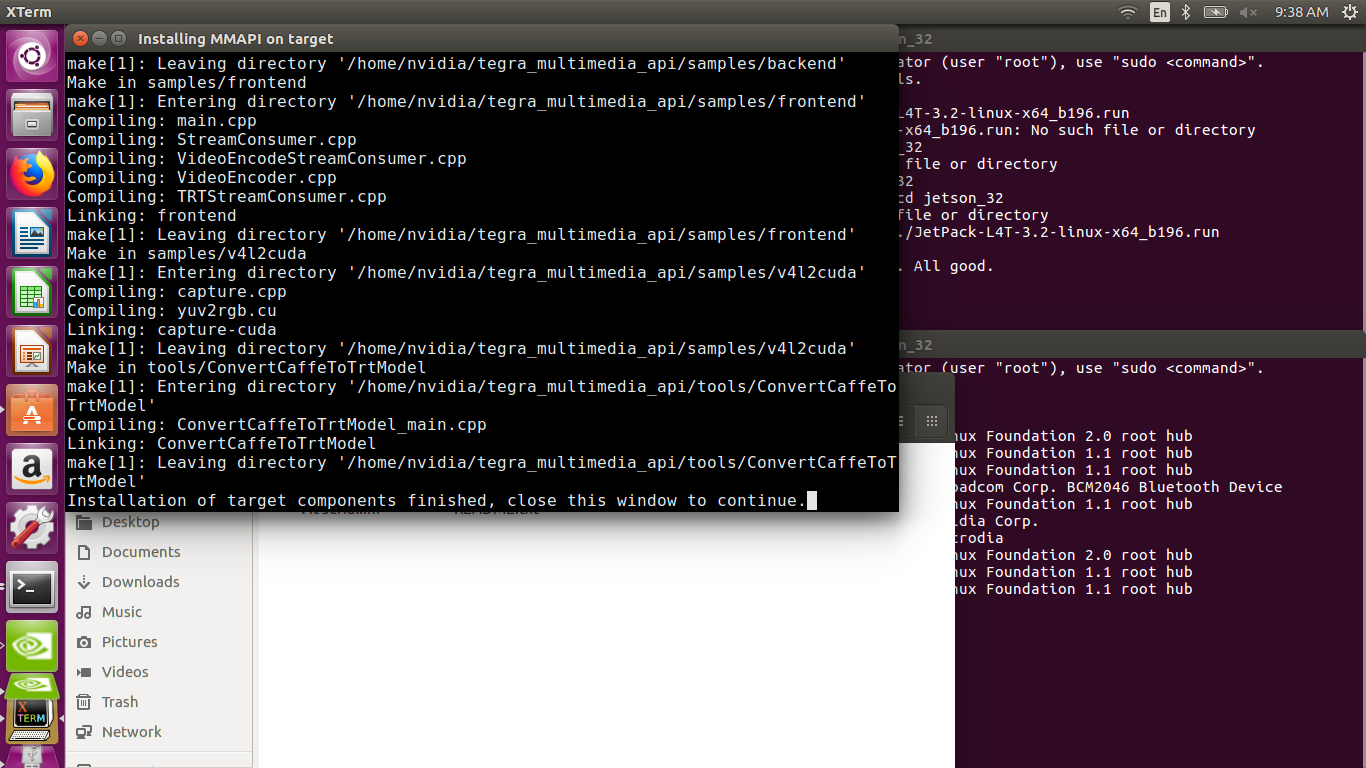Minute 7:42 - Connecting to Jetson and installing packages
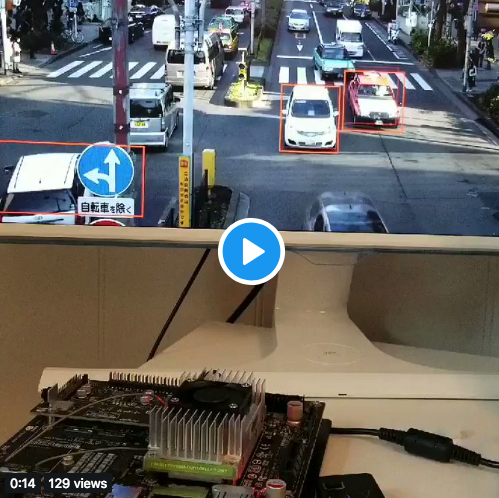
At this point, the Host connects to the Jetson and installs all the packages (target components) to it and it takes about 12 minutes. 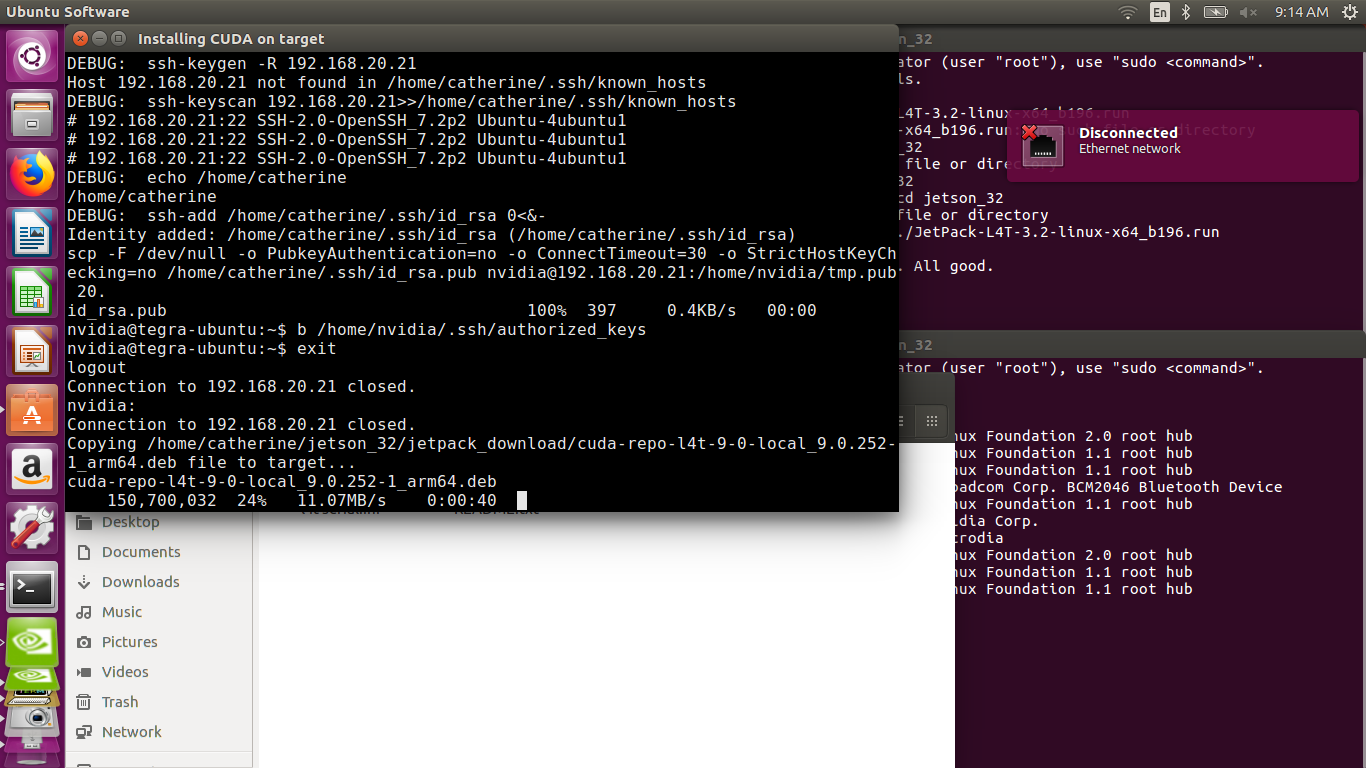Hello World - Car Detection Demo
Minute 8:20
Now that everything's been flashed on the Jetson, open up a Terminal on the Jetson Ubuntu system. You'll be prompted to enter your password.$nvidia@tegra-ubuntu sudo ./jetson_clocks.sh
Open Terminal and cd into /home/nvidia/tegra_multimedia_api/samples/backend
$nvidia@tegra-ubuntu:~$cd '/home/nvidia/tegra_multimedia_api/samples/backend'
Minute 9:35 Make File
For Jetson 3.2, what he has in the video won't work! In the video, he has used the `README` file from the `/home/nvidia/tegra_multimedia_api` folder. He proceeds to copy and paste a script at around line 270. Alas, there doesn't appear to be that many lines in the Jetson 3.2 README file. Take a look at this blog post that documents this problem: https://devtalk.nvidia.com/default/topic/1027789/jetson-tx2/jetsonhacks-car-video-detection-example-needs-update/So, instead of typing this in per the video:
./backend 1 ../../data/Video/sample_outdoor_car_1080p_10fps.h264 H264 \ --gie-deployfile ../../data/Model/GoogleNet_one_class/ GoogleNet_modified_oneClass_halfHD.prototxt \ --gie-modelfile ../../data/Model/GoogleNet_one_class/ --gie-forcefp32 0 --gie-proc-interval 1 -fps 10
You need to type in this:
./backend 1 ../../data/Video/sample_outdoor_car_1080p_10fps.h264 H264 --trt-deployfile ../../data/Model/GoogleNet_one_class/GoogleNet_modified_oneClass_halfHD.prototxt --trt-modelfile ../../data/Model/GoogleNet_one_class/GoogleNet_modified_oneClass_halfHD.caffemodel --trt-forcefp32 0 --trt-proc-interval 1 -fps 10
You'll notice the change is in using trt instead of gie. You can let the video run and when it'l automatically stop on its own.
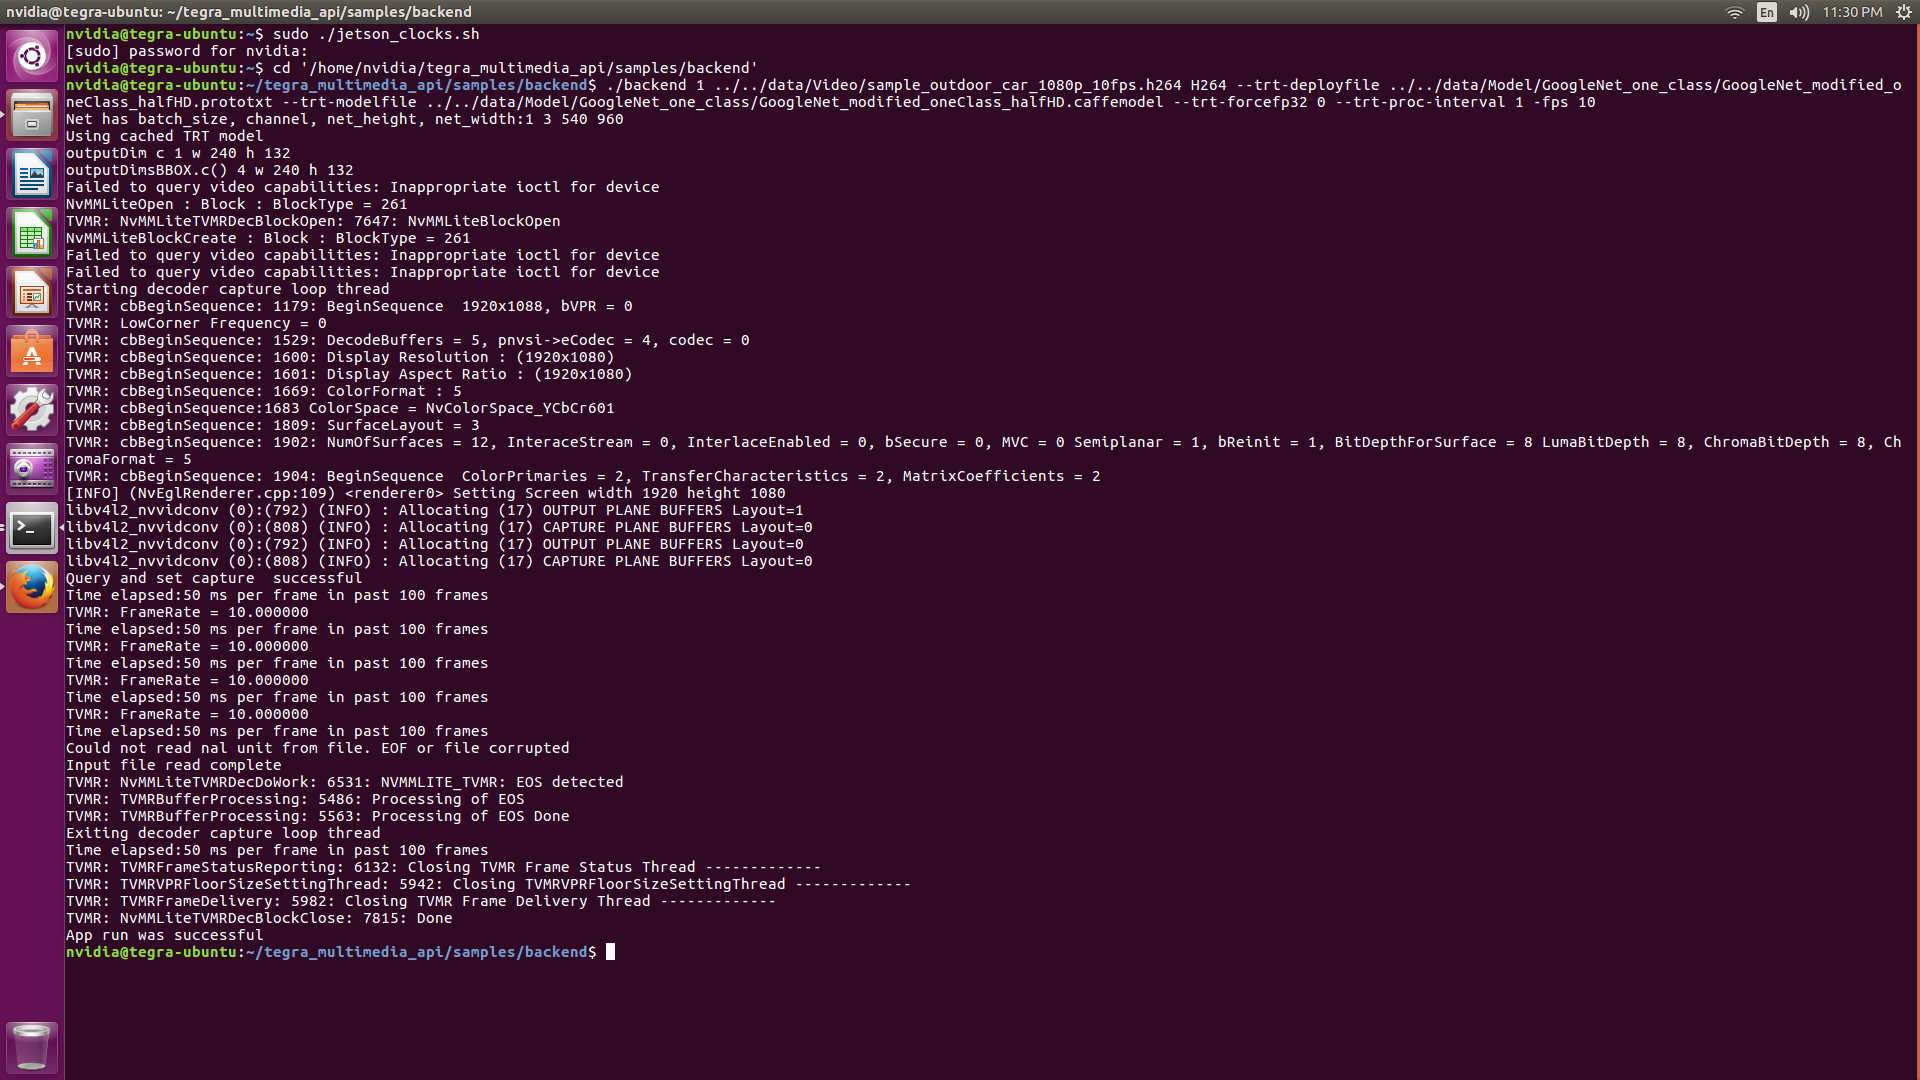
Voila!
The car video is detecting objects using GoogleNet: https://www.cs.unc.edu/~wliu/papers/GoogLeNet.pdf
Video on Twitter: https://twitter.com/nudro/status/1005453515035238401.