Deploying an R Shiny App to AWS
For a recent company project, I helped deploy an R Shiny app developed by a teammate to AWS. There are multiple blogs online that provide great, detailed instructions on how to do this. After doing it several times now, I wanted to share the website that I thought provided the best walk-through as well as offer some of my tips.
Today we'll do three things:
- Deploy an R Shiny app called "Box Office Mojo" courtesy of https://github.com/chrisrzhou/
- Set up users, each with username and password to access the app.
- Deploy R Studio for data scientists to code so that within the server, they can deploy their own Shiny app.
Sign up for an AWS Account and log in
First if you haven't already, you need to sign up for an AWS account, set up your billing via credit card, and log in. You should be greeted by a screen like this:

Something to note is when I walked my team through this tutorial, some of them received a message from AWS about their account being verified as a first time user. After 15 minutes, they received another email and were able to continue.
R Bloggers Post
After looking online, the best website I found was from R-bloggers, here:
https://www.r-bloggers.com/shiny-server-on-aws/. Pretty much everything I learned came from this website and I'd refer to it for any settings-based questions.
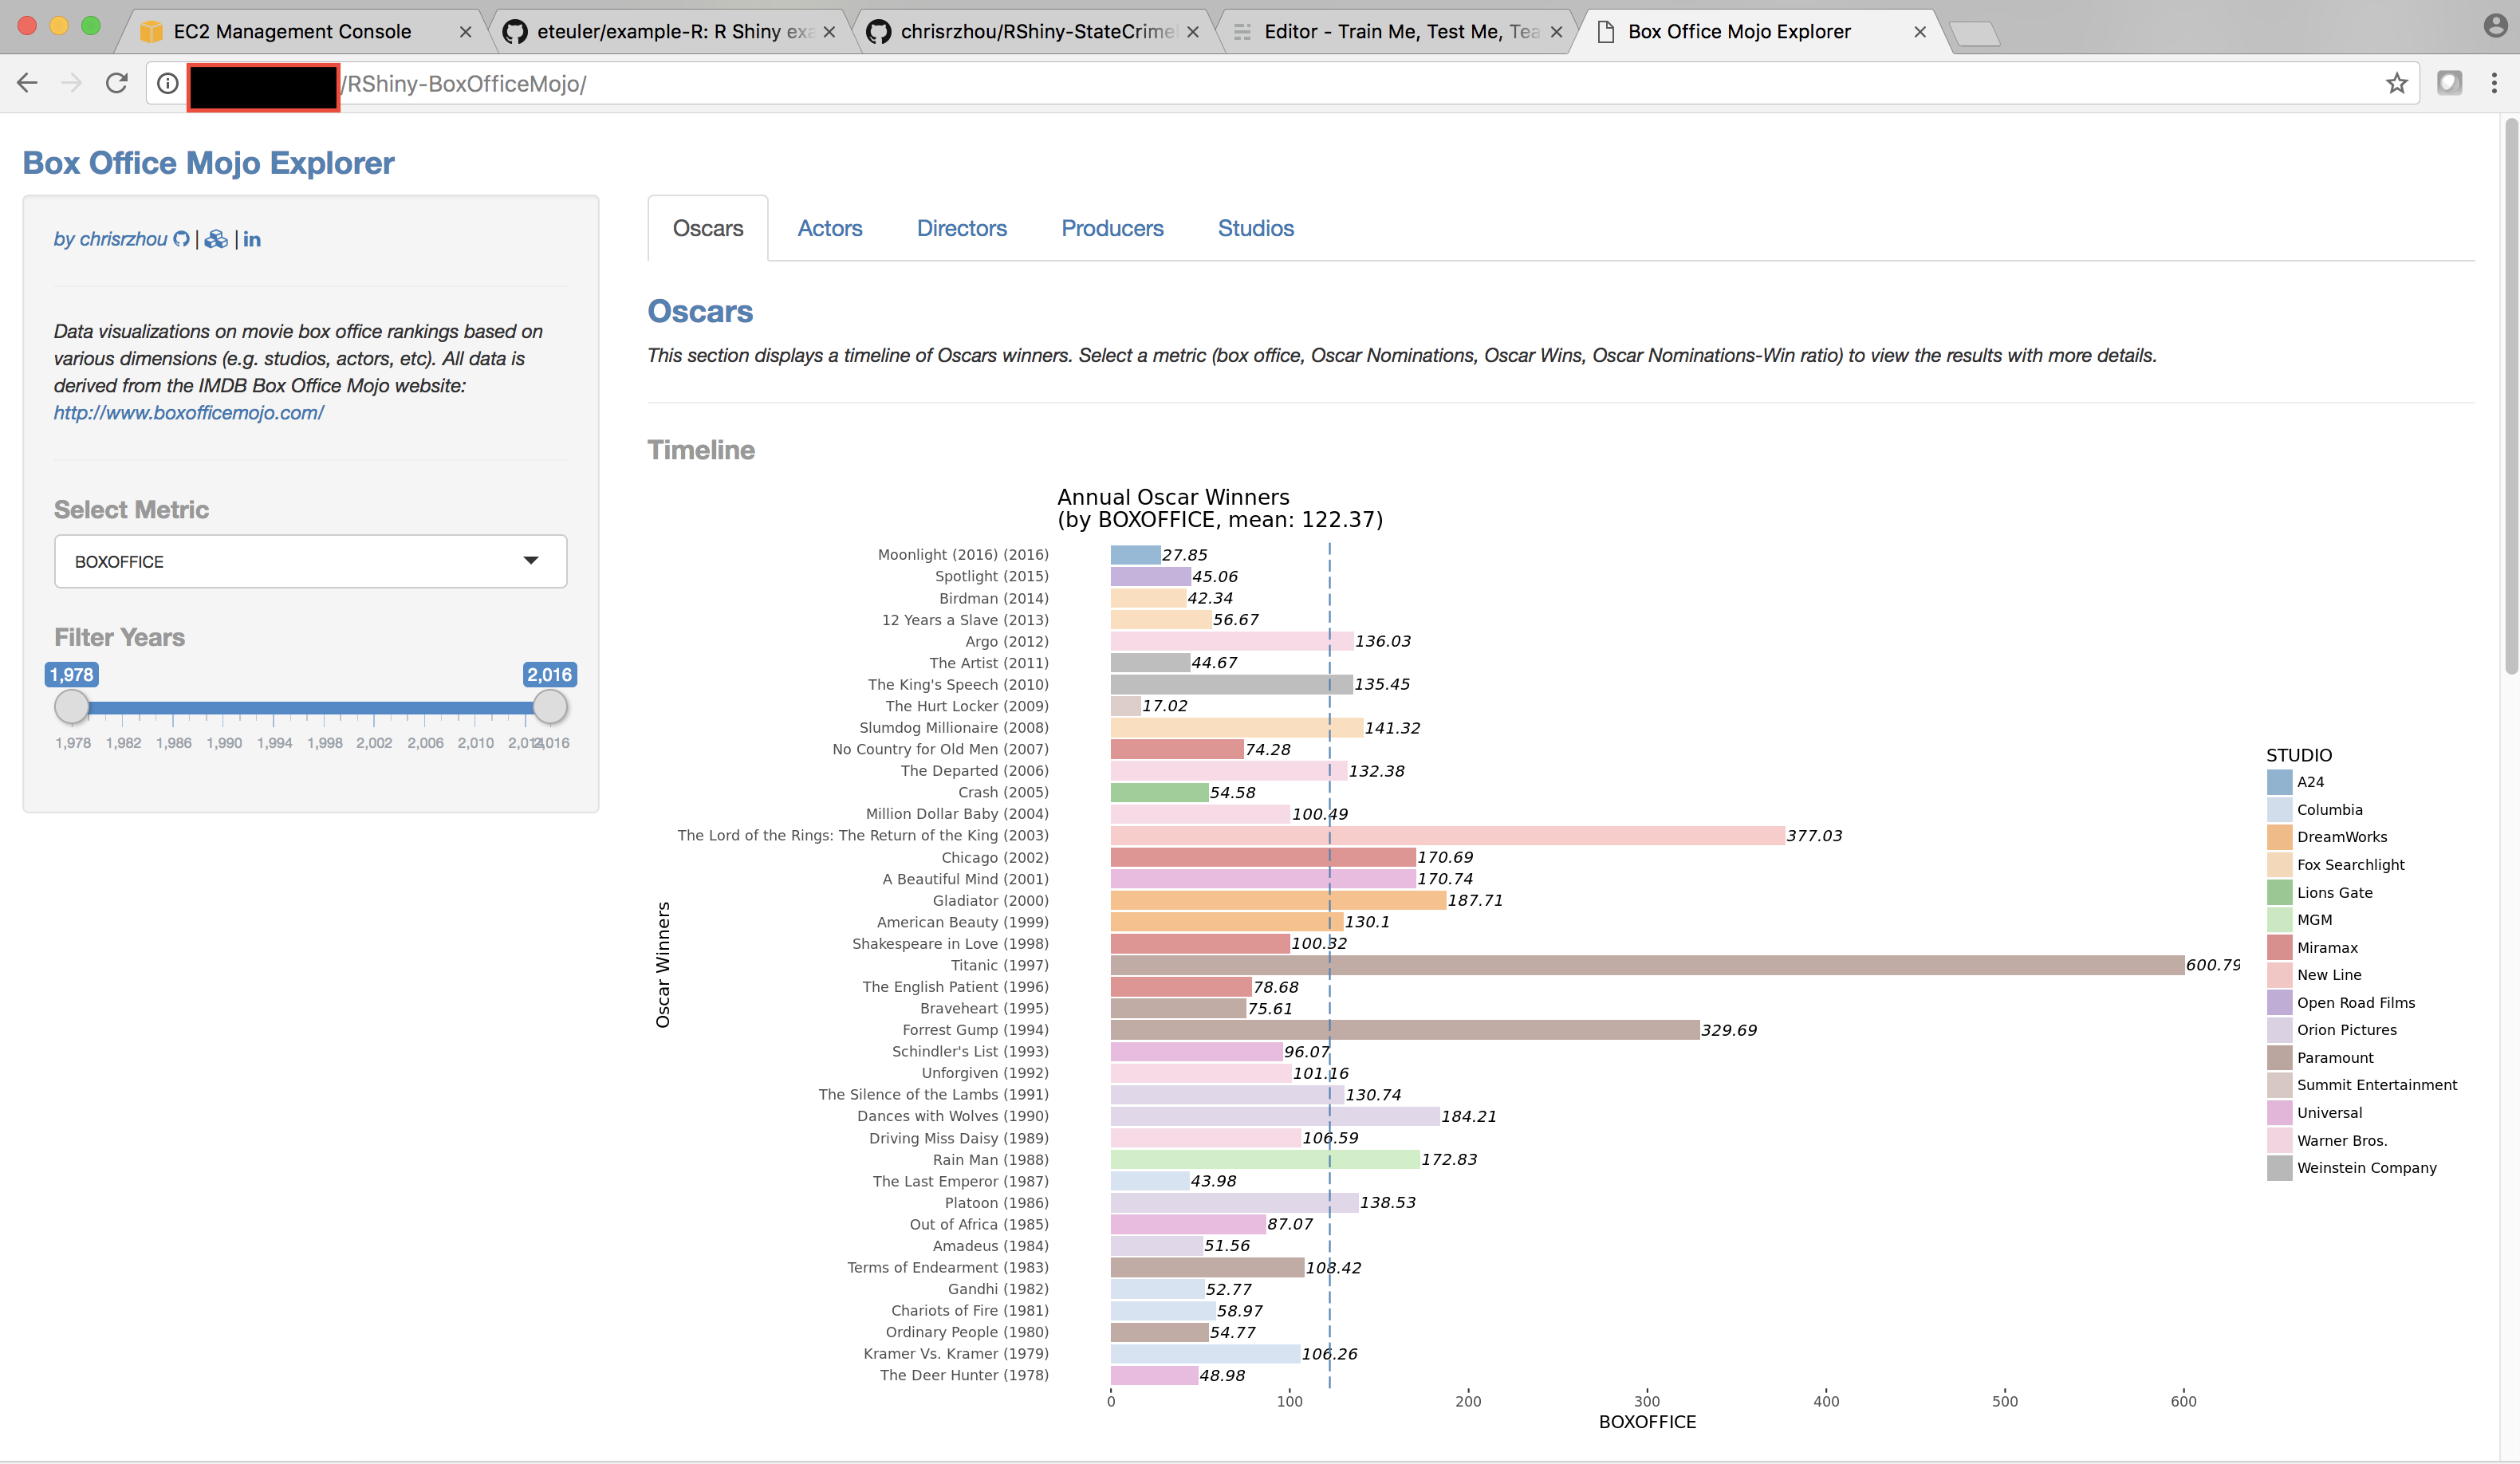
Let's deploy an R Shiny App
For the walk-through let's deploy this app located publicly online via chriszhou's tutorial: https://github.com/chrisrzhou/RShiny-BoxOfficeMojo. At the end of this post, you'll be able to deploy any R Shiny app to AWS, and it'll look like this:
Step 1
Go ahead and click on EC2 on the console:
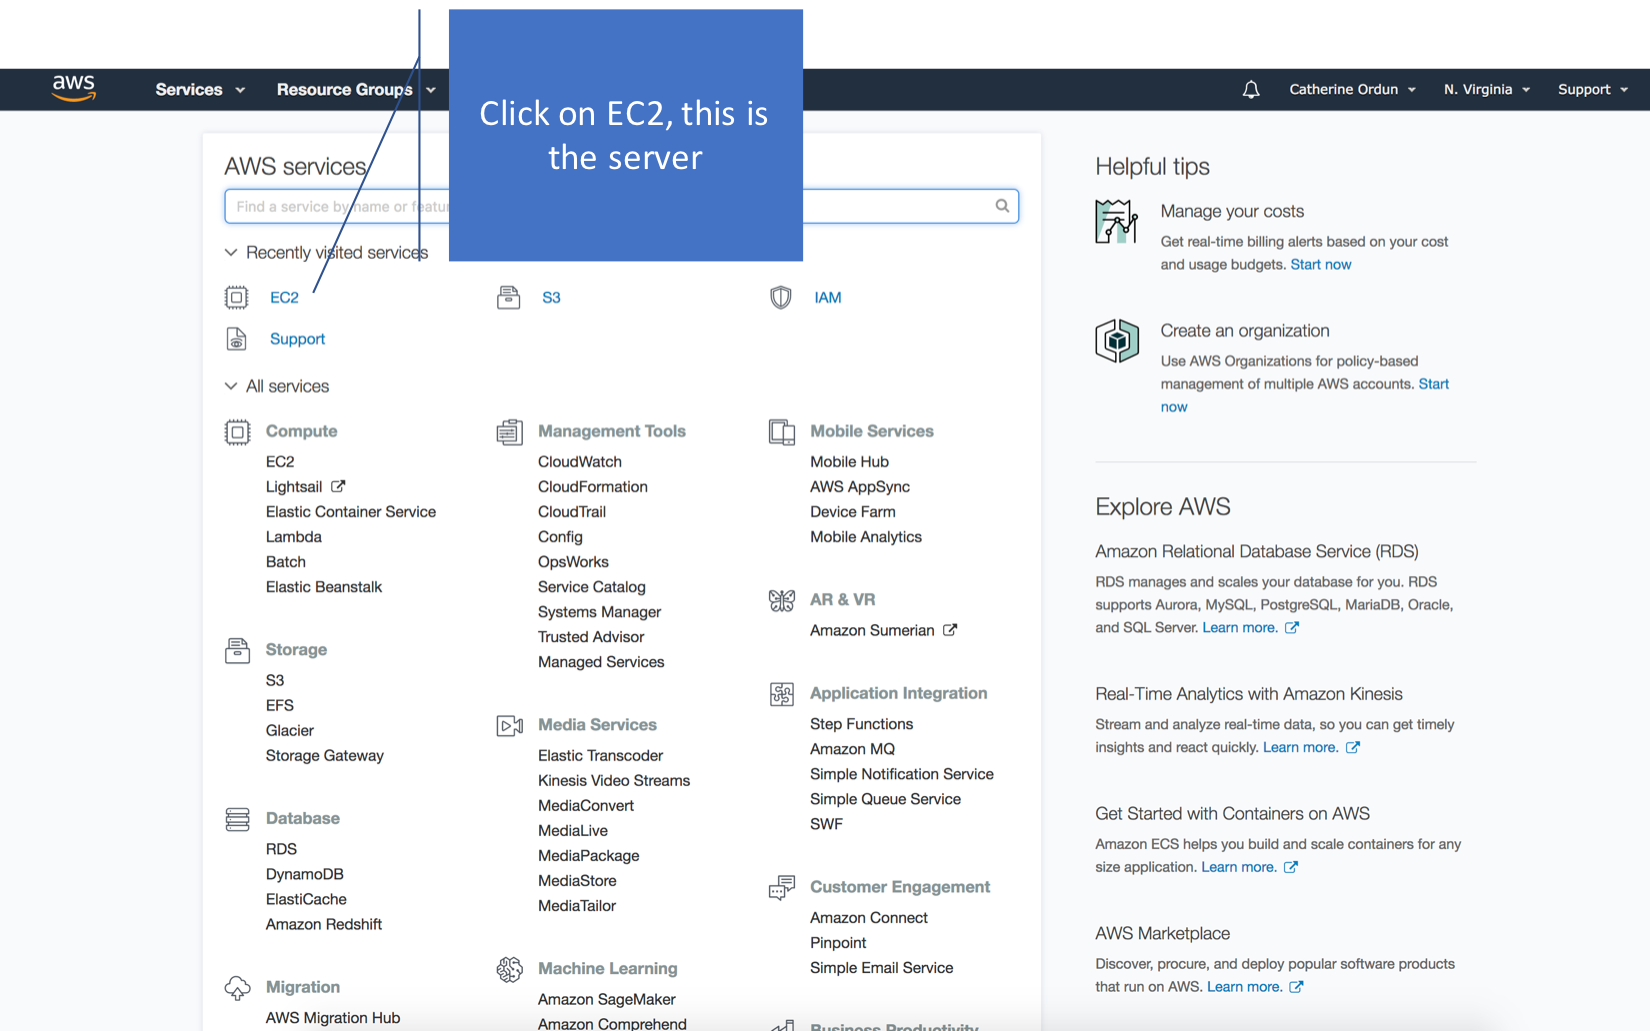
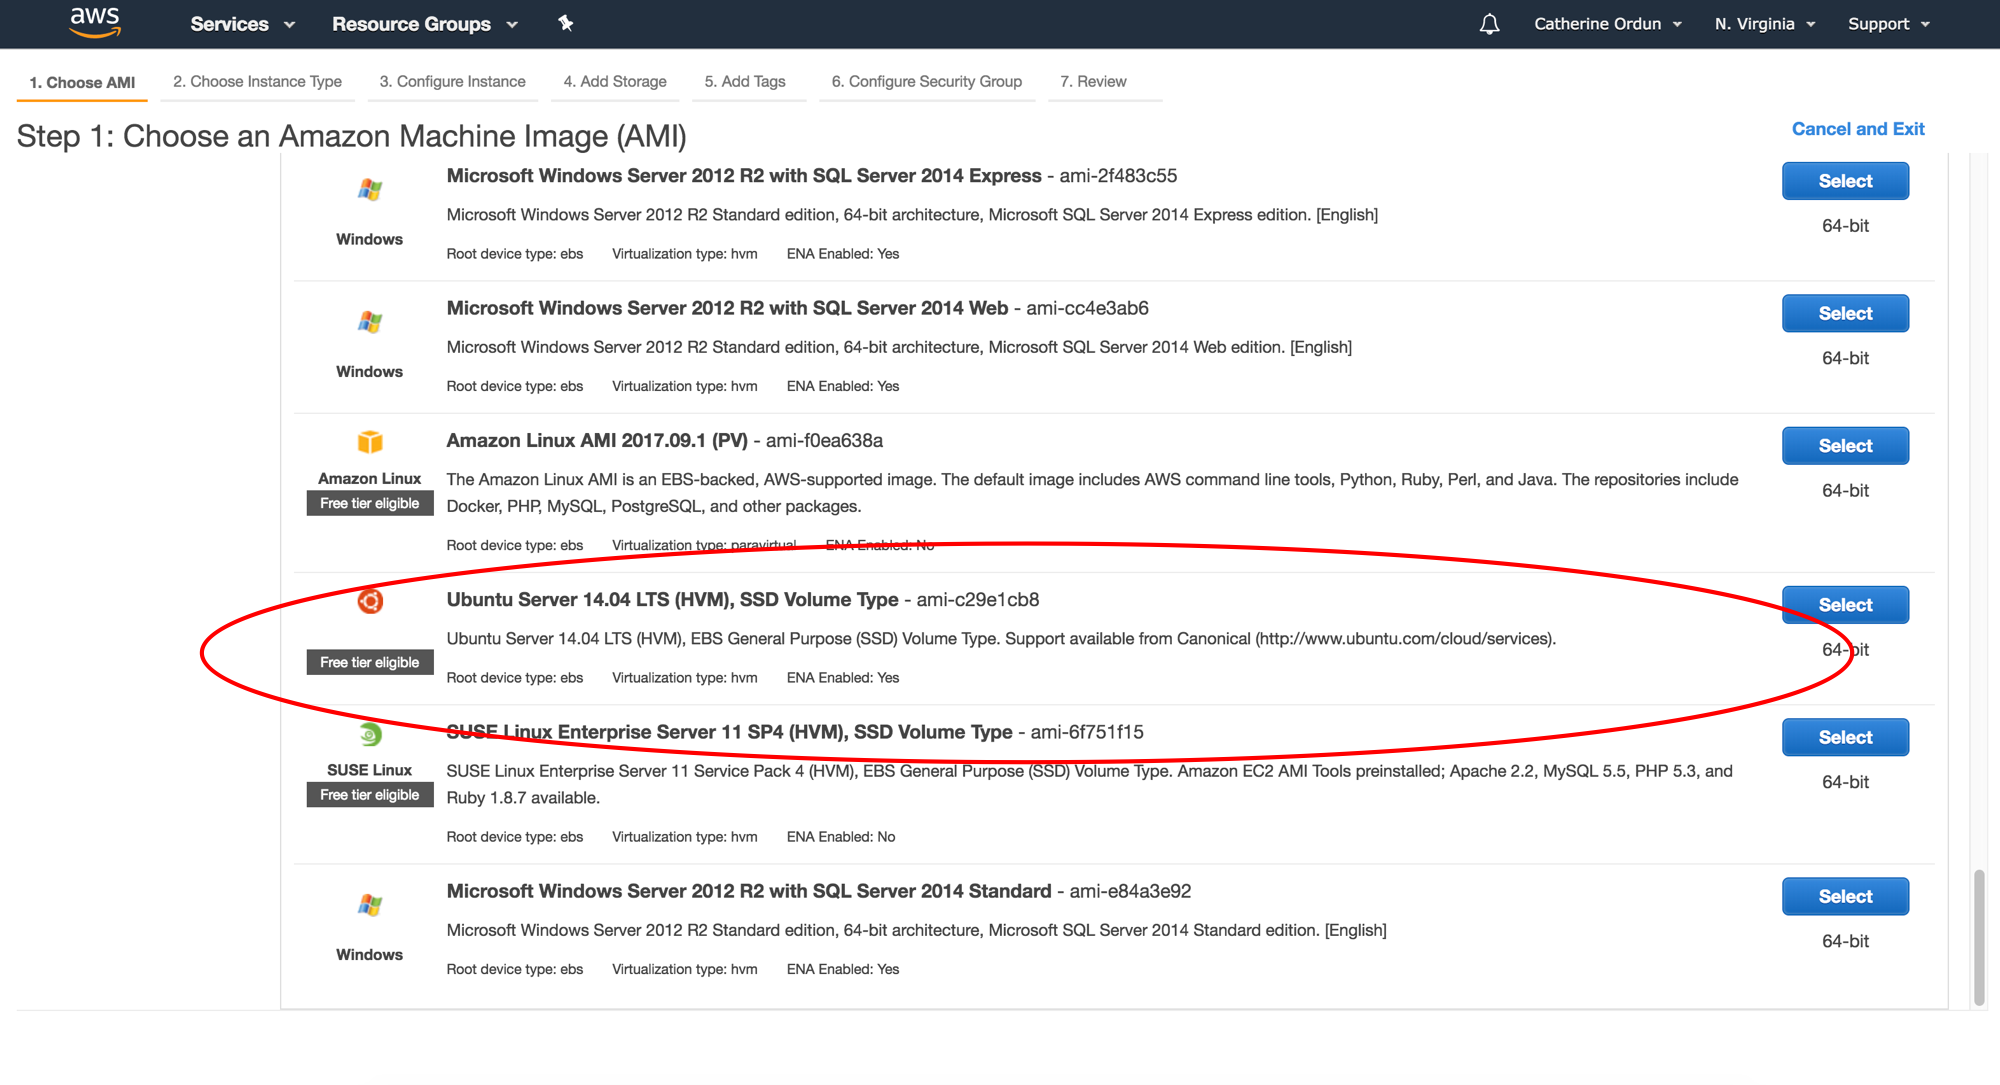
You'll be greeted by a screen with all the available AMI's, or images with the necessary libraries and dependencies, to select from. Scroll down to the bottom of the page and select the following:
- AMI: Ubuntu Server 14.04
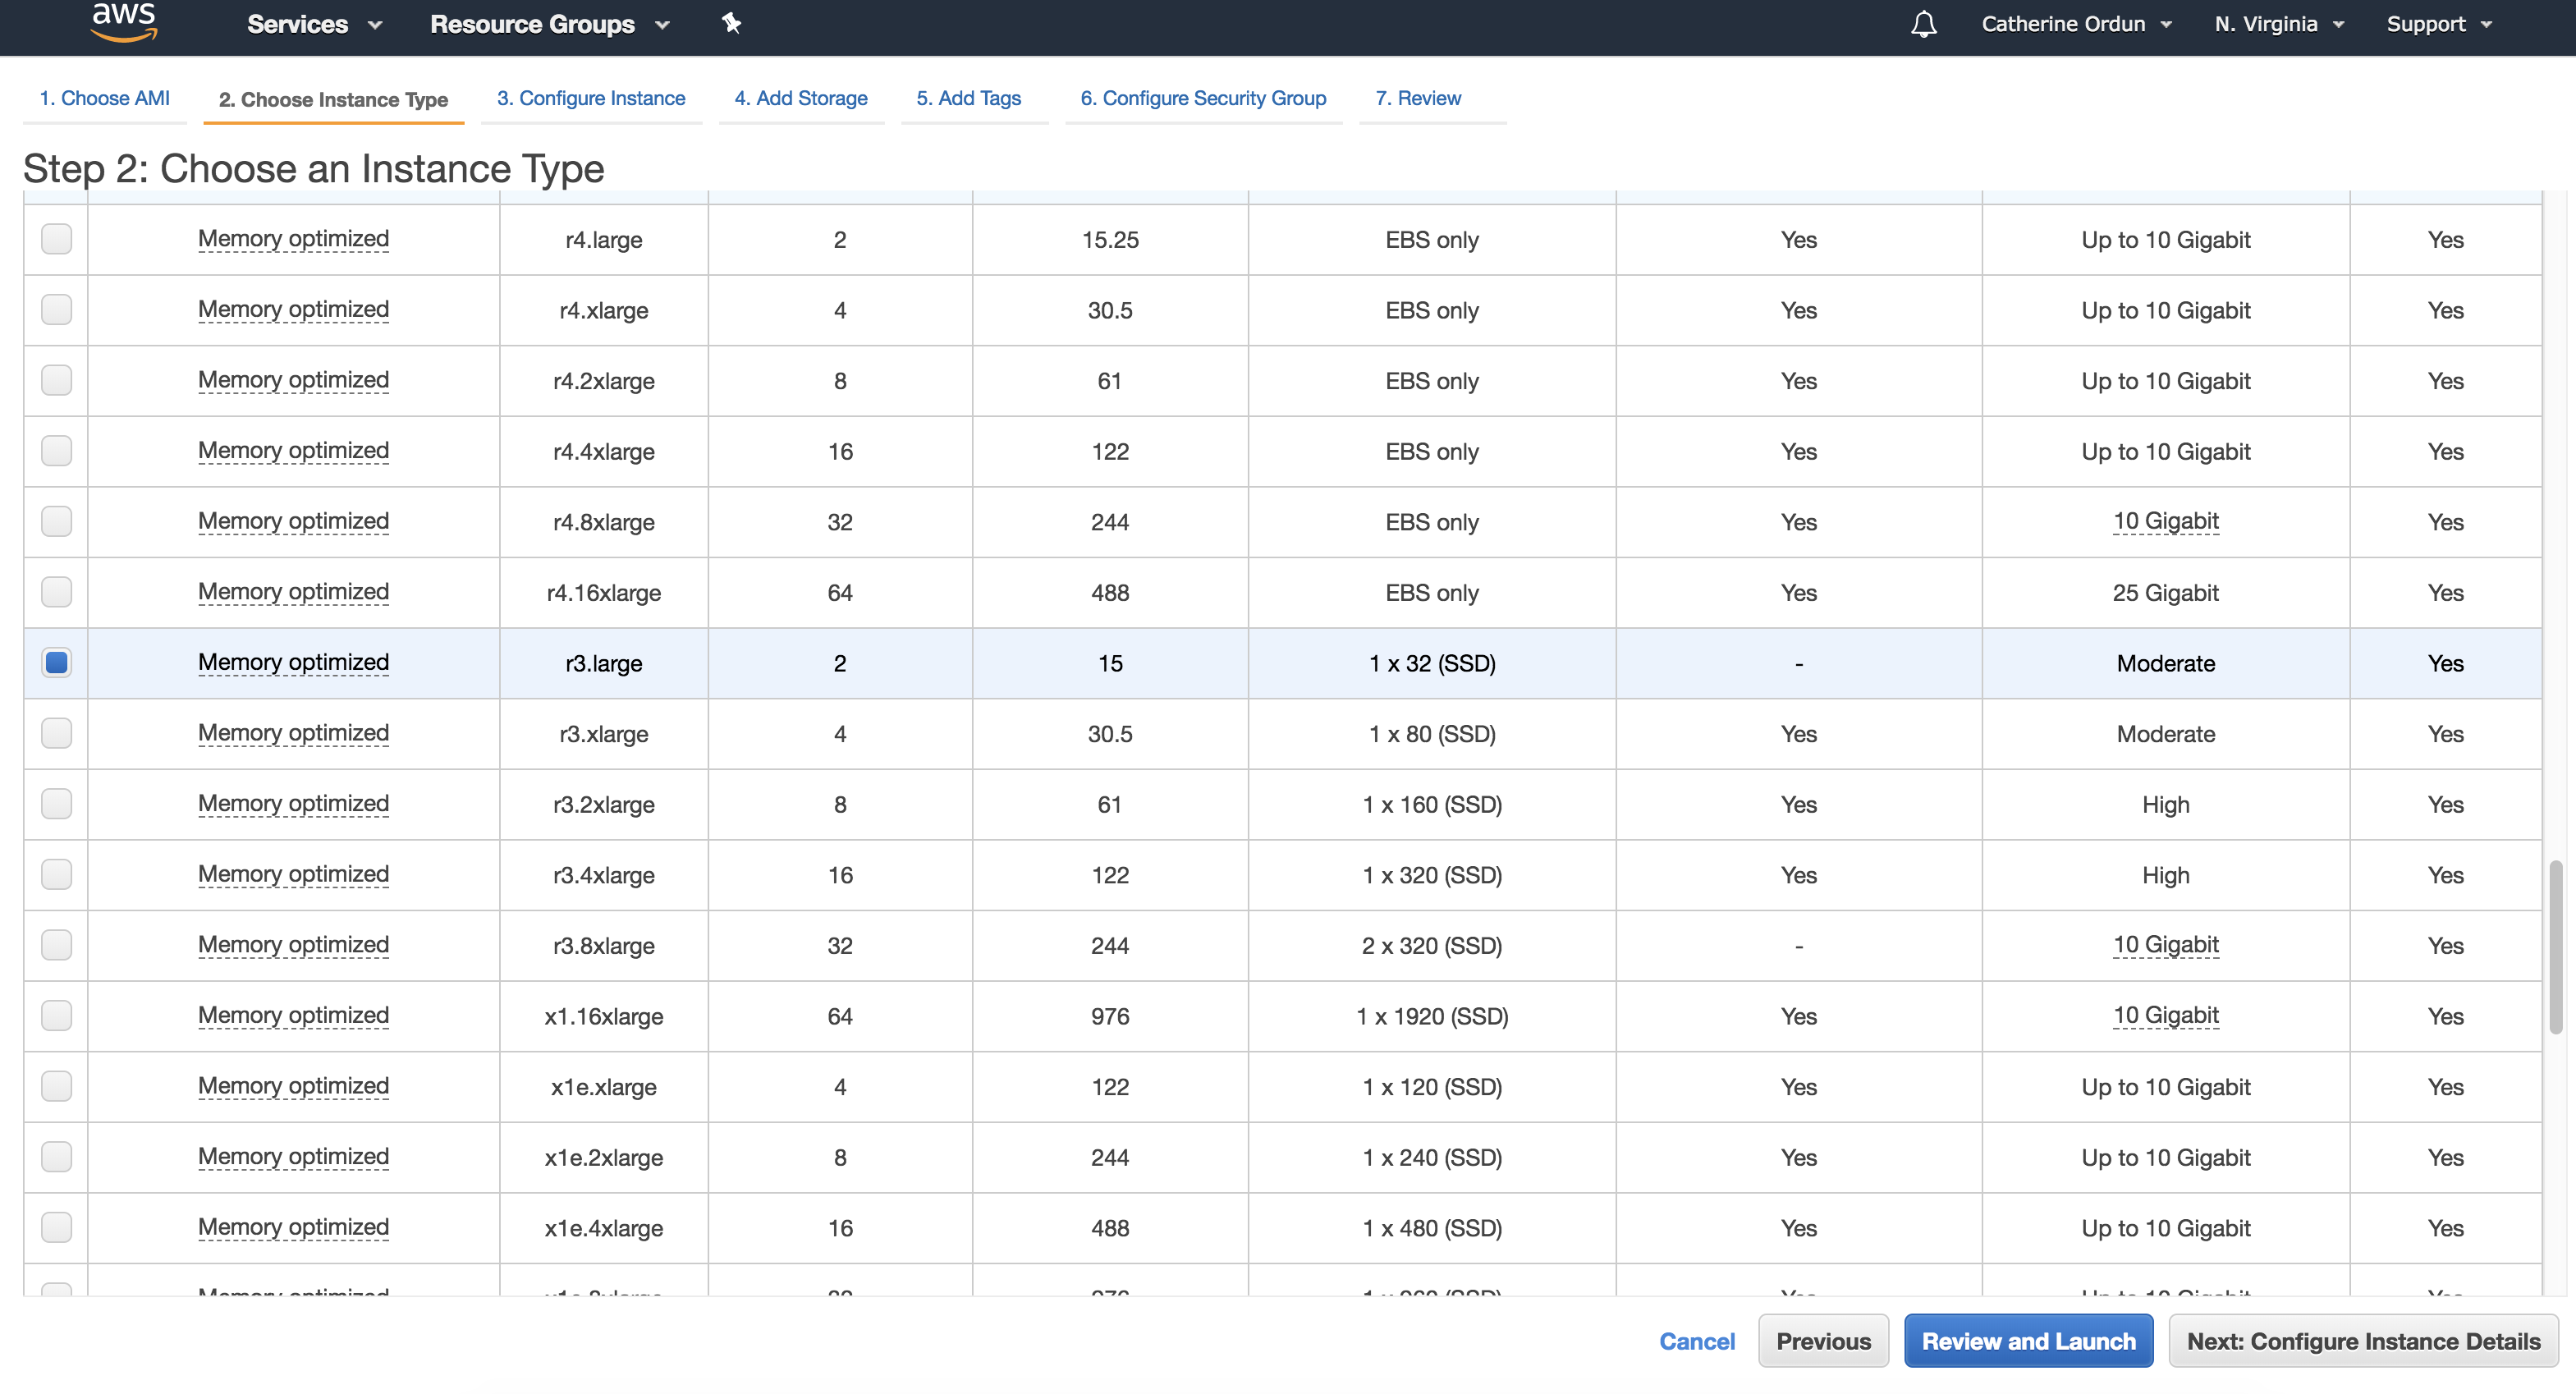
Now, select your EC2 instance type:
- r3.large
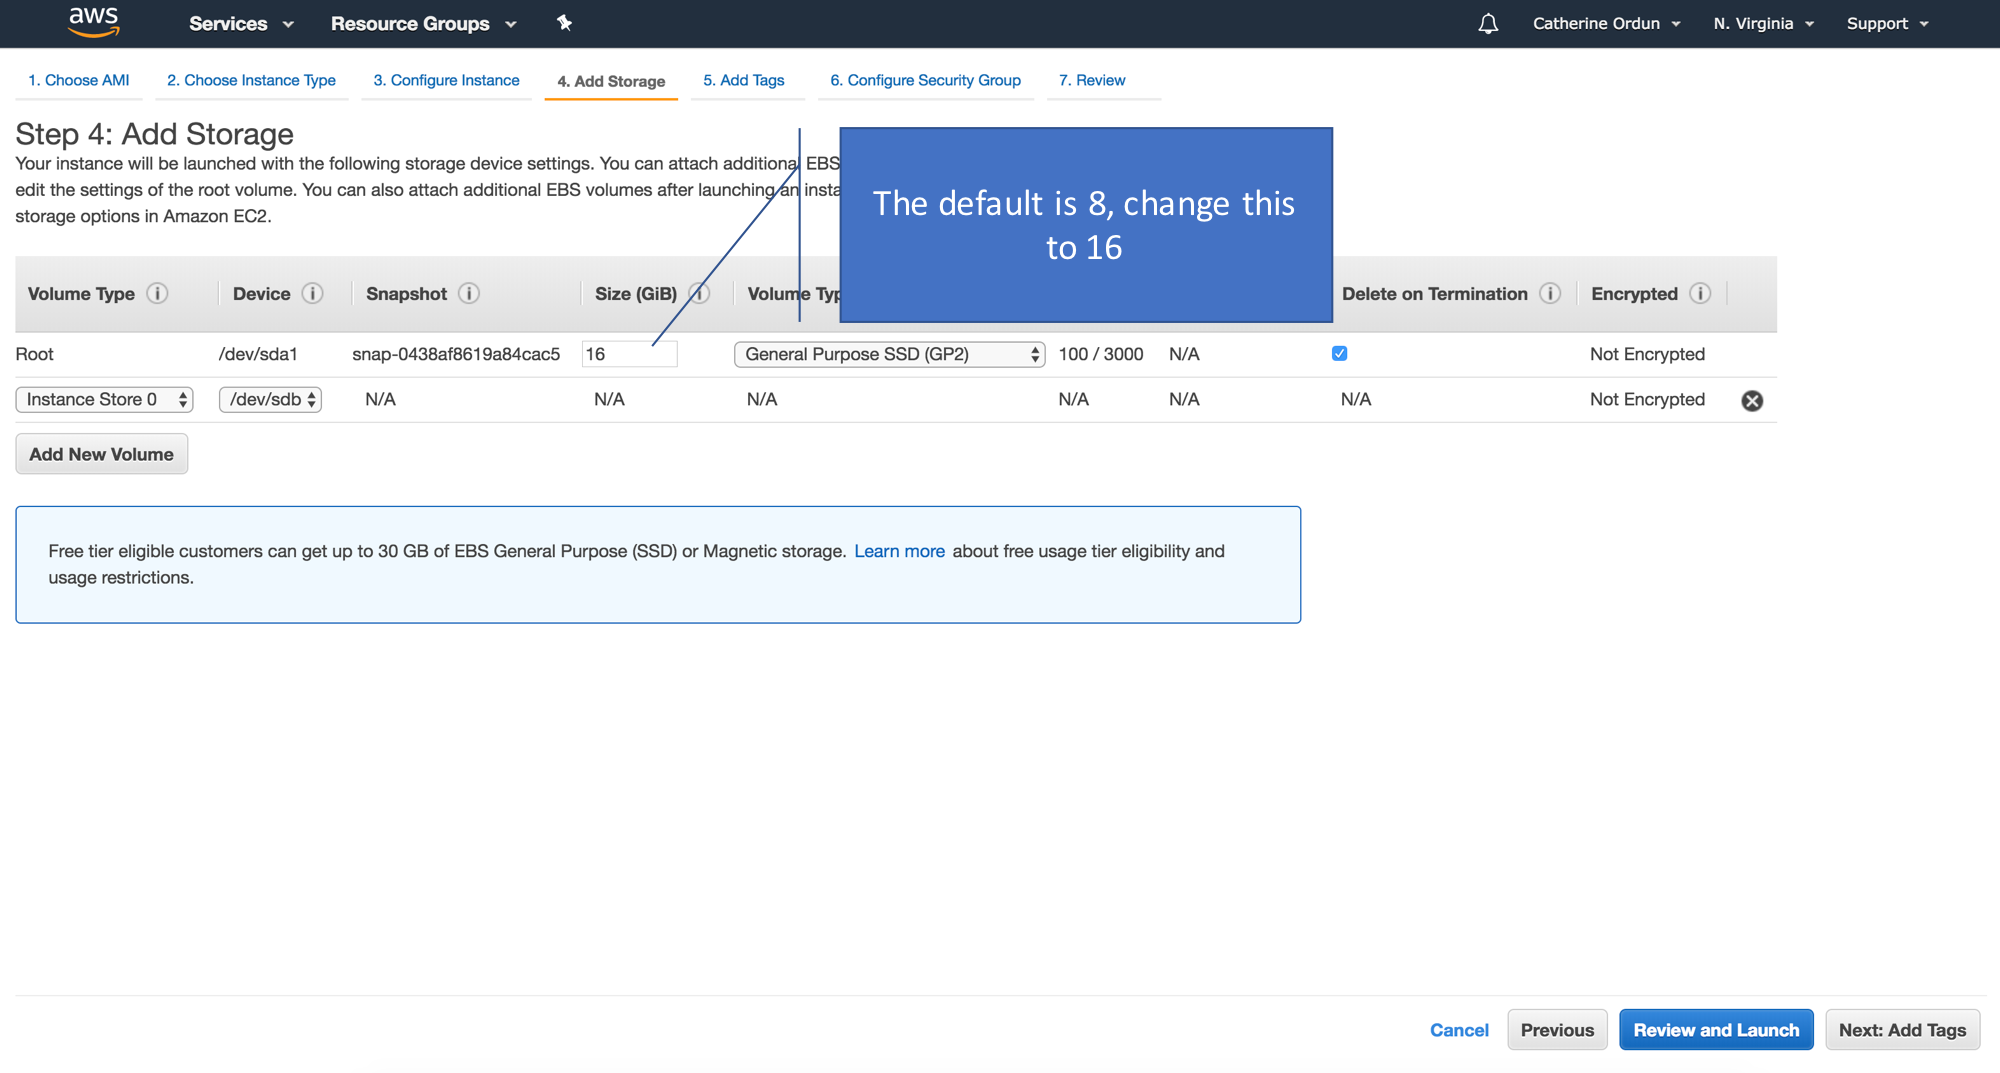
Click the button "Next Configure Instance Details", and just leave everything as default. Skip all these and click on "Next: Add Storage".

Configure storage, which R-Bloggers recommends to set as 16GB:
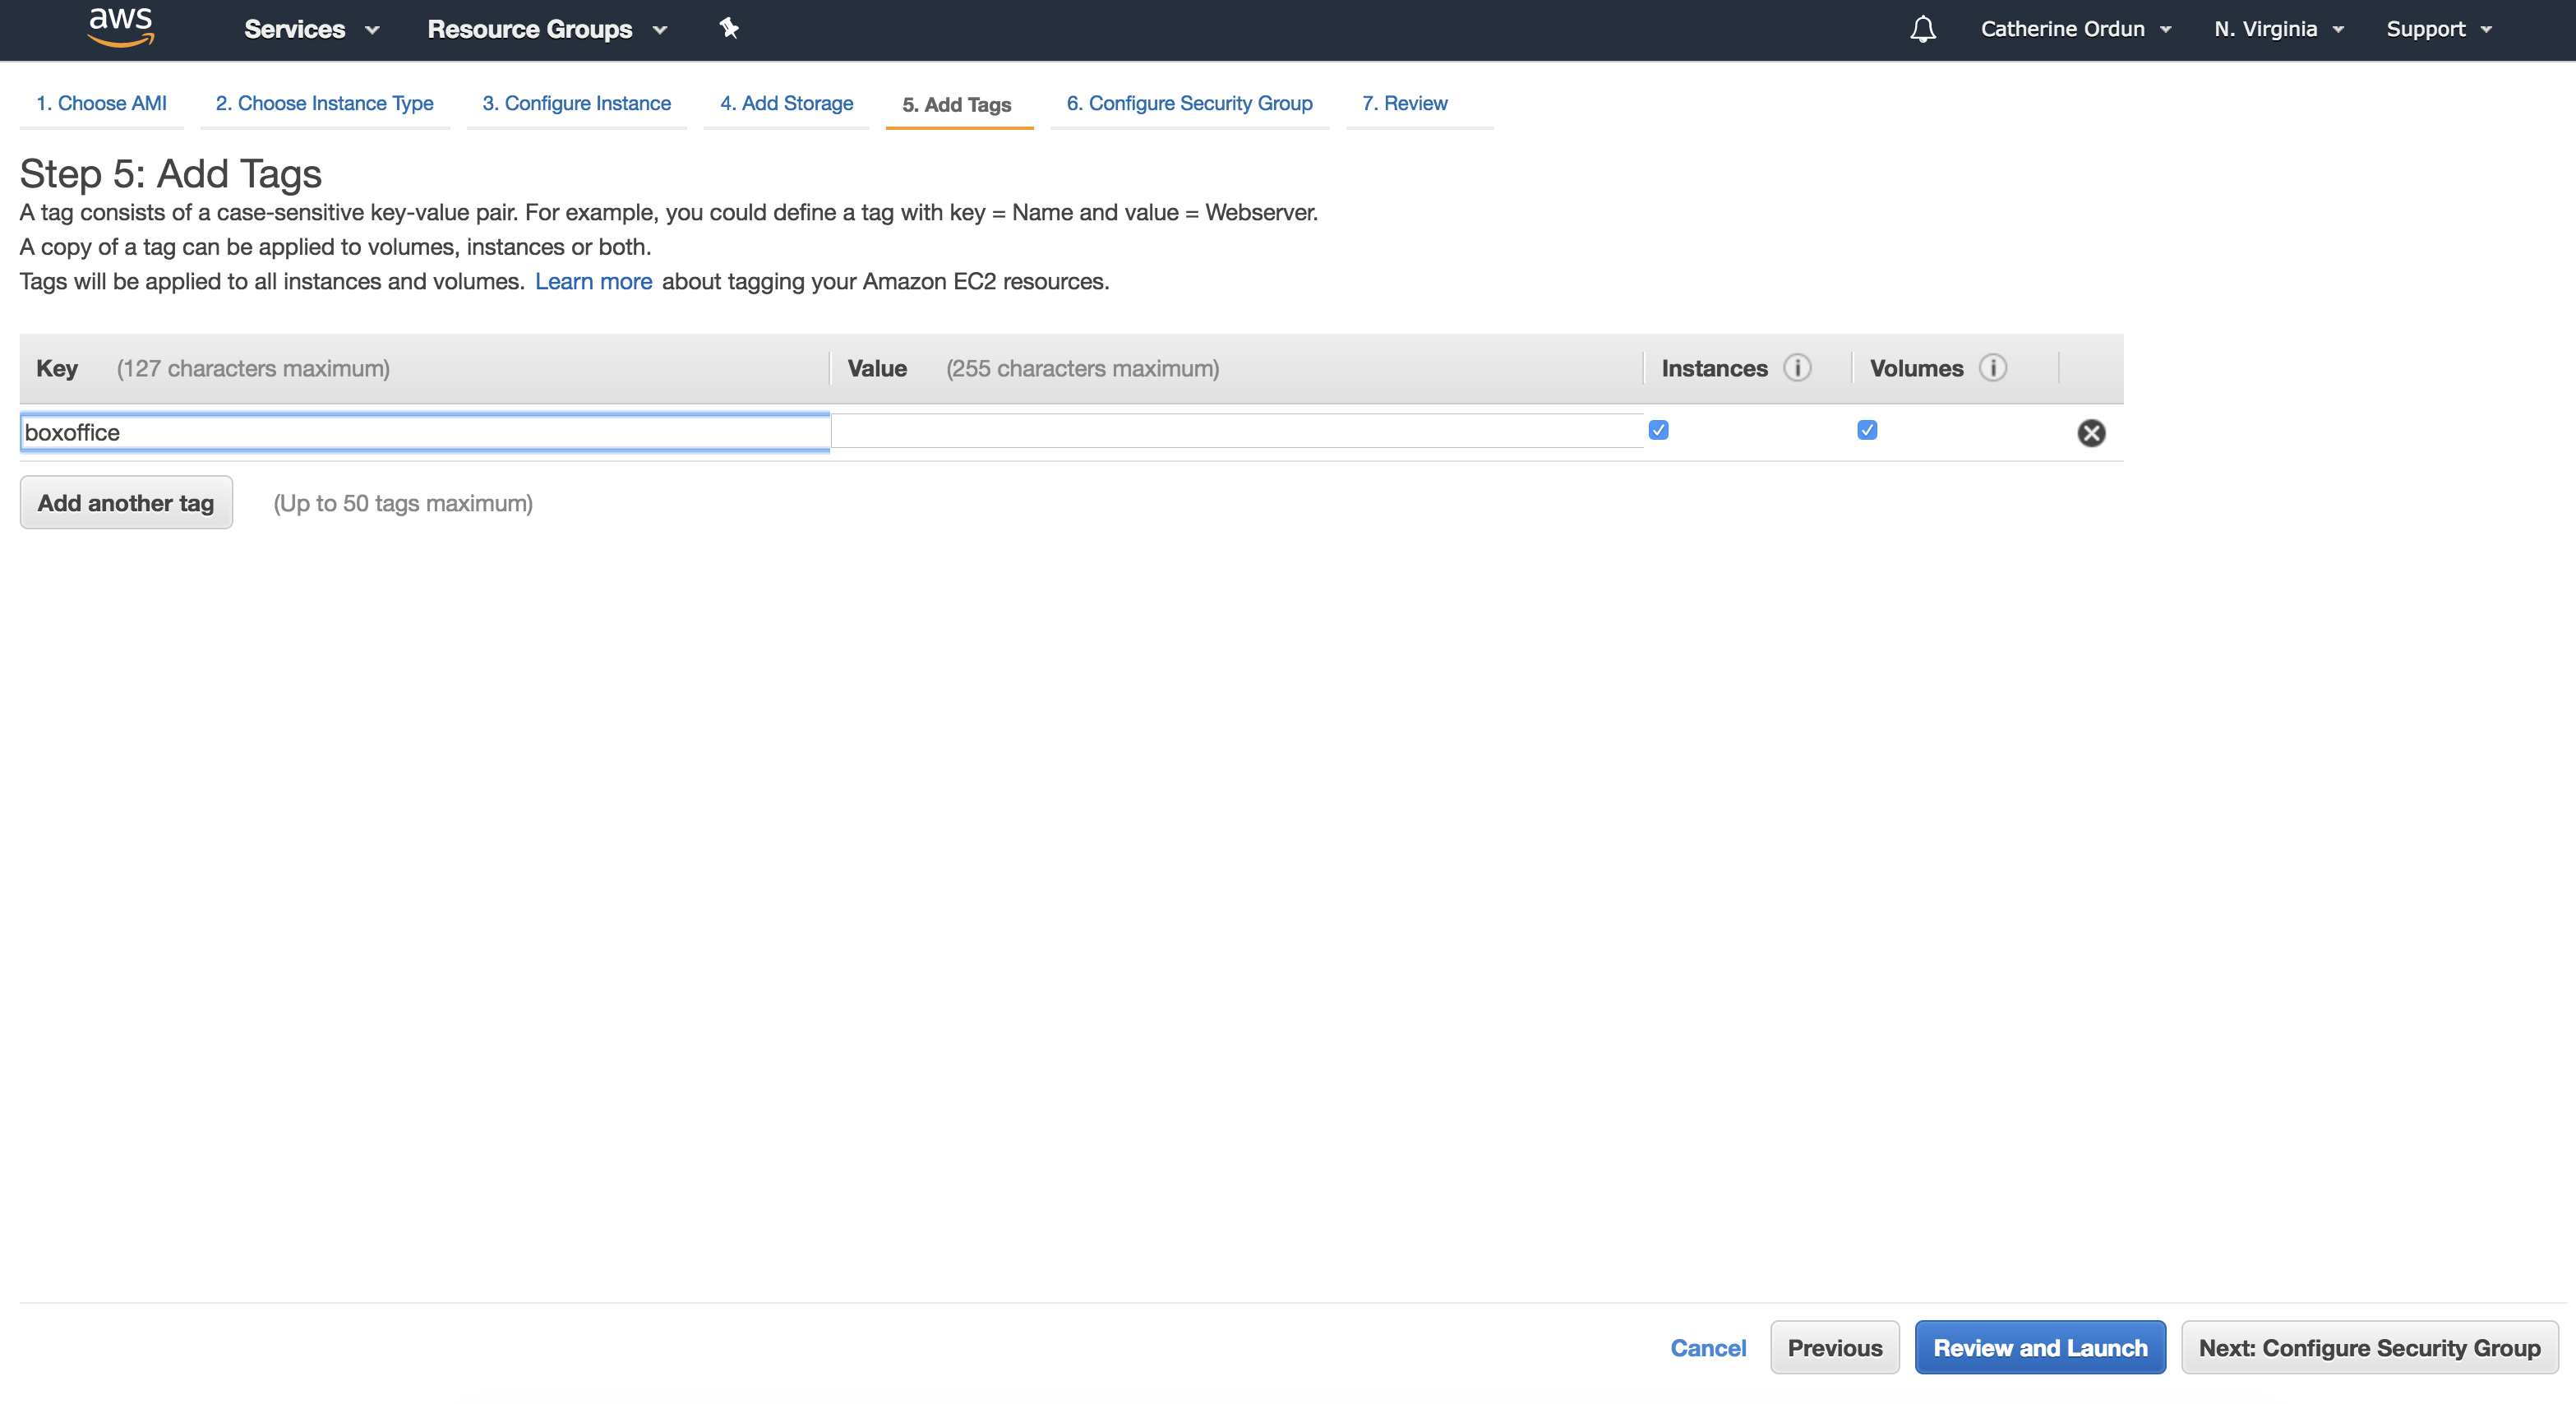
Click on "Next: Add Tags" and add a tag name of your choice. For this I'll call it boxoffice, but you can name it whatever you like.
- First, click
add tag - Then add the name, in this case I'll type in
boxoffice
Security Group Configurations
This part is very important, as it allows access by public users to your Shiny App, as well as allows for permitted users to log in to R Studio, by specifying the protocols and ports. Using the configurations recommended by R-Bloggers, here are the 4 security rules:
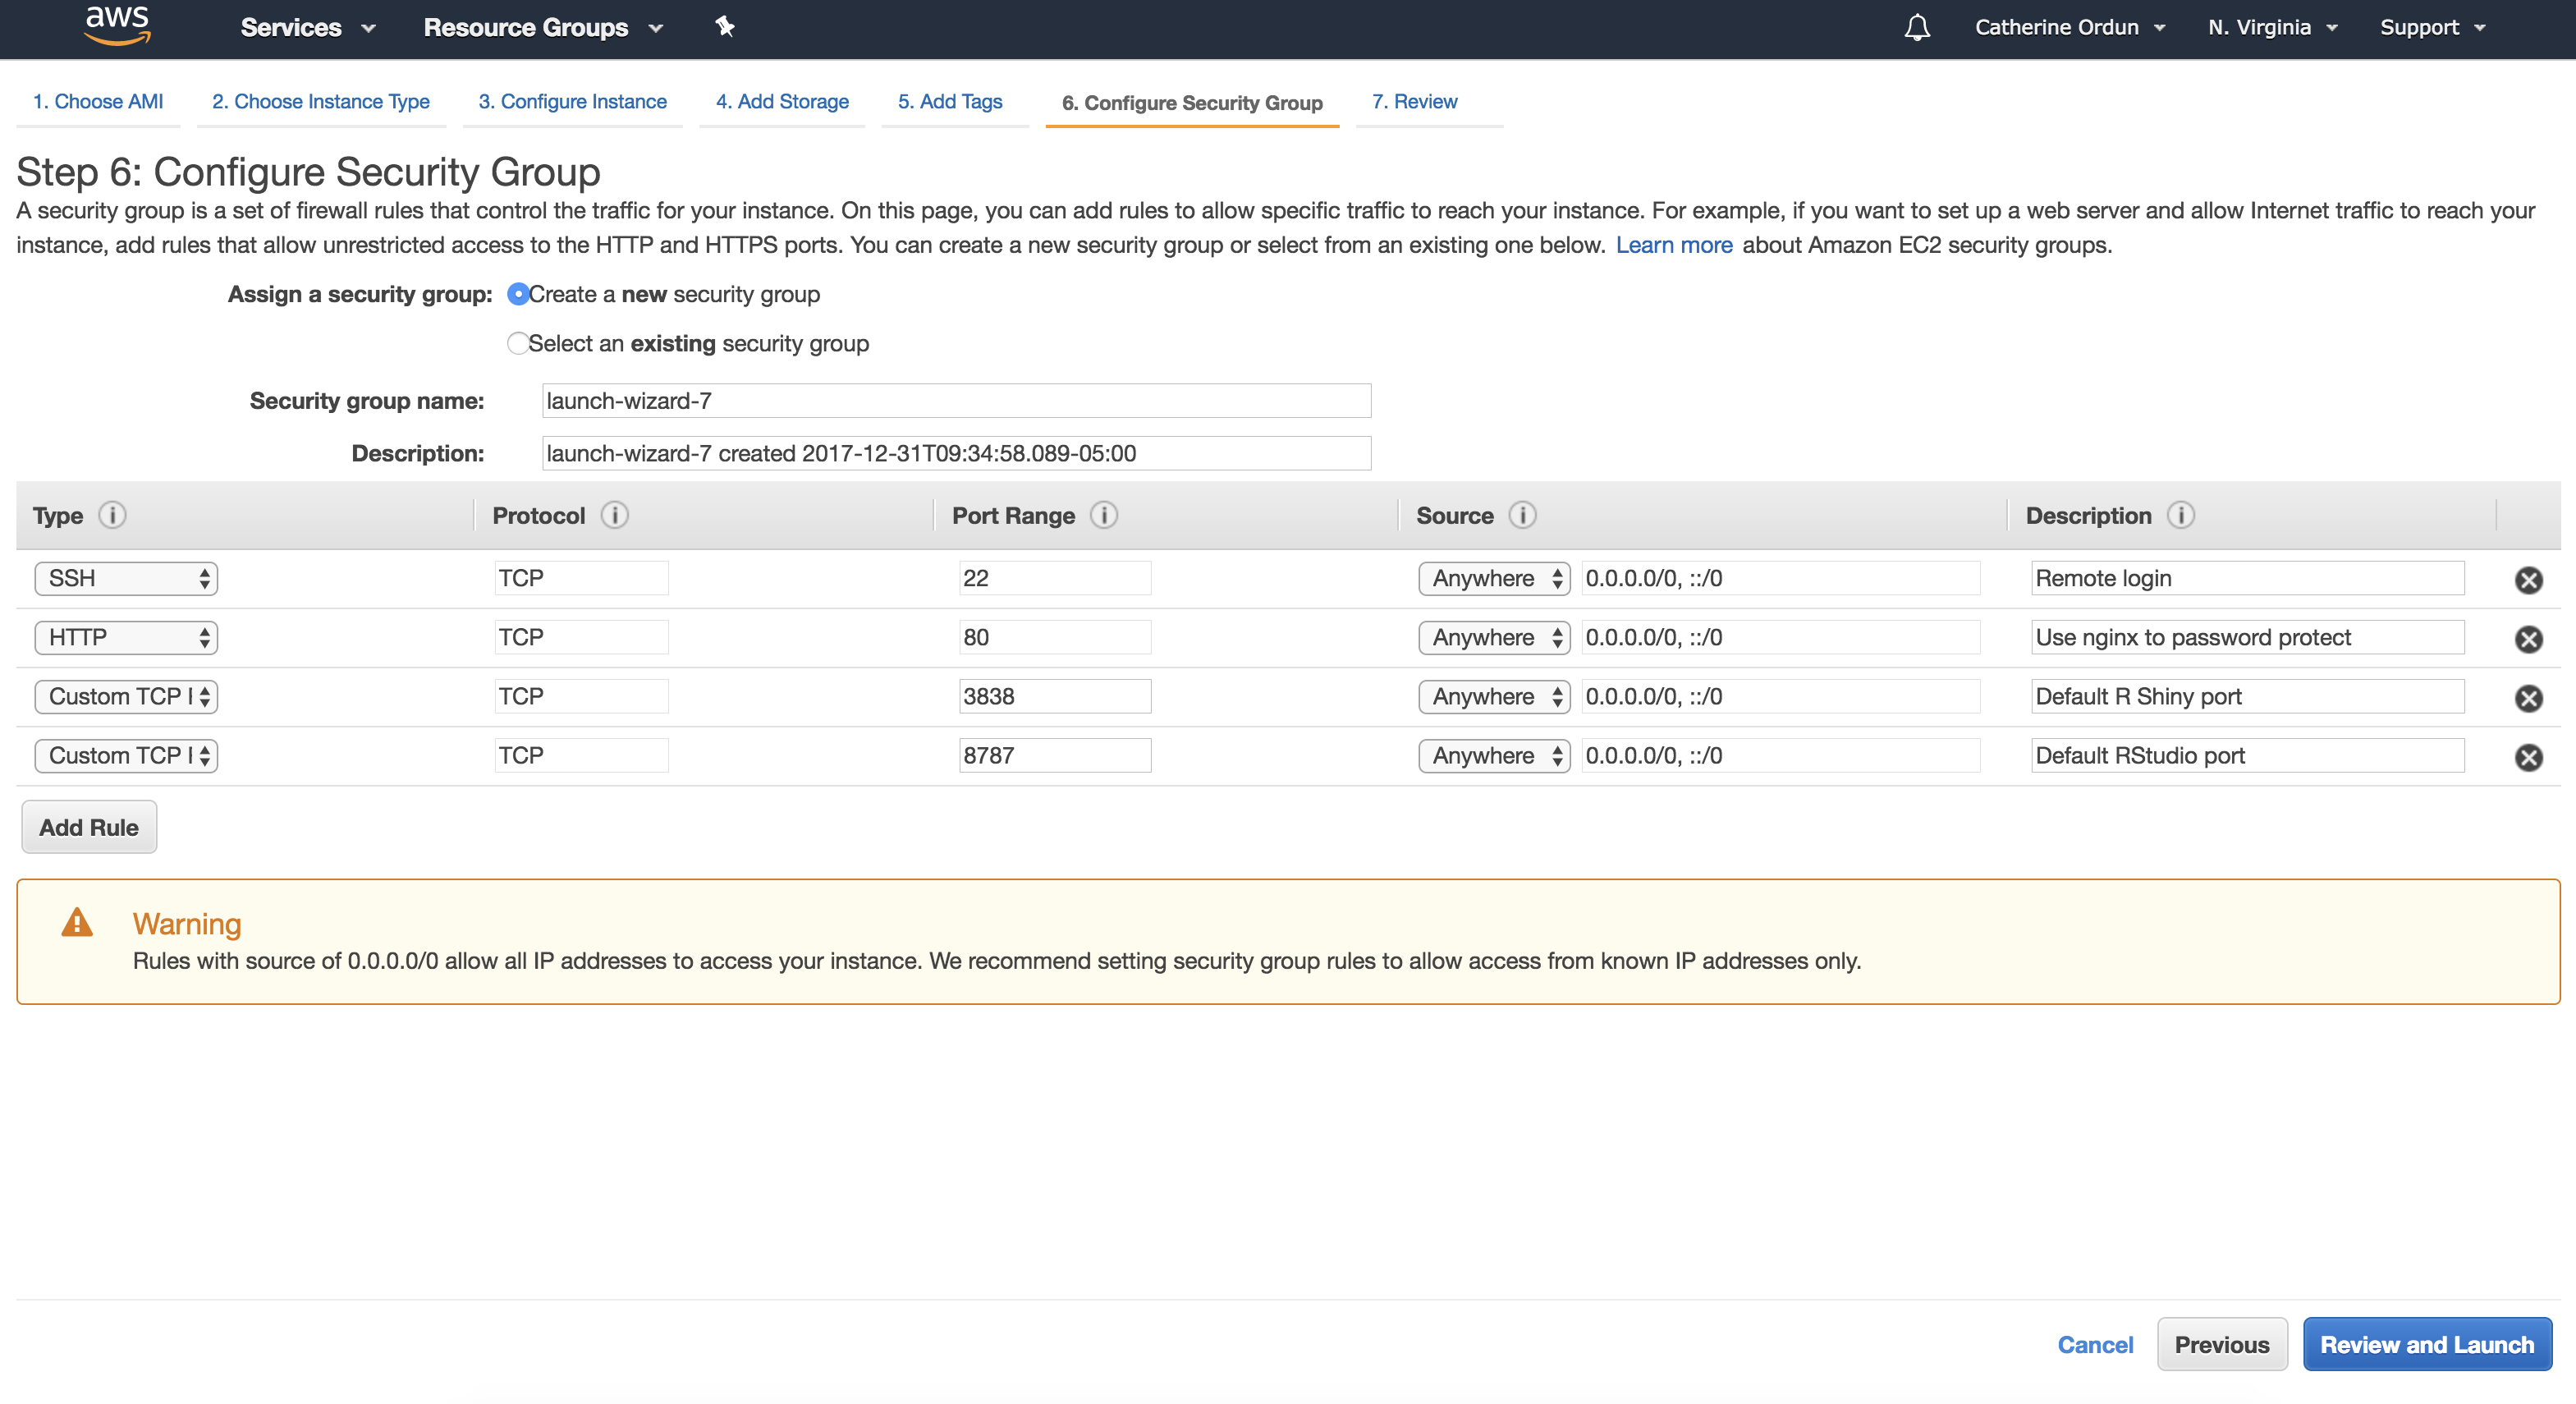
To add a Security Rule:
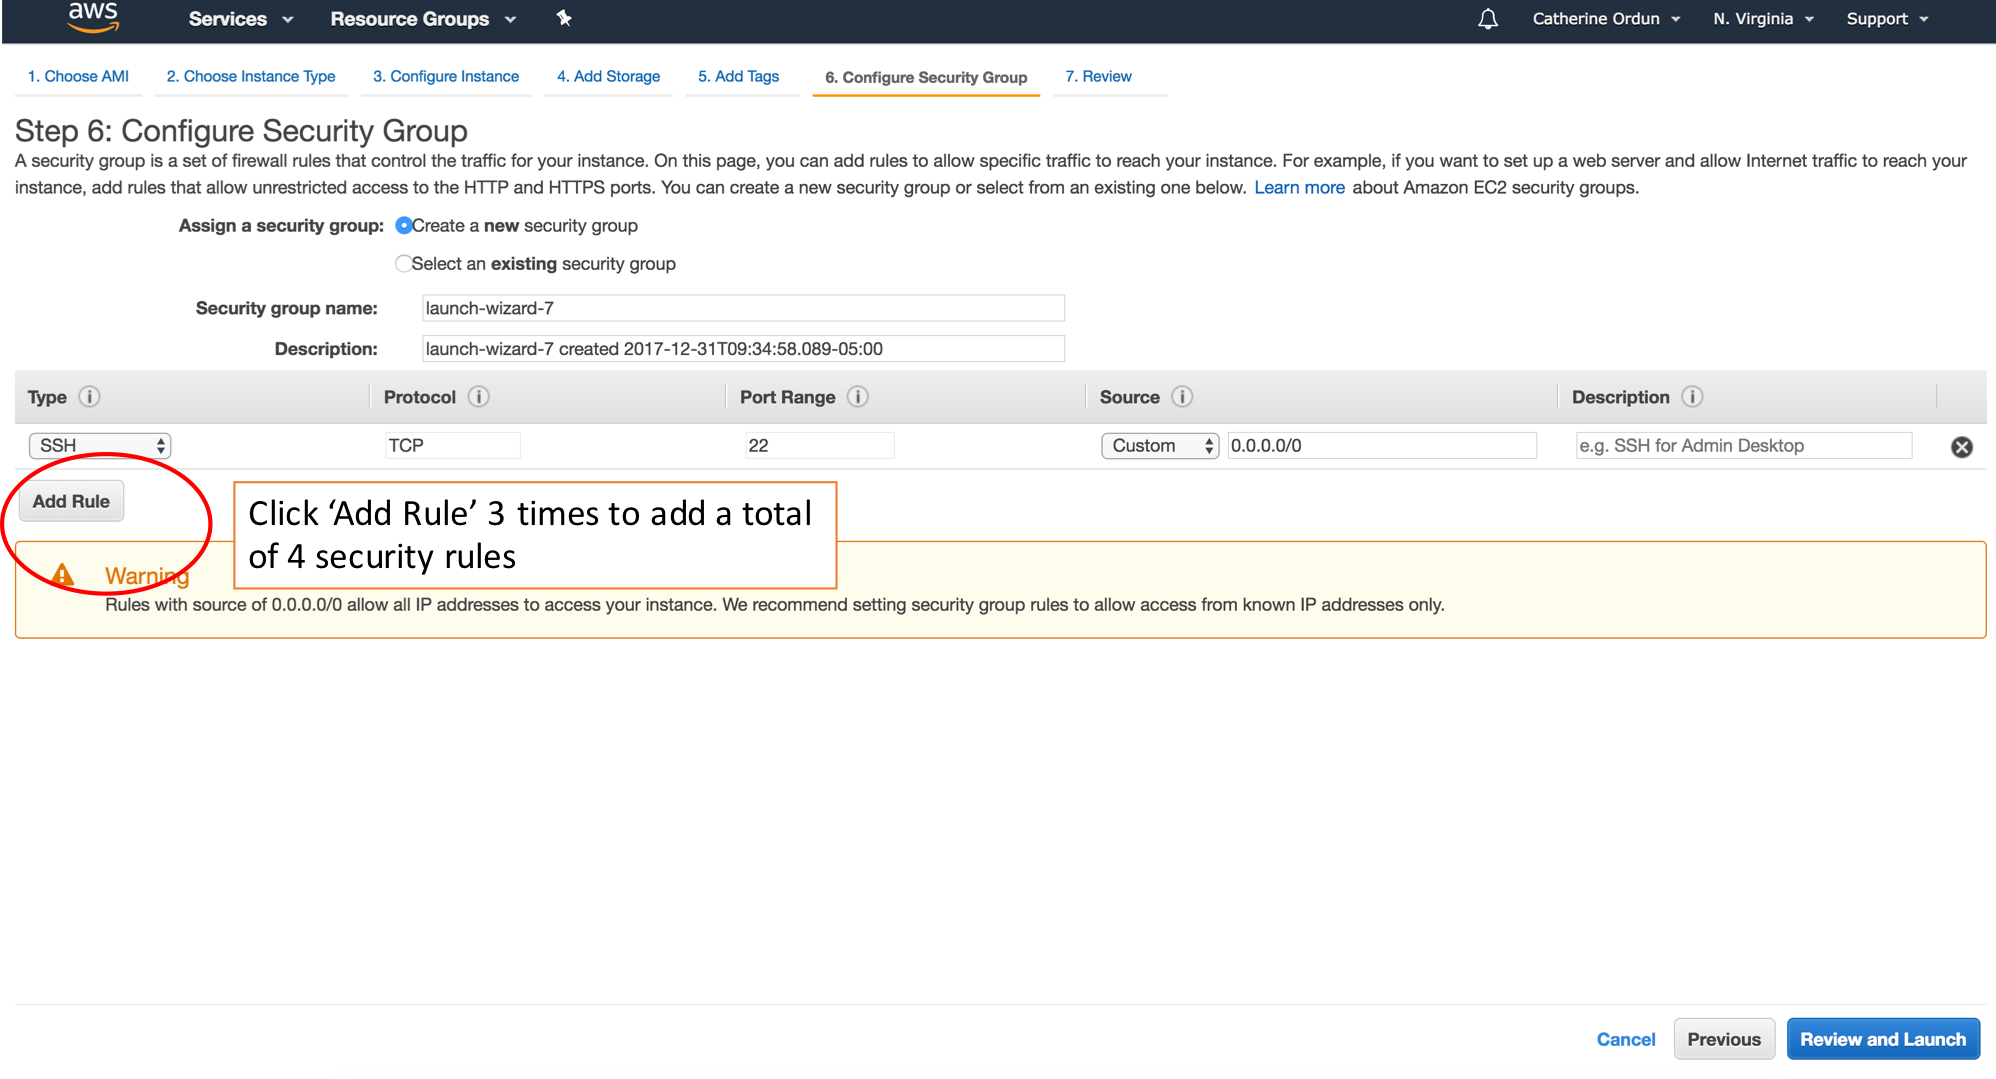
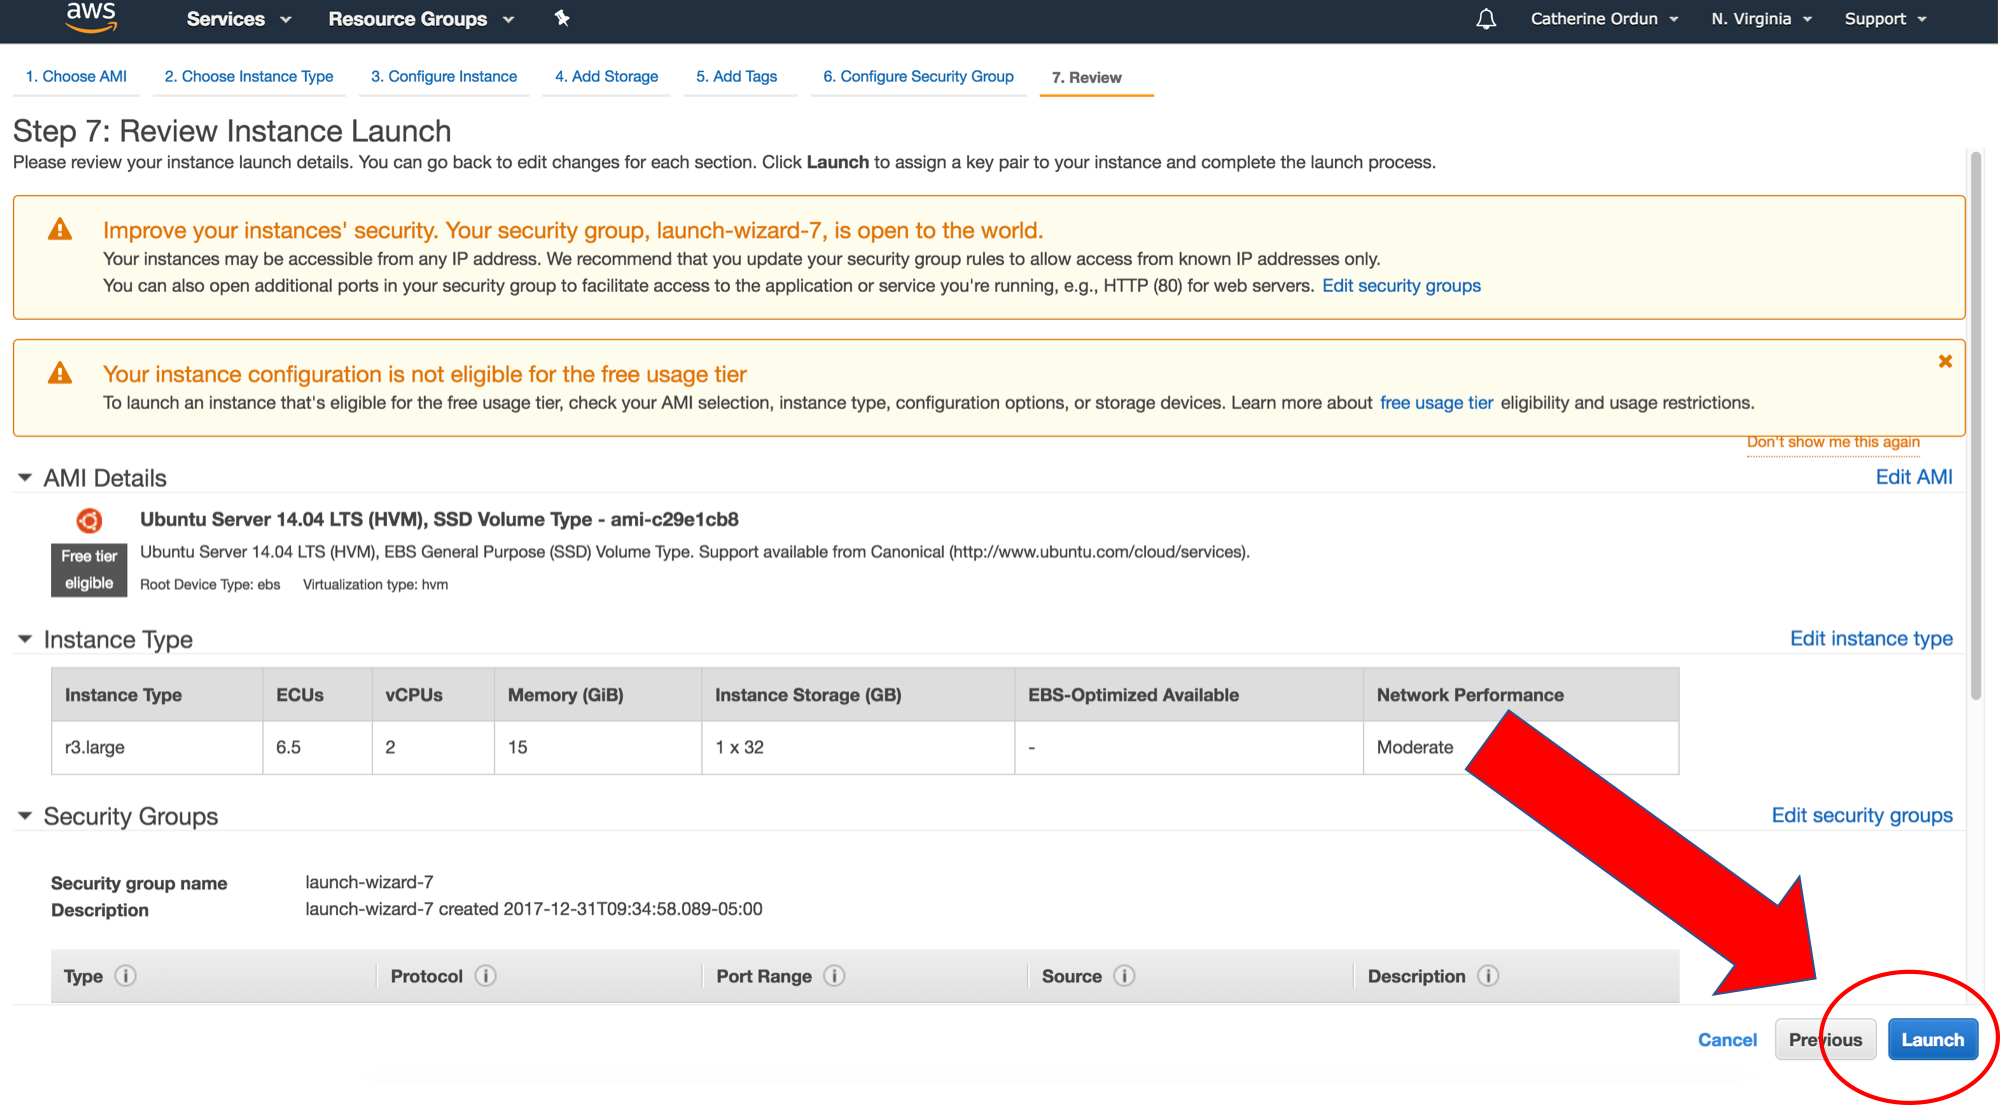
And make sure the rules look exactly like the screenshot above. Now click the blue button "Review and Launch". This will take you to this page, just click "Launch"!
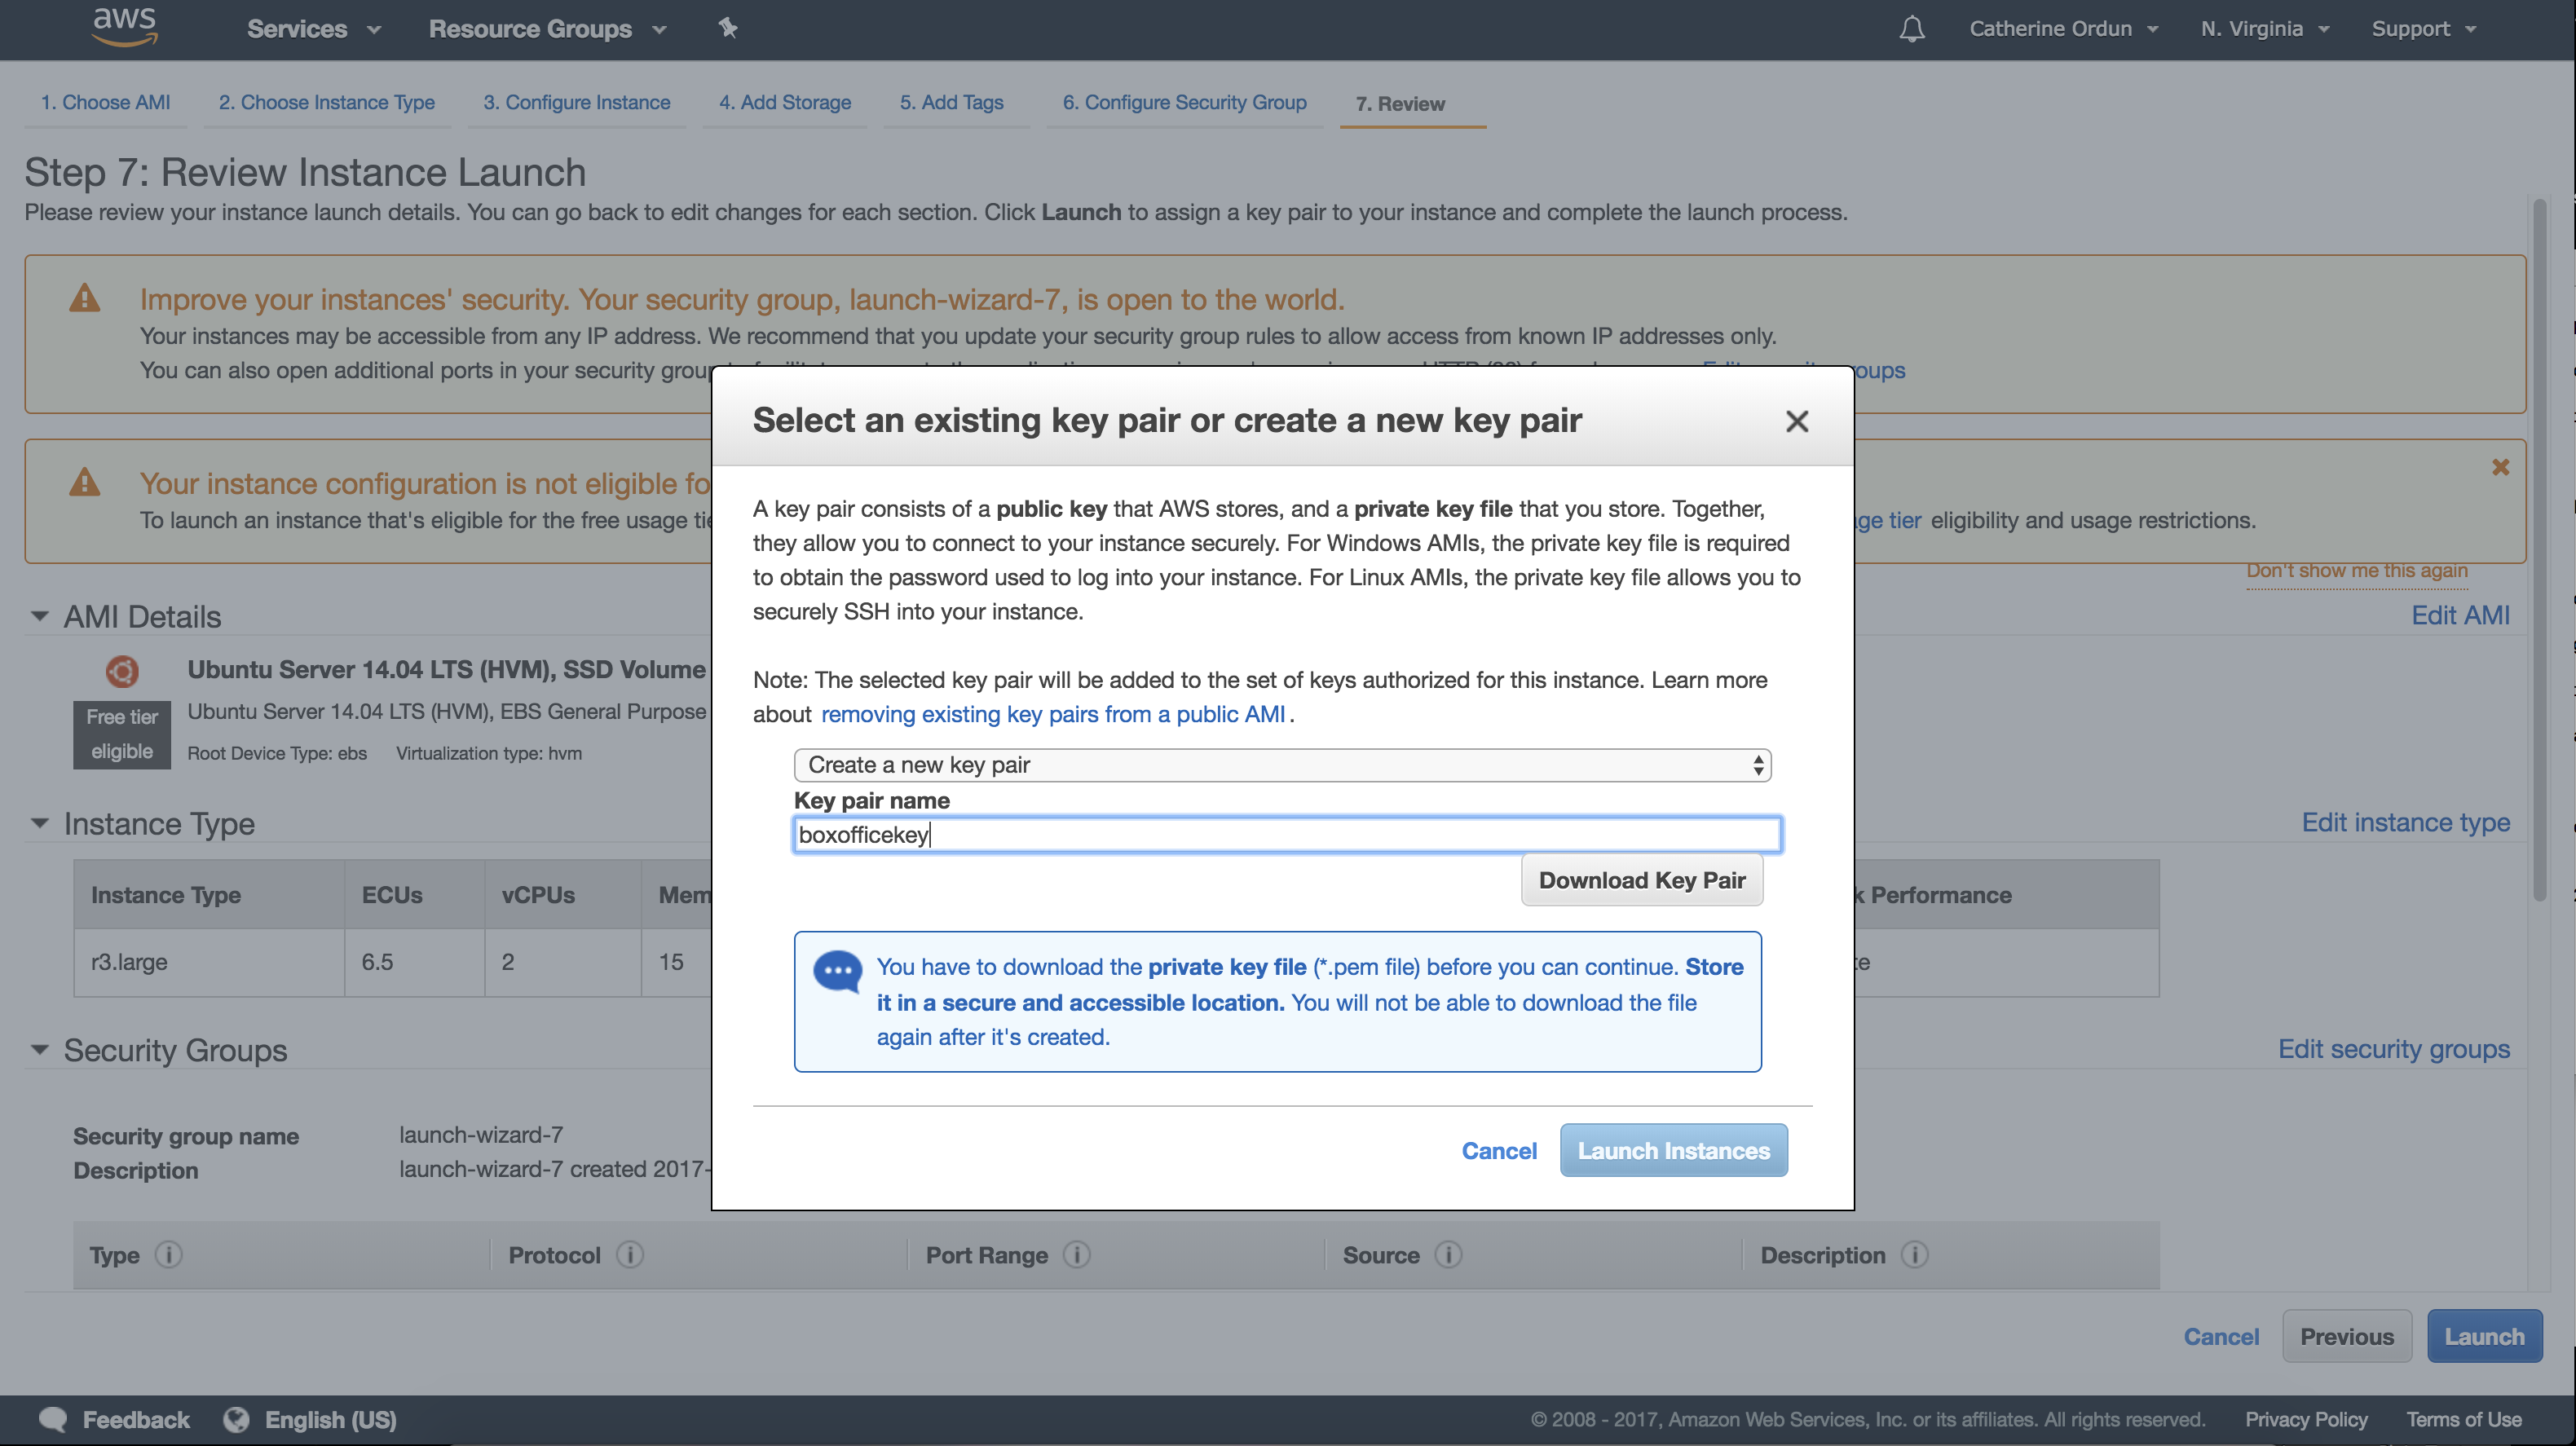
Step 2 - Downloading your AWS Key
If this is your first time with AWS, you'll be asked to create a new key. The screen will look like the below. Simply enter a name for your key and download it. In this case, I called my key boxofficemojo. Go ahead and click "Download Key Pair" when you're done.
TIP 1
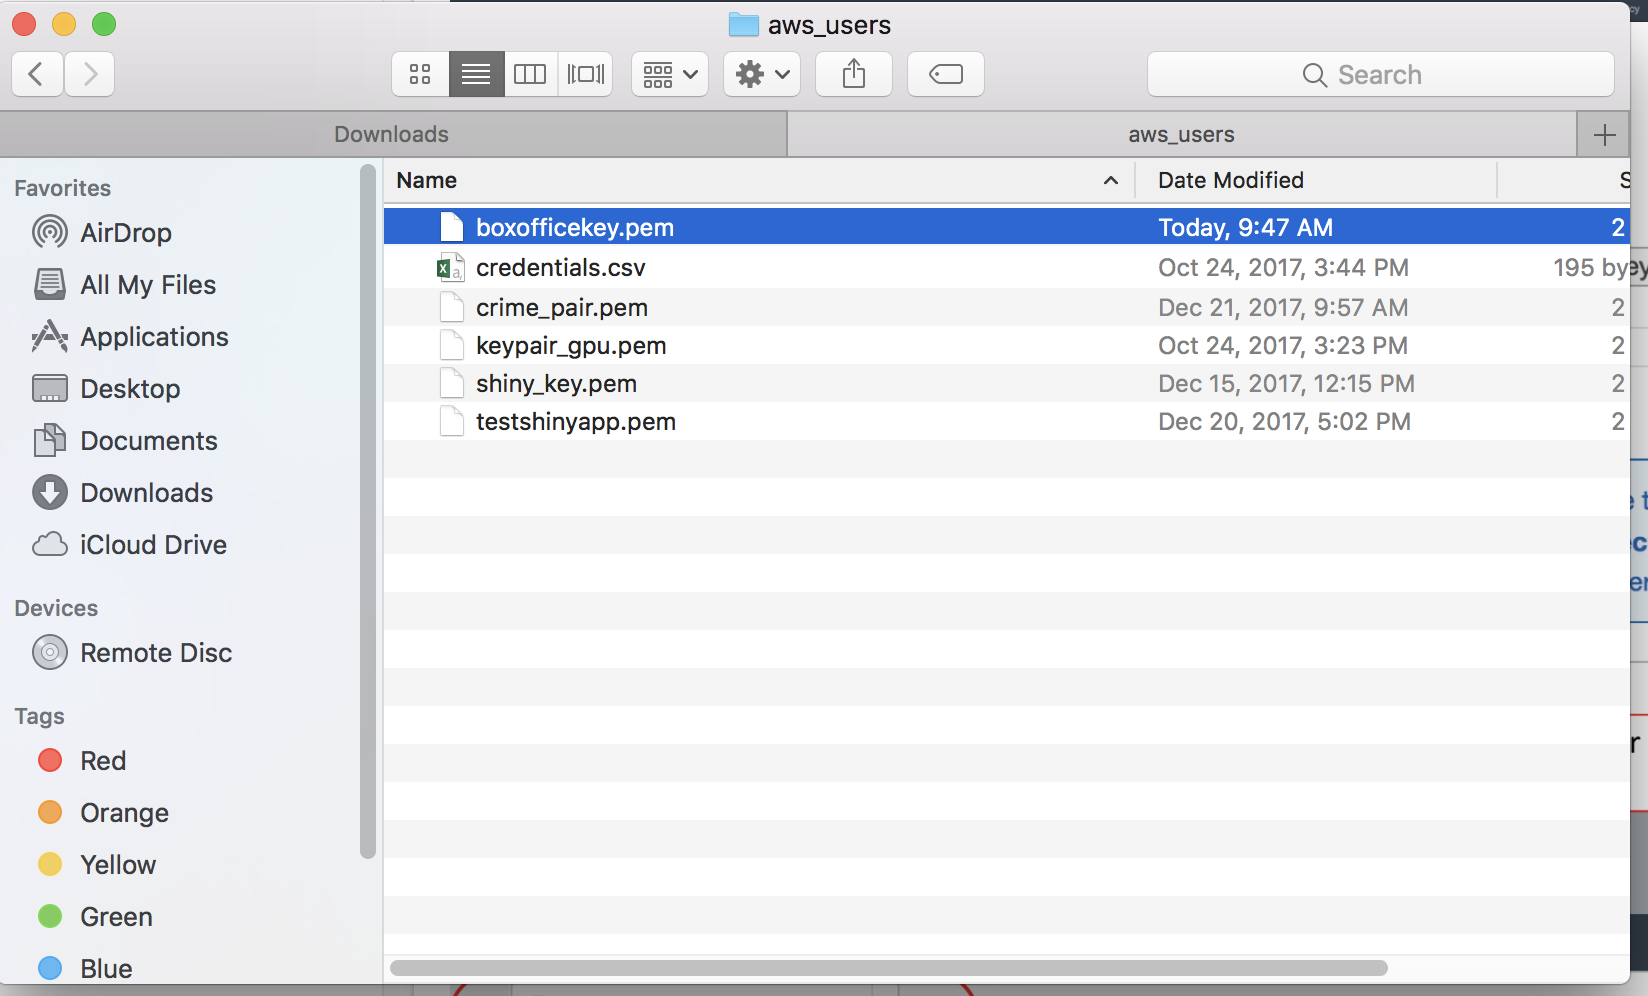
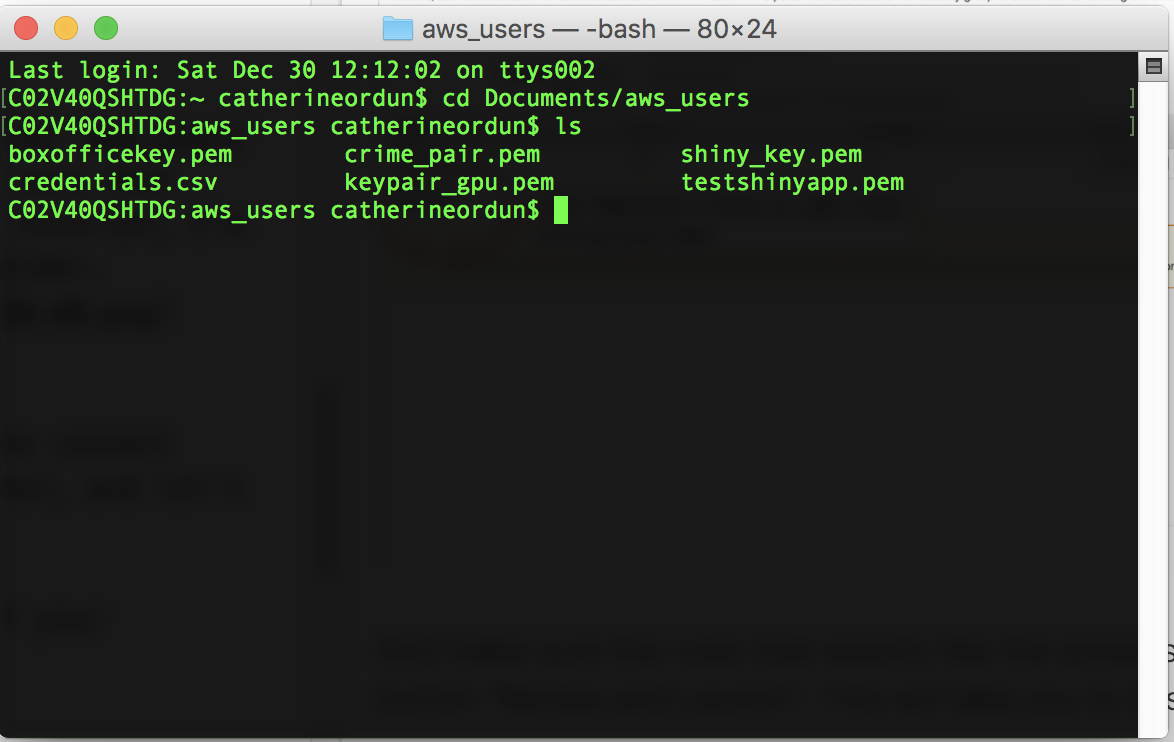
After you download your key, put it in a different directory on your computer.
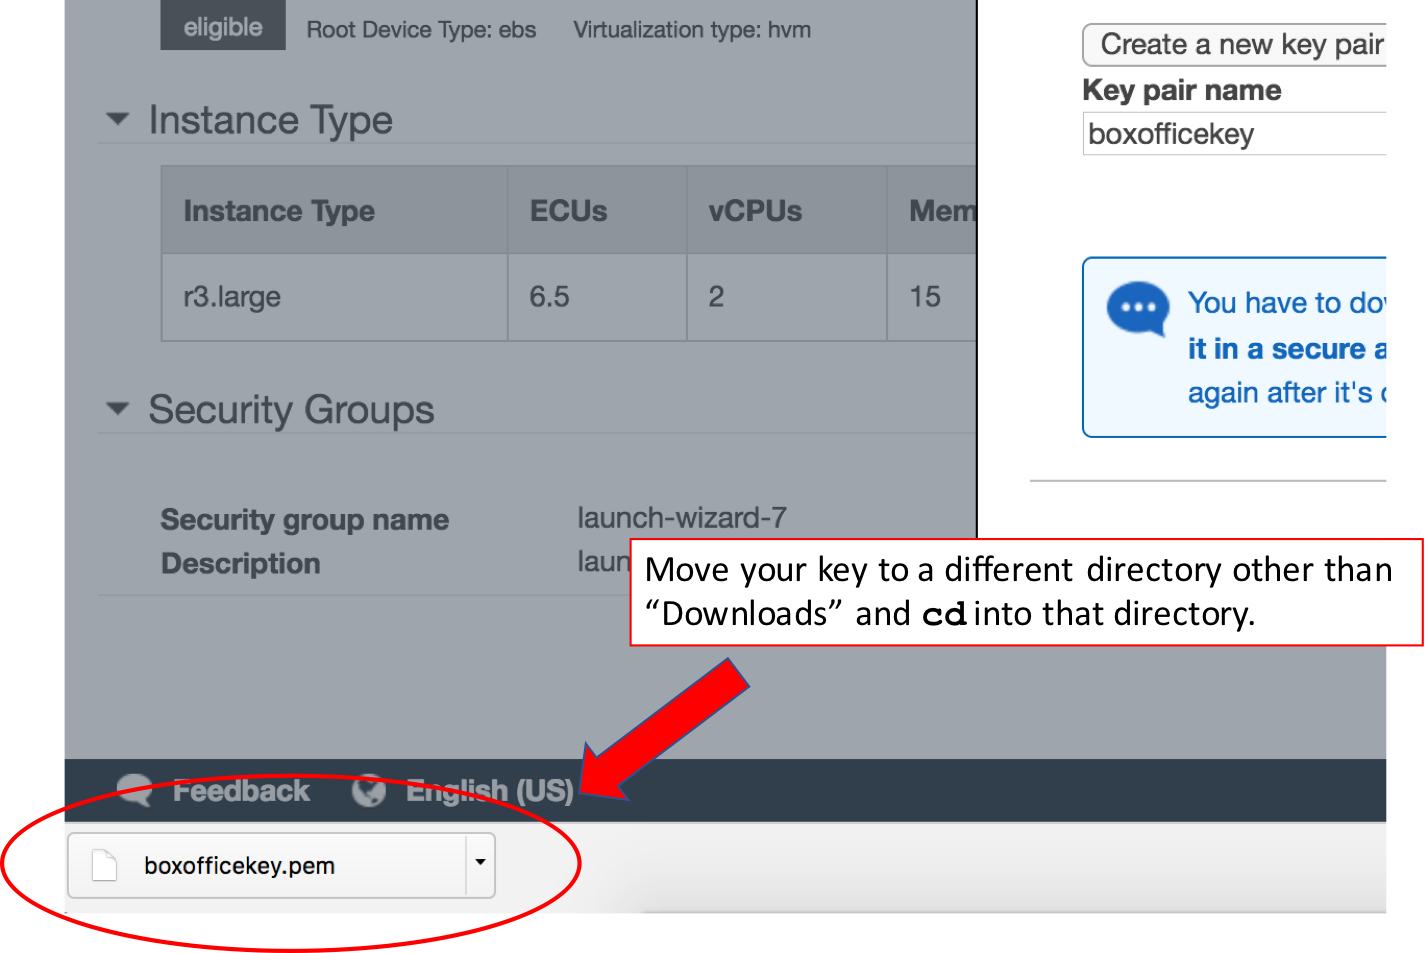
For example, I'll move my boxofficekey to a directory called aws_users for ease of access. I'm not a sysadmin by any means, so I'm sure that there are much more secure ways of doing this. But for this tutorial, I'm just showing that you should move it out of the Downloads folder.
Step 3 - Connecting to the EC2
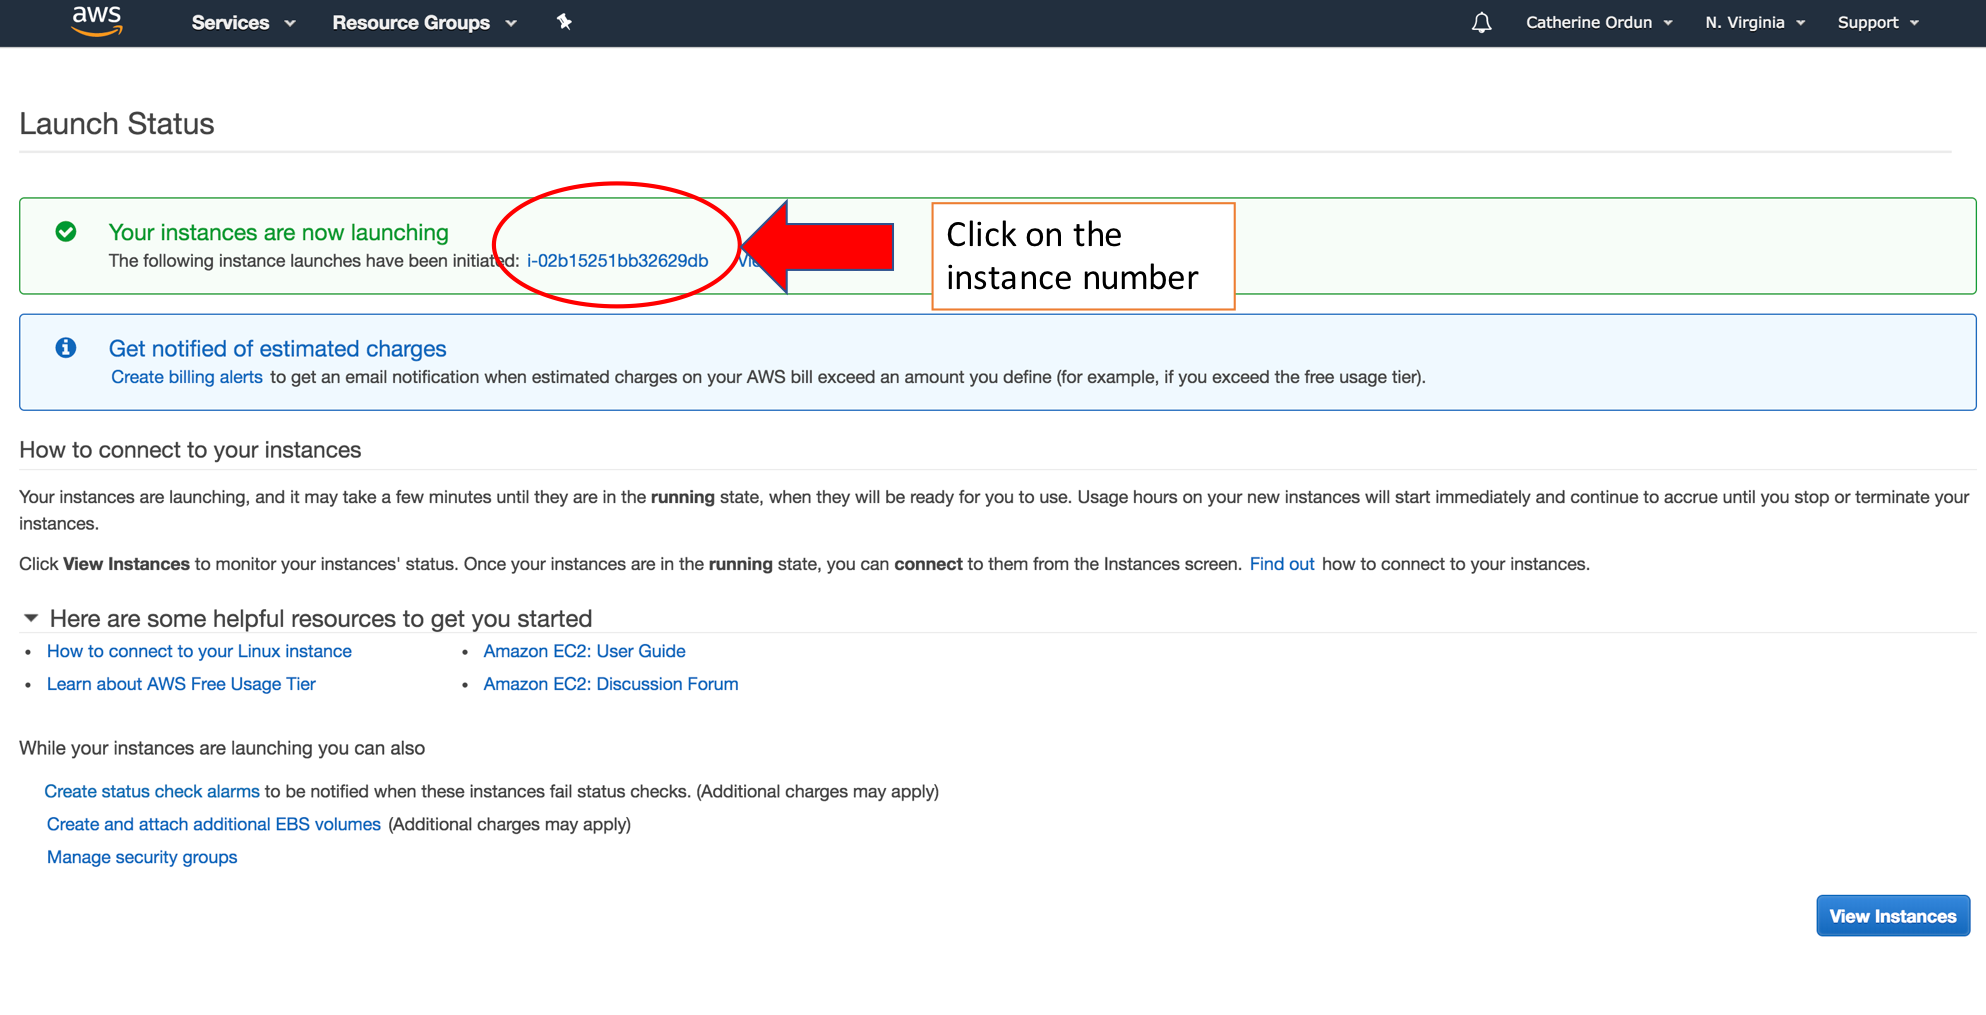
Great! If you haven't already, click on "Launch Instances" after downloading your key, and you should see a screen that shows your instance is running:
Go ahead and connect to it by clicking "Connect".
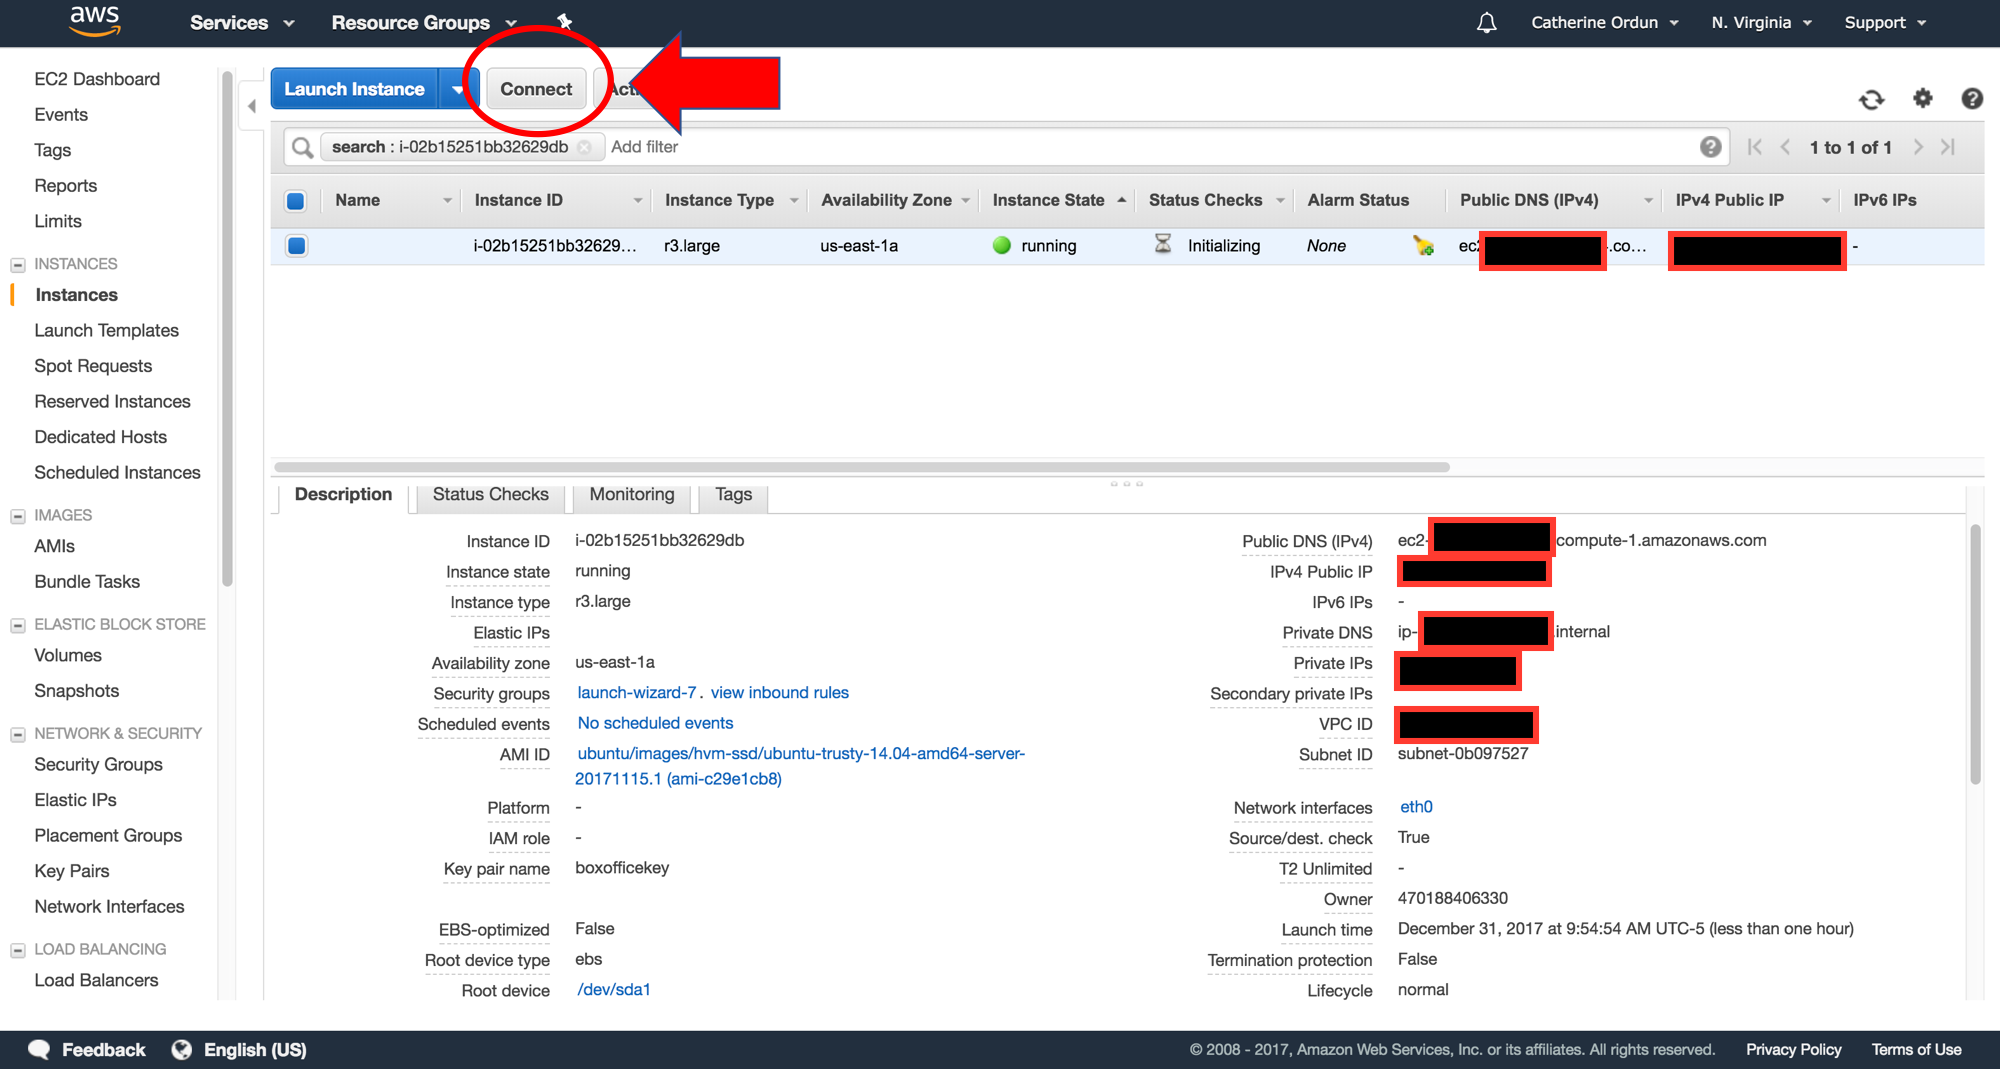
Fire up your command line - on a Mac, it's your Terminal, and change directory (cd) into where your key was moved to.
You'll be greeted with a screen called "Connect To Your Instance".
Back in your Terminal, you'll want to enter:
$ chmod 400 ~/.ssh/boxofficekey.pem
And then under the "Example" copy and paste it exactly. You'll note that where I indicate yourpublicDNS will actually be replaced by your specific DNS on your screen. I'm not showing this because I think there are some security repercussions for publicly disclosing this.
$ssh -i "boxofficekey.pem" ubuntu@yourpublicDNS
The prompt will ask you, and type in yes
Are you sure you want to continue connecting (yes/no)? yes
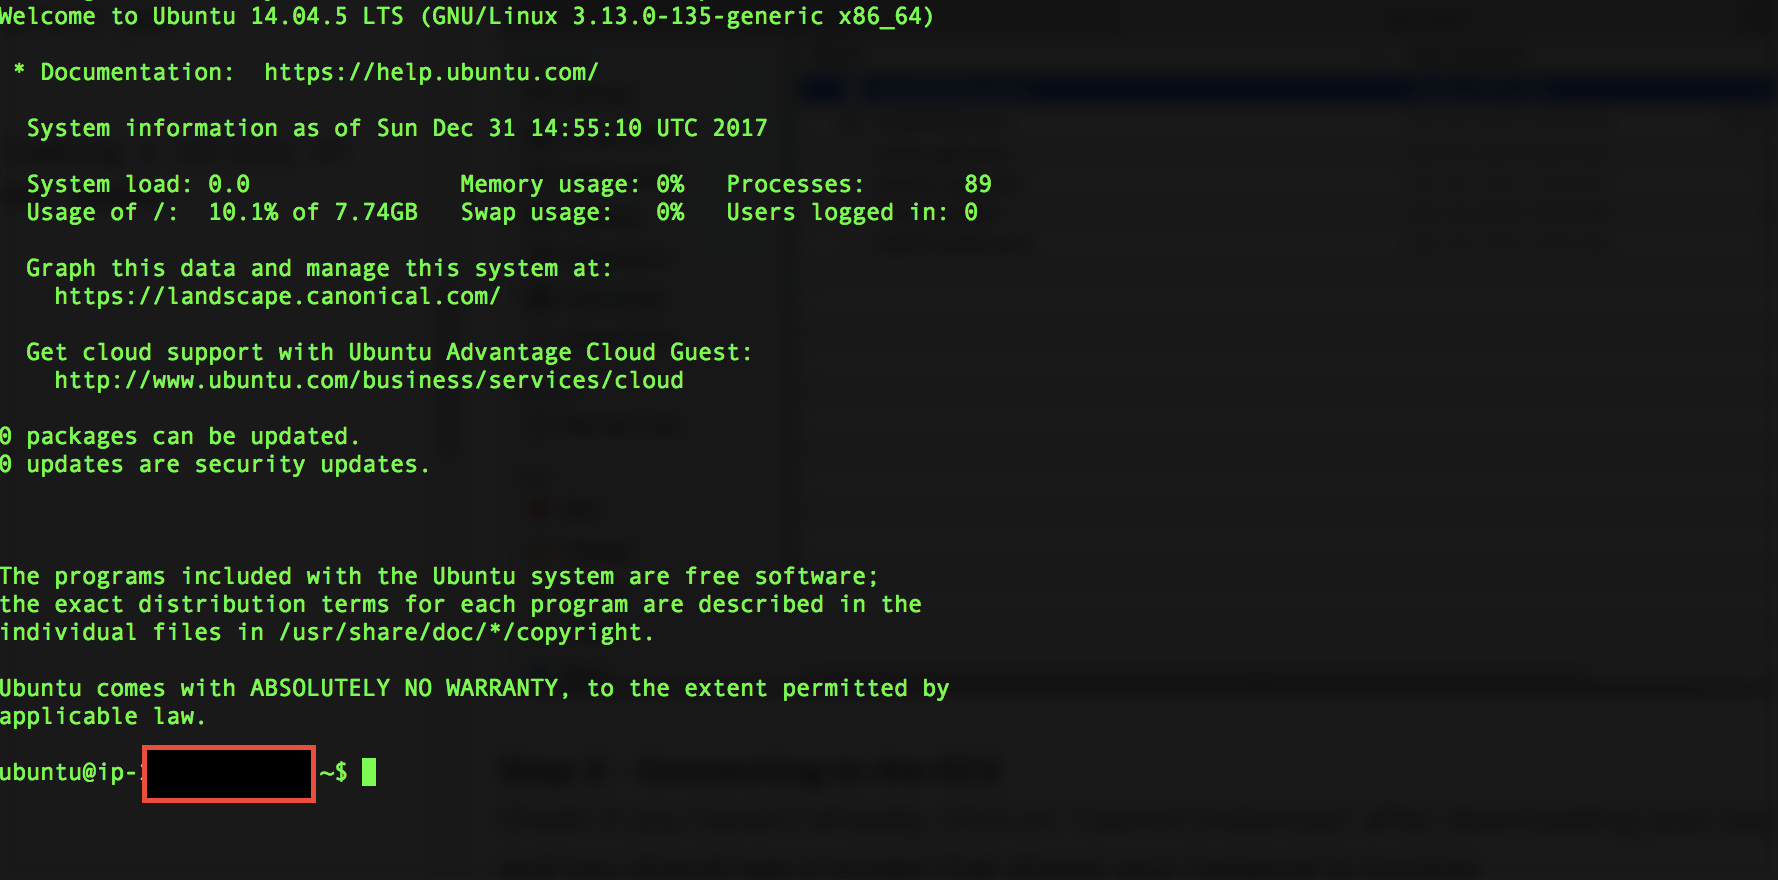
If all's good, your screen should look like this in Terminal, and you're now connected as username ubuntu:
Step 4 - Installing System Libraries
The rest of your time will be spent in Terminal downloading a variety of packages which can take a while depending your internet speed.
Install Updates:
$ sudo apt-get update
$ sudo apt-get -y install \
    nginx \
    gdebi-core \
    apache2-utils \
    pandoc \
    pandoc-citeproc \
    libssl-dev \
    libcurl4-gnutls-dev \
    libcairo2-dev \
    libgdal-dev \
    libgeos-dev \
    libproj-dev \
    libxml2-dev \
    libxt-dev \
    libv8-dev
install R, Shiny Server and RStudio Server:
I'm sure we could write a script to run all these command lines at once, but for the sake of this tutorial, every time you see a $, it means you need to copy the syntax after the $ sign and paste it into the terminal, one at a time.
$ sudo sh -c 'echo "deb http://cran.rstudio.com/bin/linux/ubuntu trusty/" >> /etc/apt/sources.list'
$ gpg --keyserver keyserver.ubuntu.com --recv-key E084DAB9
$ gpg -a --export E084DAB9 | sudo apt-key add -
$ sudo apt-get update
$ sudo apt-get -y install r-base
$ wget https://download3.rstudio.org/ubuntu-12.04/x86_64/shiny-server-1.4.2.786-amd64.deb
$ sudo gdebi shiny-server-1.4.2.786-amd64.deb
$ wget https://download2.rstudio.org/rstudio-server-0.99.902-amd64.deb
$ sudo gdebi rstudio-server-0.99.902-amd64.deb
TIP 2
Be on the look out for after running:
$ sudo gdebi shiny-server-1.4.2.786-amd64.deb
and
$ sudo gdebi rstudio-server-0.99.902-amd64.deb
You'll be asked each time, make sure you type in y
Do you want to install the software package? [y/N]:y
Install R Libraries:
The fun continues...and, at this point, you should be getting pretty good at copying and pasting syntax into Terminal:
## shiny related libraries
$ sudo su - -c "R -e \"install.packages(c('shiny', 'rmarkdown', 'shinydashboard', 'shinyjs'), repos='http://cran.rstudio.com/')\""
Note, this part of installing shiny, rmarkdown, shinydashboard, and shinyjs takes a while. On my internet connection it took less than 5 minutes.
## hadleyverse
$ sudo su - -c "R -e \"install.packages(c('ggplot2', 'dplyr', 'tidyr', 'readr', 'lazyeval', 'stringr', 'ggthemes', 'ggExtra', 'magrittr', 'viridis', 'gridExtra', 'lubridate', 'fasttime', 'data.table'), repos='http://cran.rstudio.com/')\""
This part took the longest time, about 10 minutes on my network.
## spatial analysis
$ sudo su - -c "R -e \"install.packages(c('sp', 'rgdal', 'rgeos', 'adehabitatHR', 'geojsonio', 'maptools'), repos='http://cran.rstudio.com/')\""

## htmlwidgets
$ sudo su - -c "R -e \"install.packages(c('leaflet', 'highcharter', 'DT'), repos='http://cran.rstudio.com/')\""
Step 5 - Password Protecting the App
At this point, this allows some lightweight password protection of the Box Office Mojo app. For my company project it was important, that although the code was publicly available, I only wanted two users to access it.
Back in terminal:
$ sudo service nginx stop
$ sudo stop shiny-server
This will stop the nginx service, and stop the shiny-server so that we can make changes directly to the config files.
TIP 3
I found this part to be the trickiest, as I normally don't use nano. But you must use nano in this case, in order to directly edit the files. It's essentially a text editor, but it can be literally hard to see because the font is so small, so bear with us here.
nginx config changes:
Back in Terminal, type in:
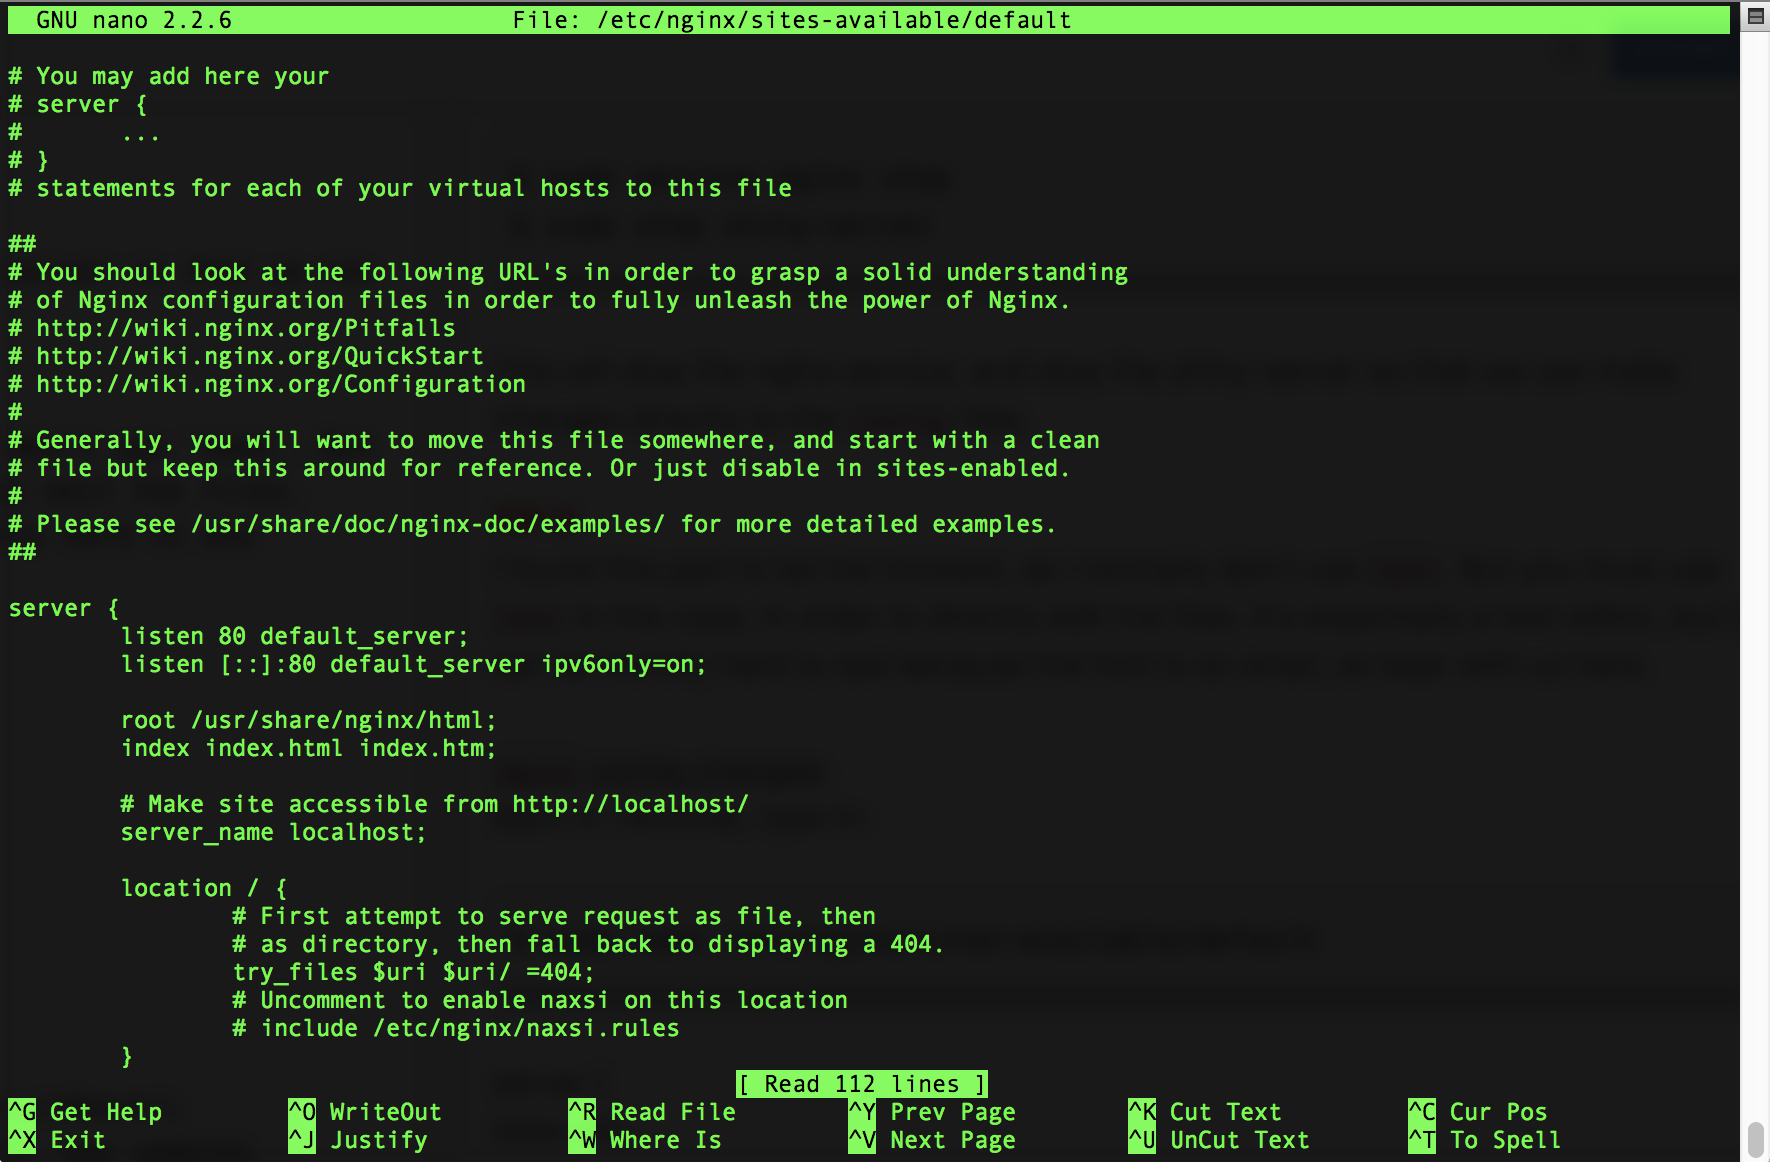
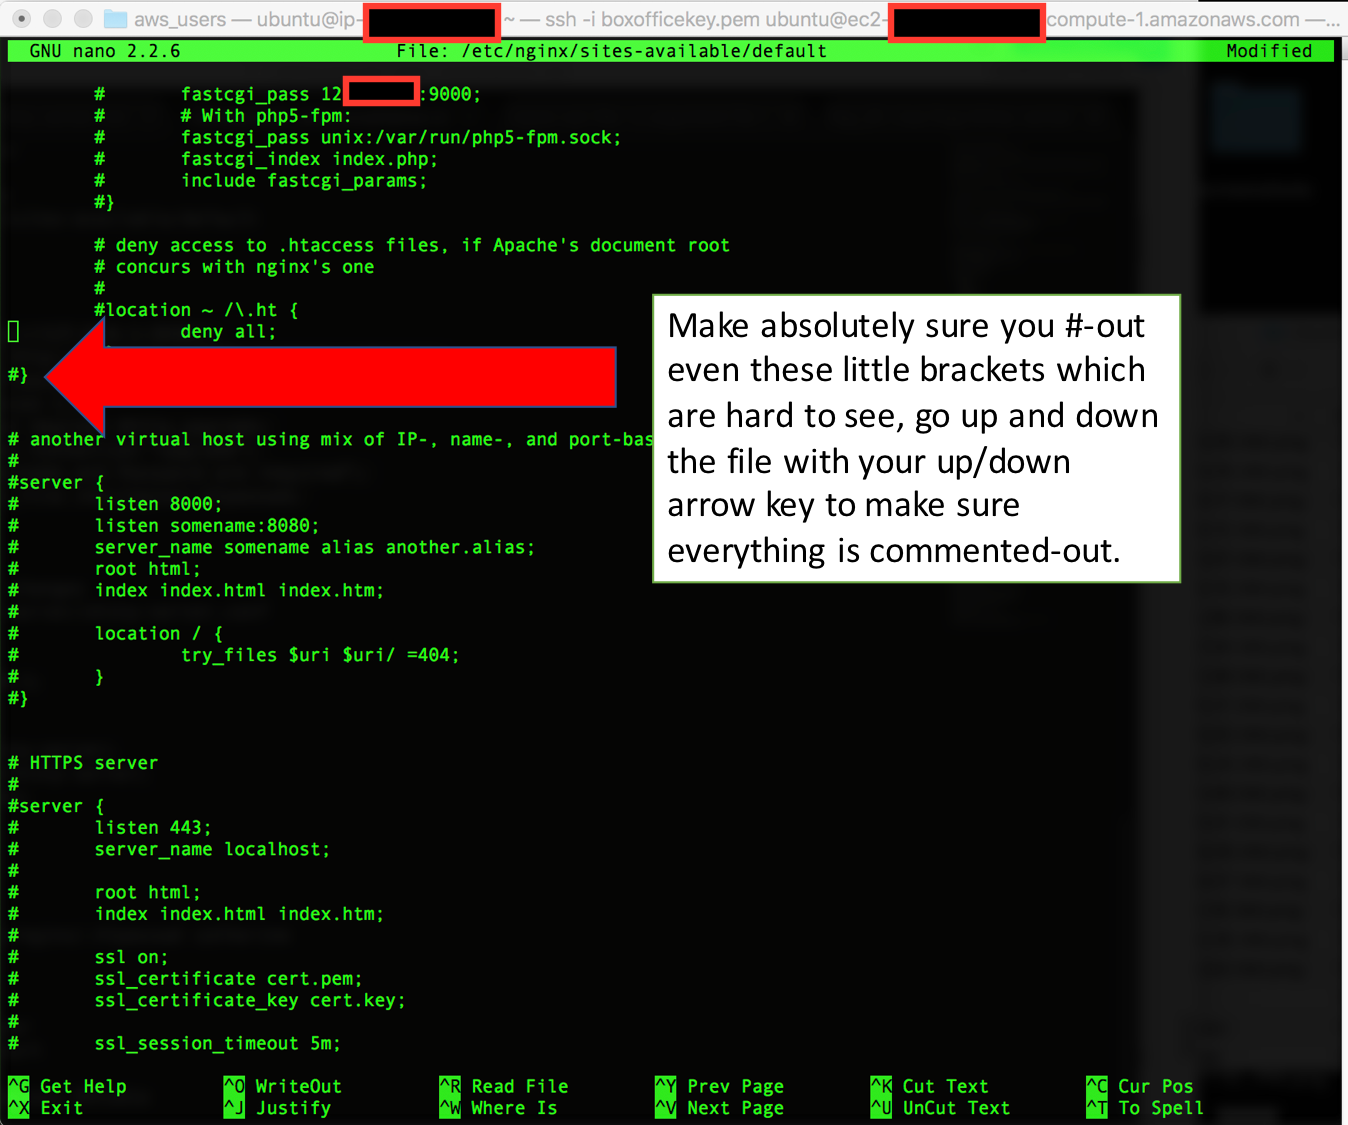
$ sudo nano /etc/nginx/sites-available/default
And, this is what you'll see:
TIP 4
Ok, this is the part I had messed up ALOT. So, be very careful here to ensure you comment-out EVERY. SINGLE. LINE. Except for what I'm about to tell you to edit. Commenting out in nano is in the form of a hashtag, like you'd do in R or Python: #.
R Studio Config
Copy all the syntax below. Delete in the config file that you just opened with nano, the top 4 lines which will be hashtagged-out. Now paste the below that you just copied, into that space. Last thing, add # at the start of every. single. line in the config file so that no other settings will be read, except for this server.
server {
    listen 80;

    location / {
    proxy_pass http://12X.X.X.1:3838/;
    proxy_redirect http://12X.X.X.1:3838/ $scheme://$host/;
    proxy_http_version 1.1;
    proxy_set_header Upgrade $http_upgrade;
    proxy_set_header Connection "upgrade";
    auth_basic "Username and Password are required";
    auth_basic_user_file /etc/nginx/.htpasswd;
 }
}
To exit-out on a Mac do control+x. Now type Y for save. You can rerun
$ sudo nano /etc/nginx/sites-available/default
to make sure all the changes took place.
R Shiny Config
Now, let's do the same thing for the Shiny config file, although it's much easier. In this case all you need to do is scroll down in the nano file to where it currently reads listen 3838 and add 12X.X.X.1 (your IP address):

$ sudo nano /etc/shiny-server/shiny-server.conf

server{
   listen 3838 12X.X.X.1;

   location / {
    site_dir /srv/shiny-server;
    log_dir /var/log/shiny-server;
    directory_index on;
  }
}
To exit-out on a Mac do control+x. Now type Y for save. You can rerun
$ sudo nano /etc/shiny-server/shiny-server.conf
to make sure all the changes took place.
Step 6 - Create Access to Your Shiny App Passwords
Now, we can start setting up the passwords and usernames. I chose my own name catherine, you can choose what makes sense for you. I actually ended up creating several usernames for clients.
$ cd /etc/nginx
$ sudo htpasswd -c /etc/nginx/.htpasswd catherine
Upon entering the sudo htpasswd command, it will prompt you for a password:

TIP 5: Do you want to add more users?
It took me forever to find this, so I wanted to make sure I shared it. You need to leave out the -c argument for any additional users you wish to add. So as a result, you type in this syntax:
$ sudo htpasswd /etc/nginx/.htpasswd mary
In the below, I created a new username for mary. You can do this for multiple people.

Step 7 - Create R Studio Password
First, we should restart nginx and shiny:
$ sudo start shiny-server
$ sudo service nginx start
First, let's look at our successfully deployed R Studio server. If you recall from your instance launch page, in the bottom pane, there was the IPv4 address. This is the public IP address your data scientists will access in order to log in to R Studio.
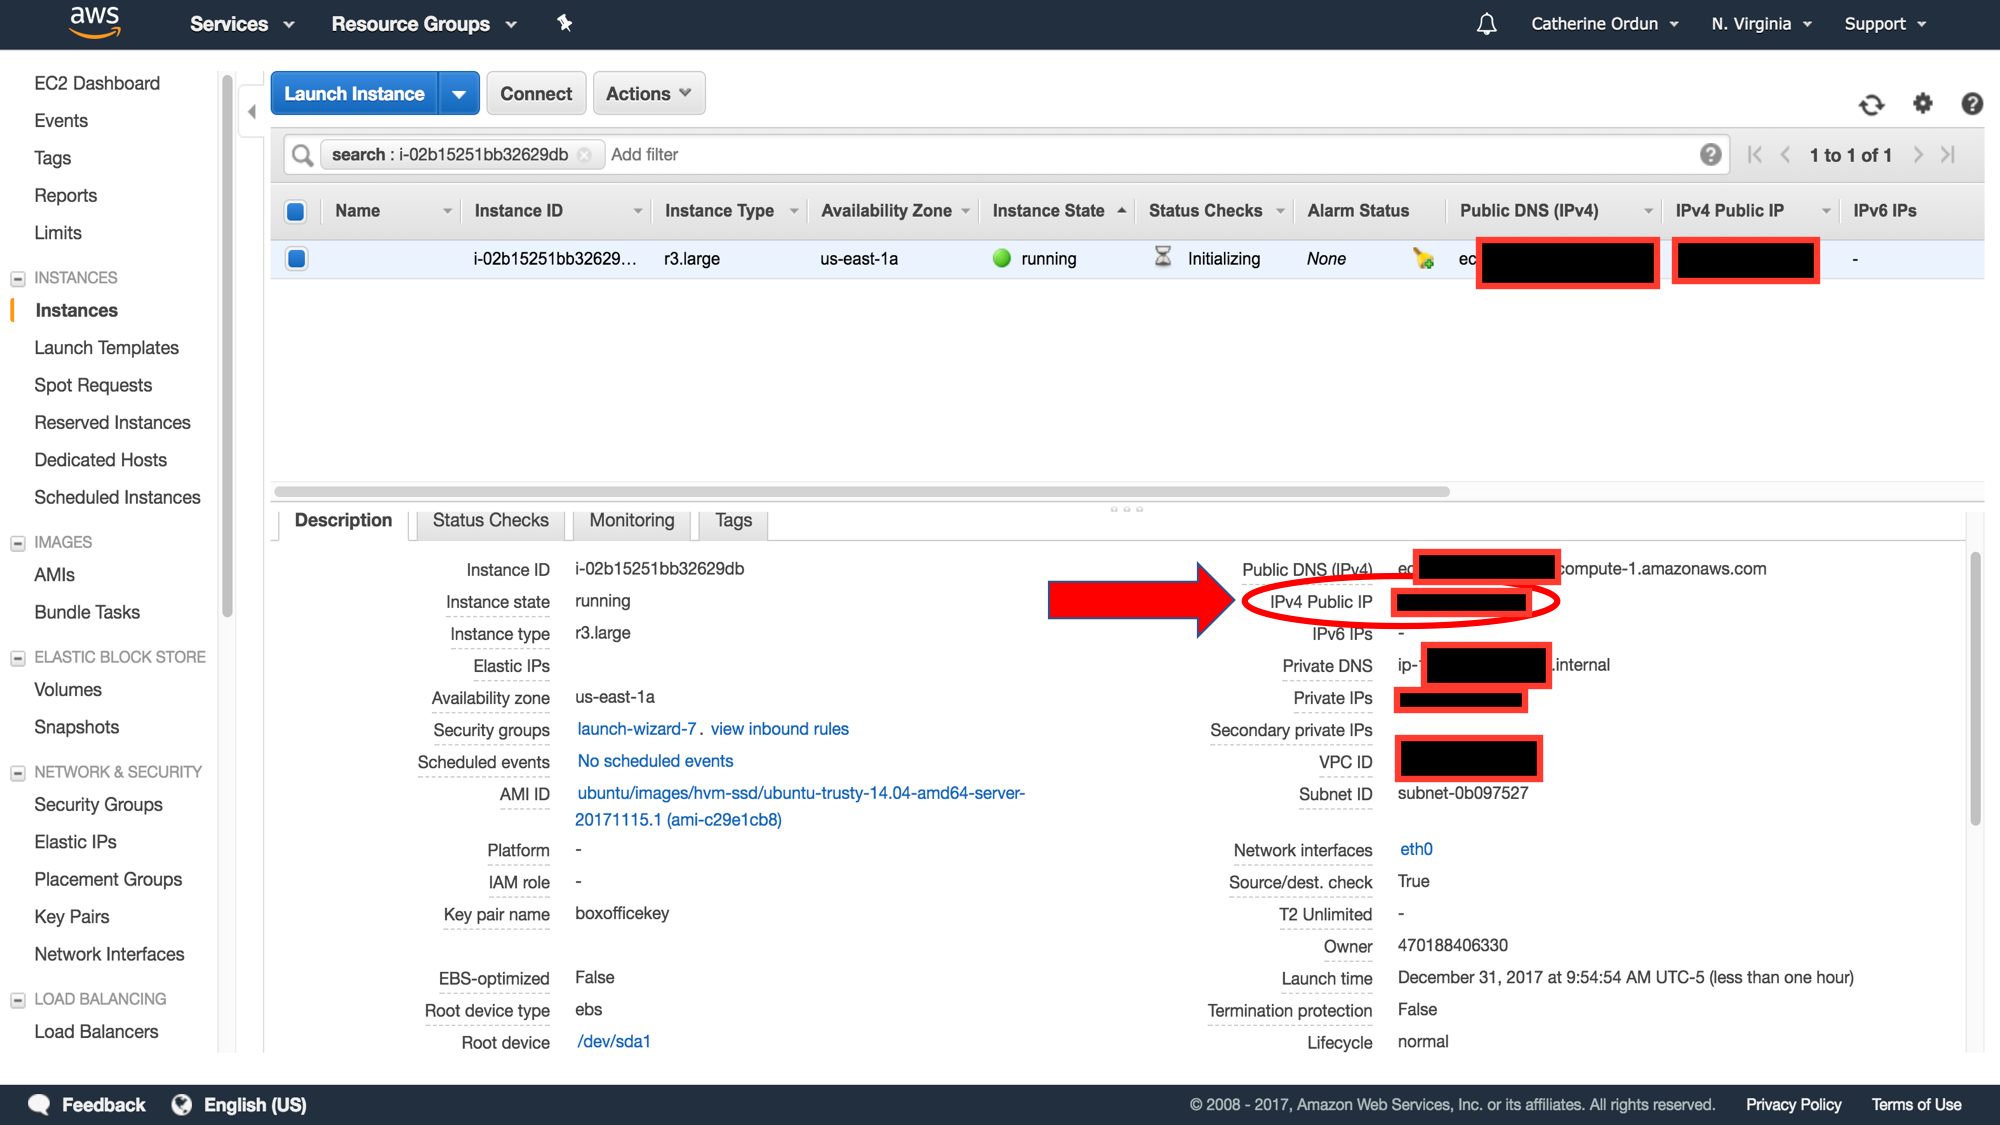
Type into your browser http://ipaddresshere:8787, where your IPv4 will be different than mine. Remember, 8787 was the port name we used when specifying our security rules.
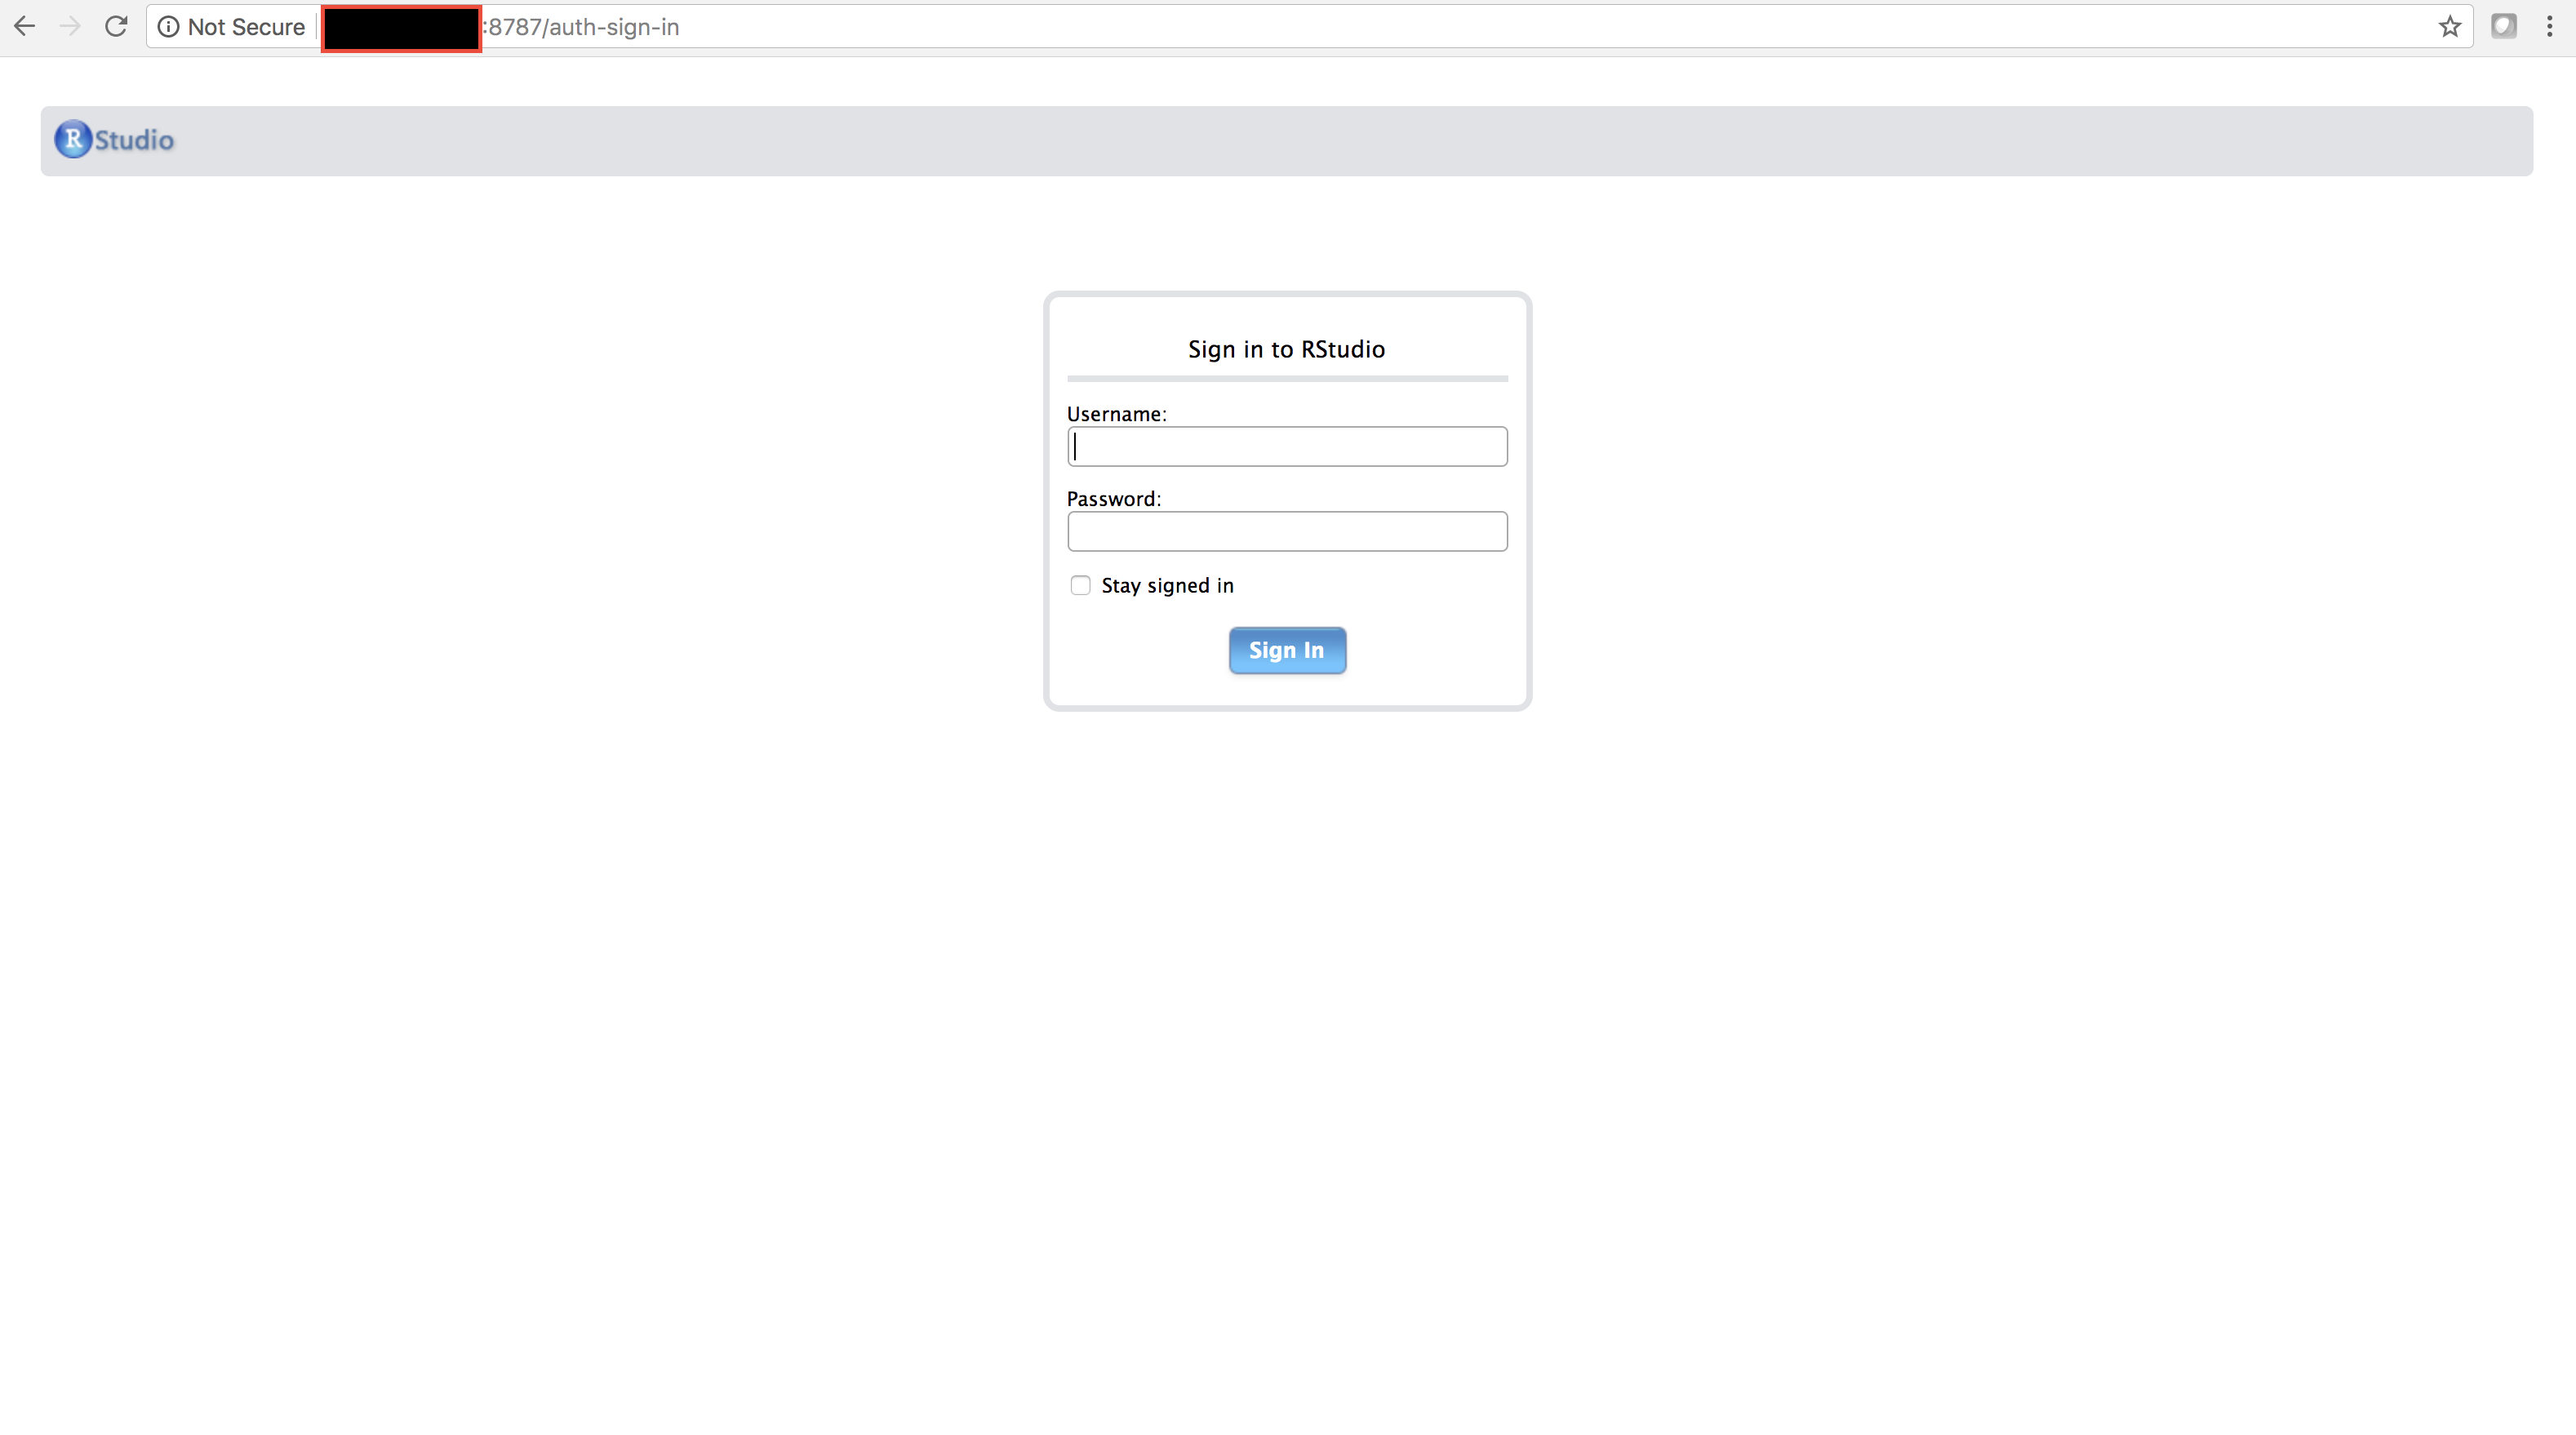
Now, let's create a password for R Studio. This also took me FOREVER to figure out why I couldn't connect.

But, after talking to some people, I realized it was simply ubuntu this whole time. Type in through Terminal:
$ sudo passwd ubuntu
And just like when we created the Shiny App passwords and usernames, enter the password upon prompt. Now, you can log in again at http://ipaddresshere:8787

Step 8 - FINALLY. Deploy the Shiny App
Ok, thanks for sticking in here. We've finally made it to be able to deploy the Shiny App from https://github.com/chrisrzhou/RShiny-BoxOfficeMojo.
TIP 6
What I realized after much trial and tribulation from the data scientist providing me their R code, is that the Github account must be in this exact form:
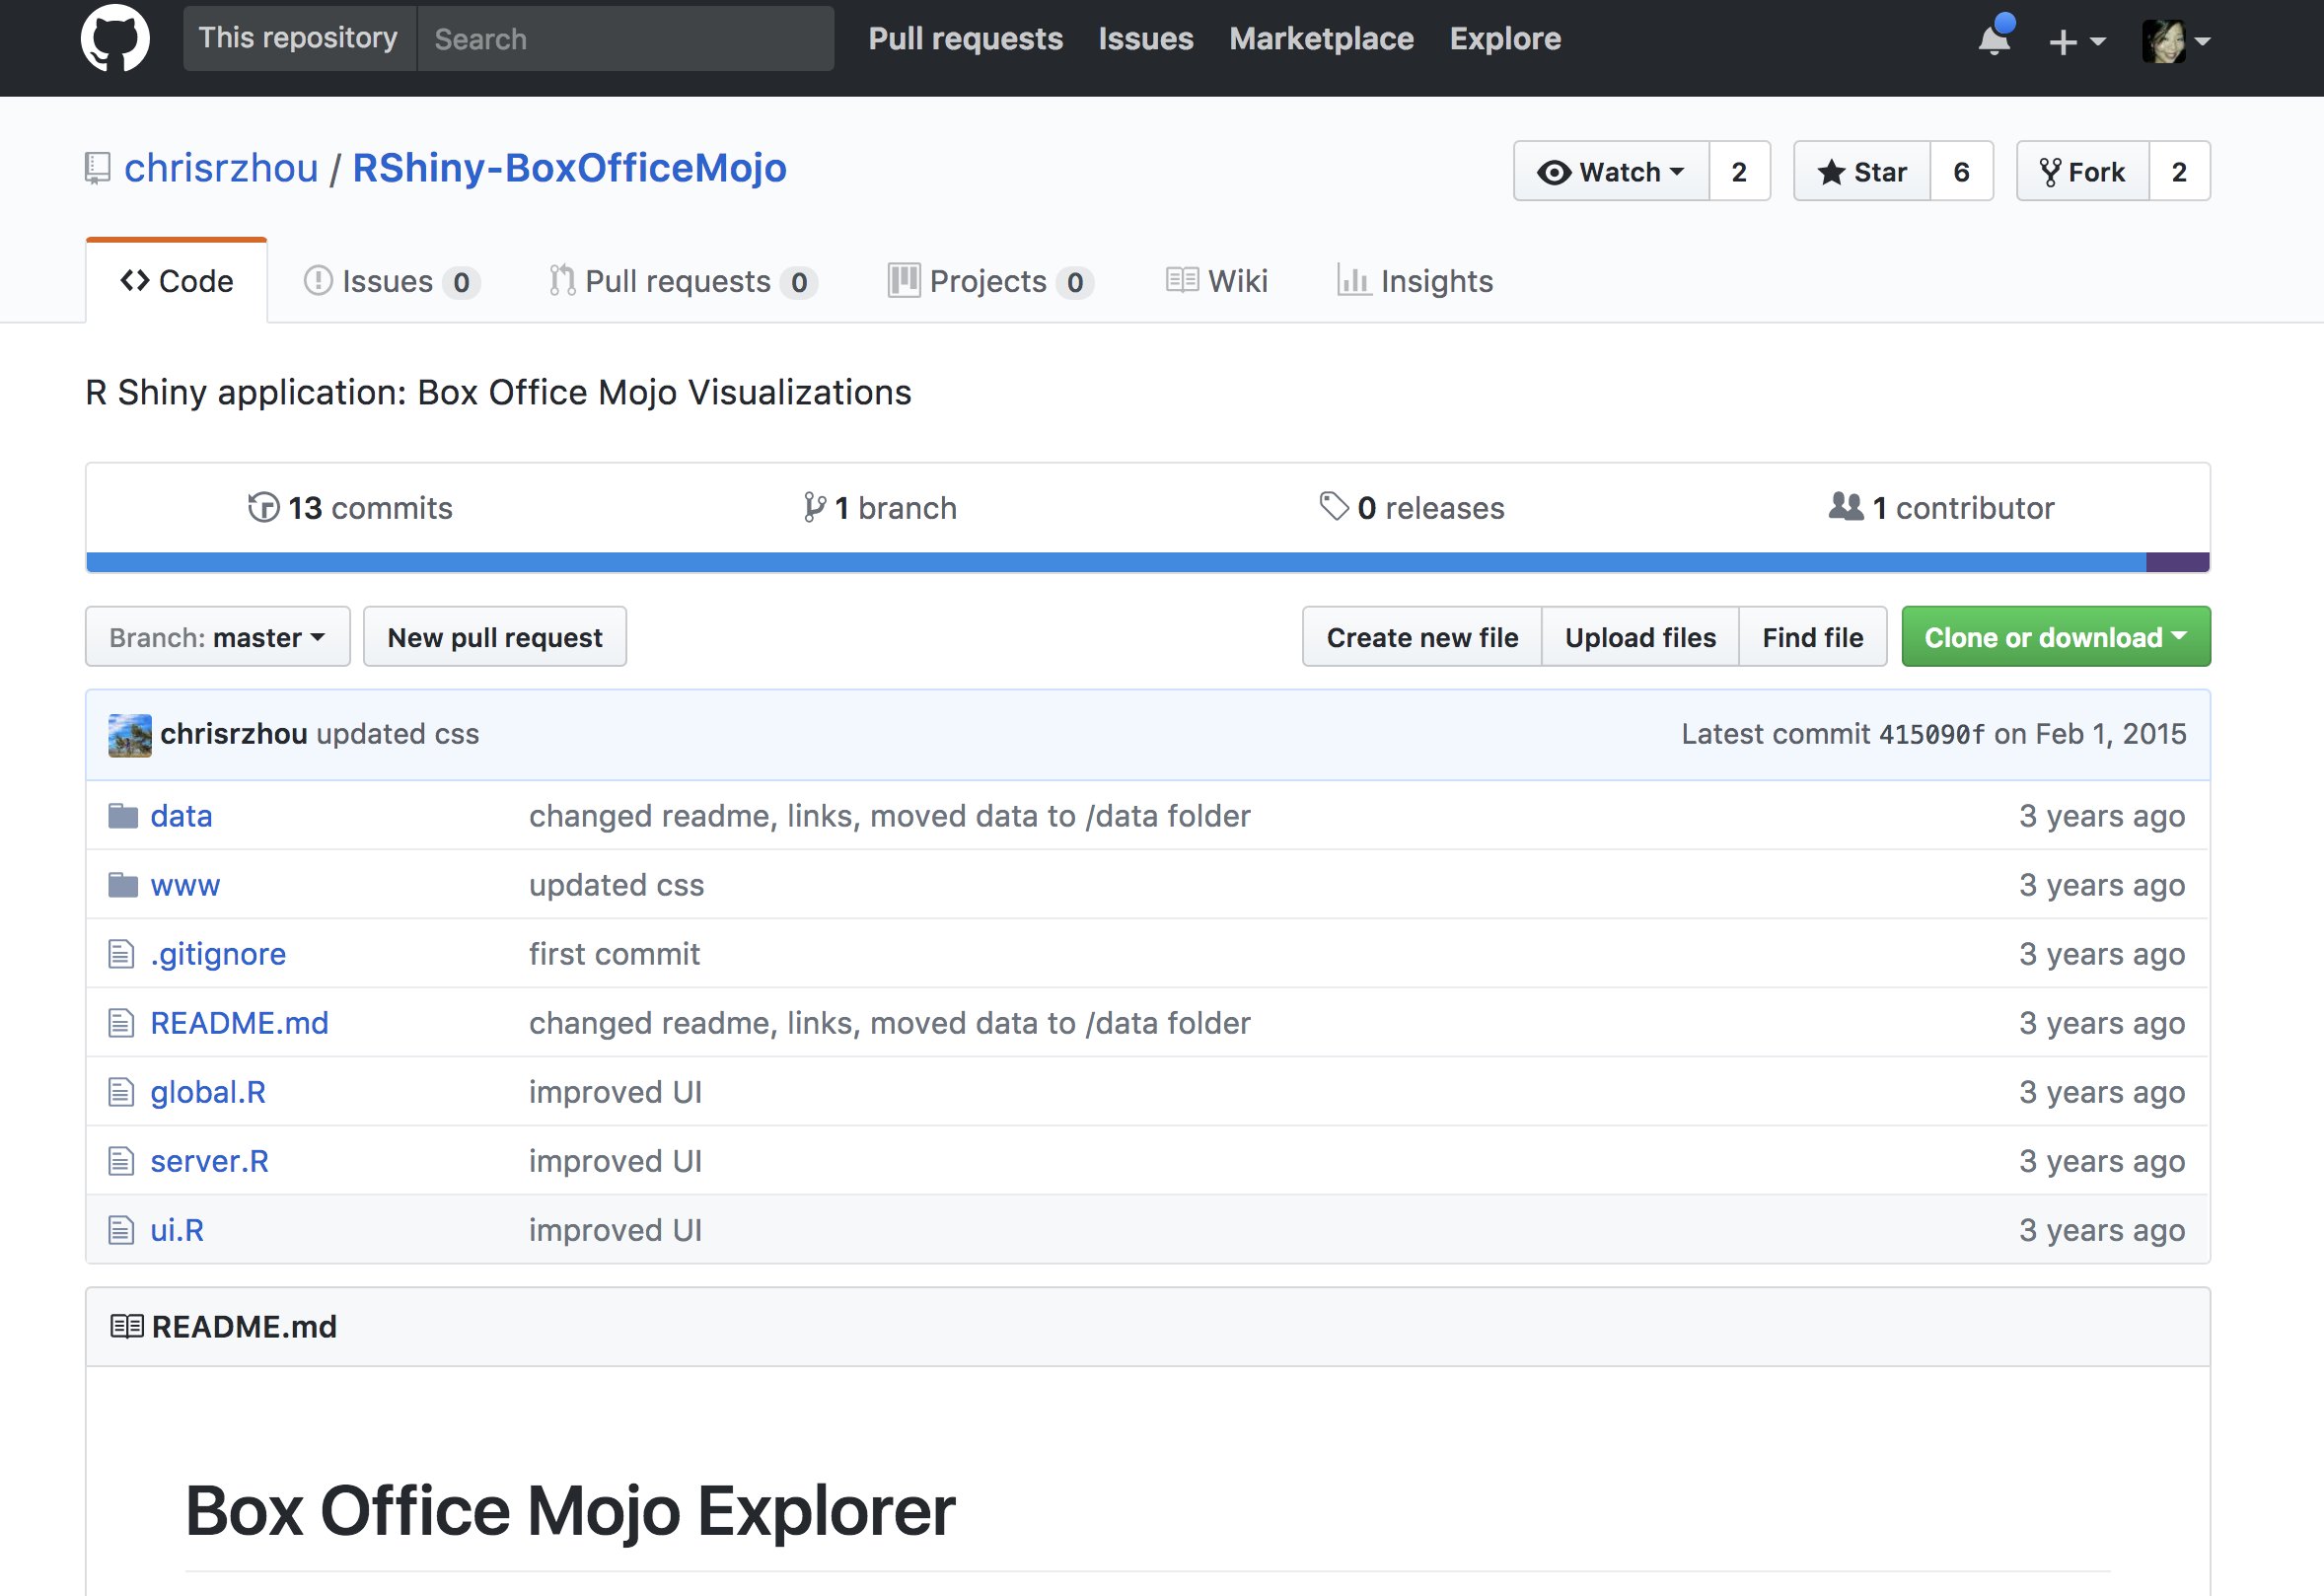
There must be a data file, www file, a server.R, ui.R file, and any other scripts, in this case there appears to be a global.R file being used.
TIP 7
Another thing I realized after a lot of pain, was that each R file must NOT have a setwd() command. I know data scientists will do this for their own local version, but you must ask them not to include this (comment-it-out), or worse-case, do the following again through nano once you clone it to fix it by commenting it out:
#do you need to edit a file right in Terminal?
$ cd /srv/shiny-server
$ nano server.ui
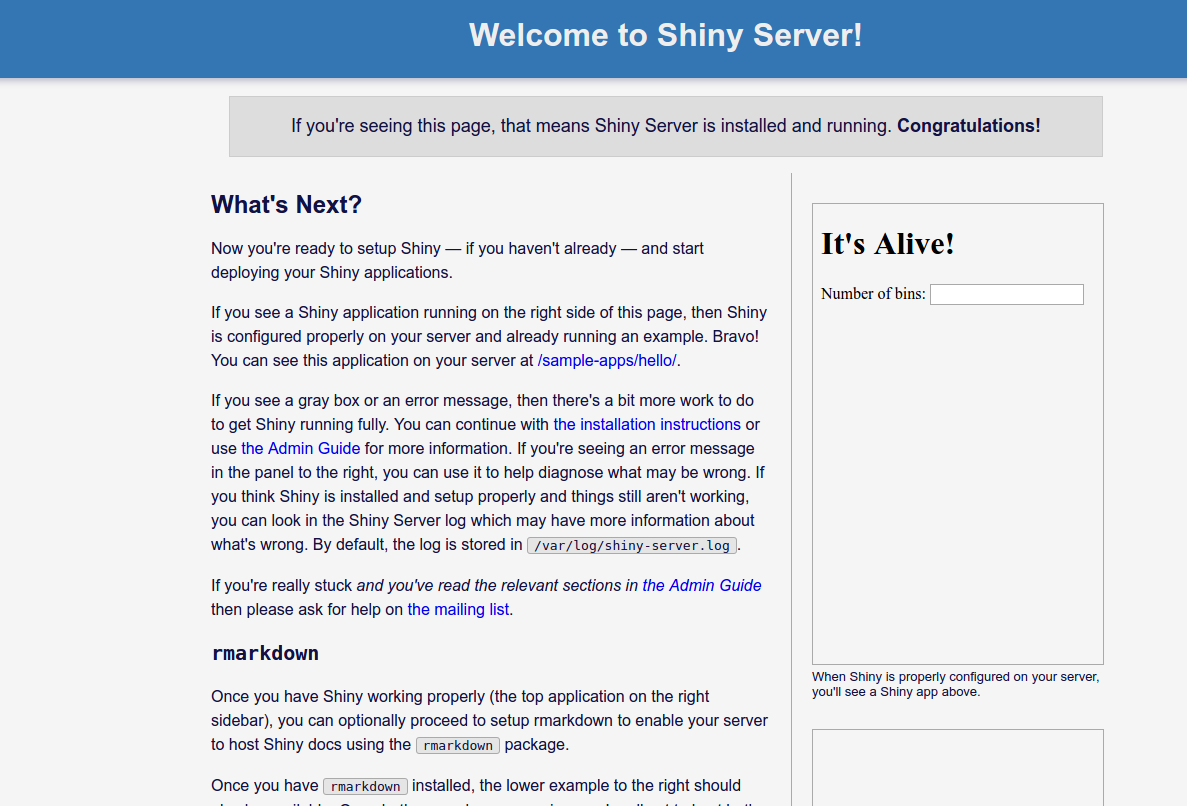
DEPLOY Box Office Mojo
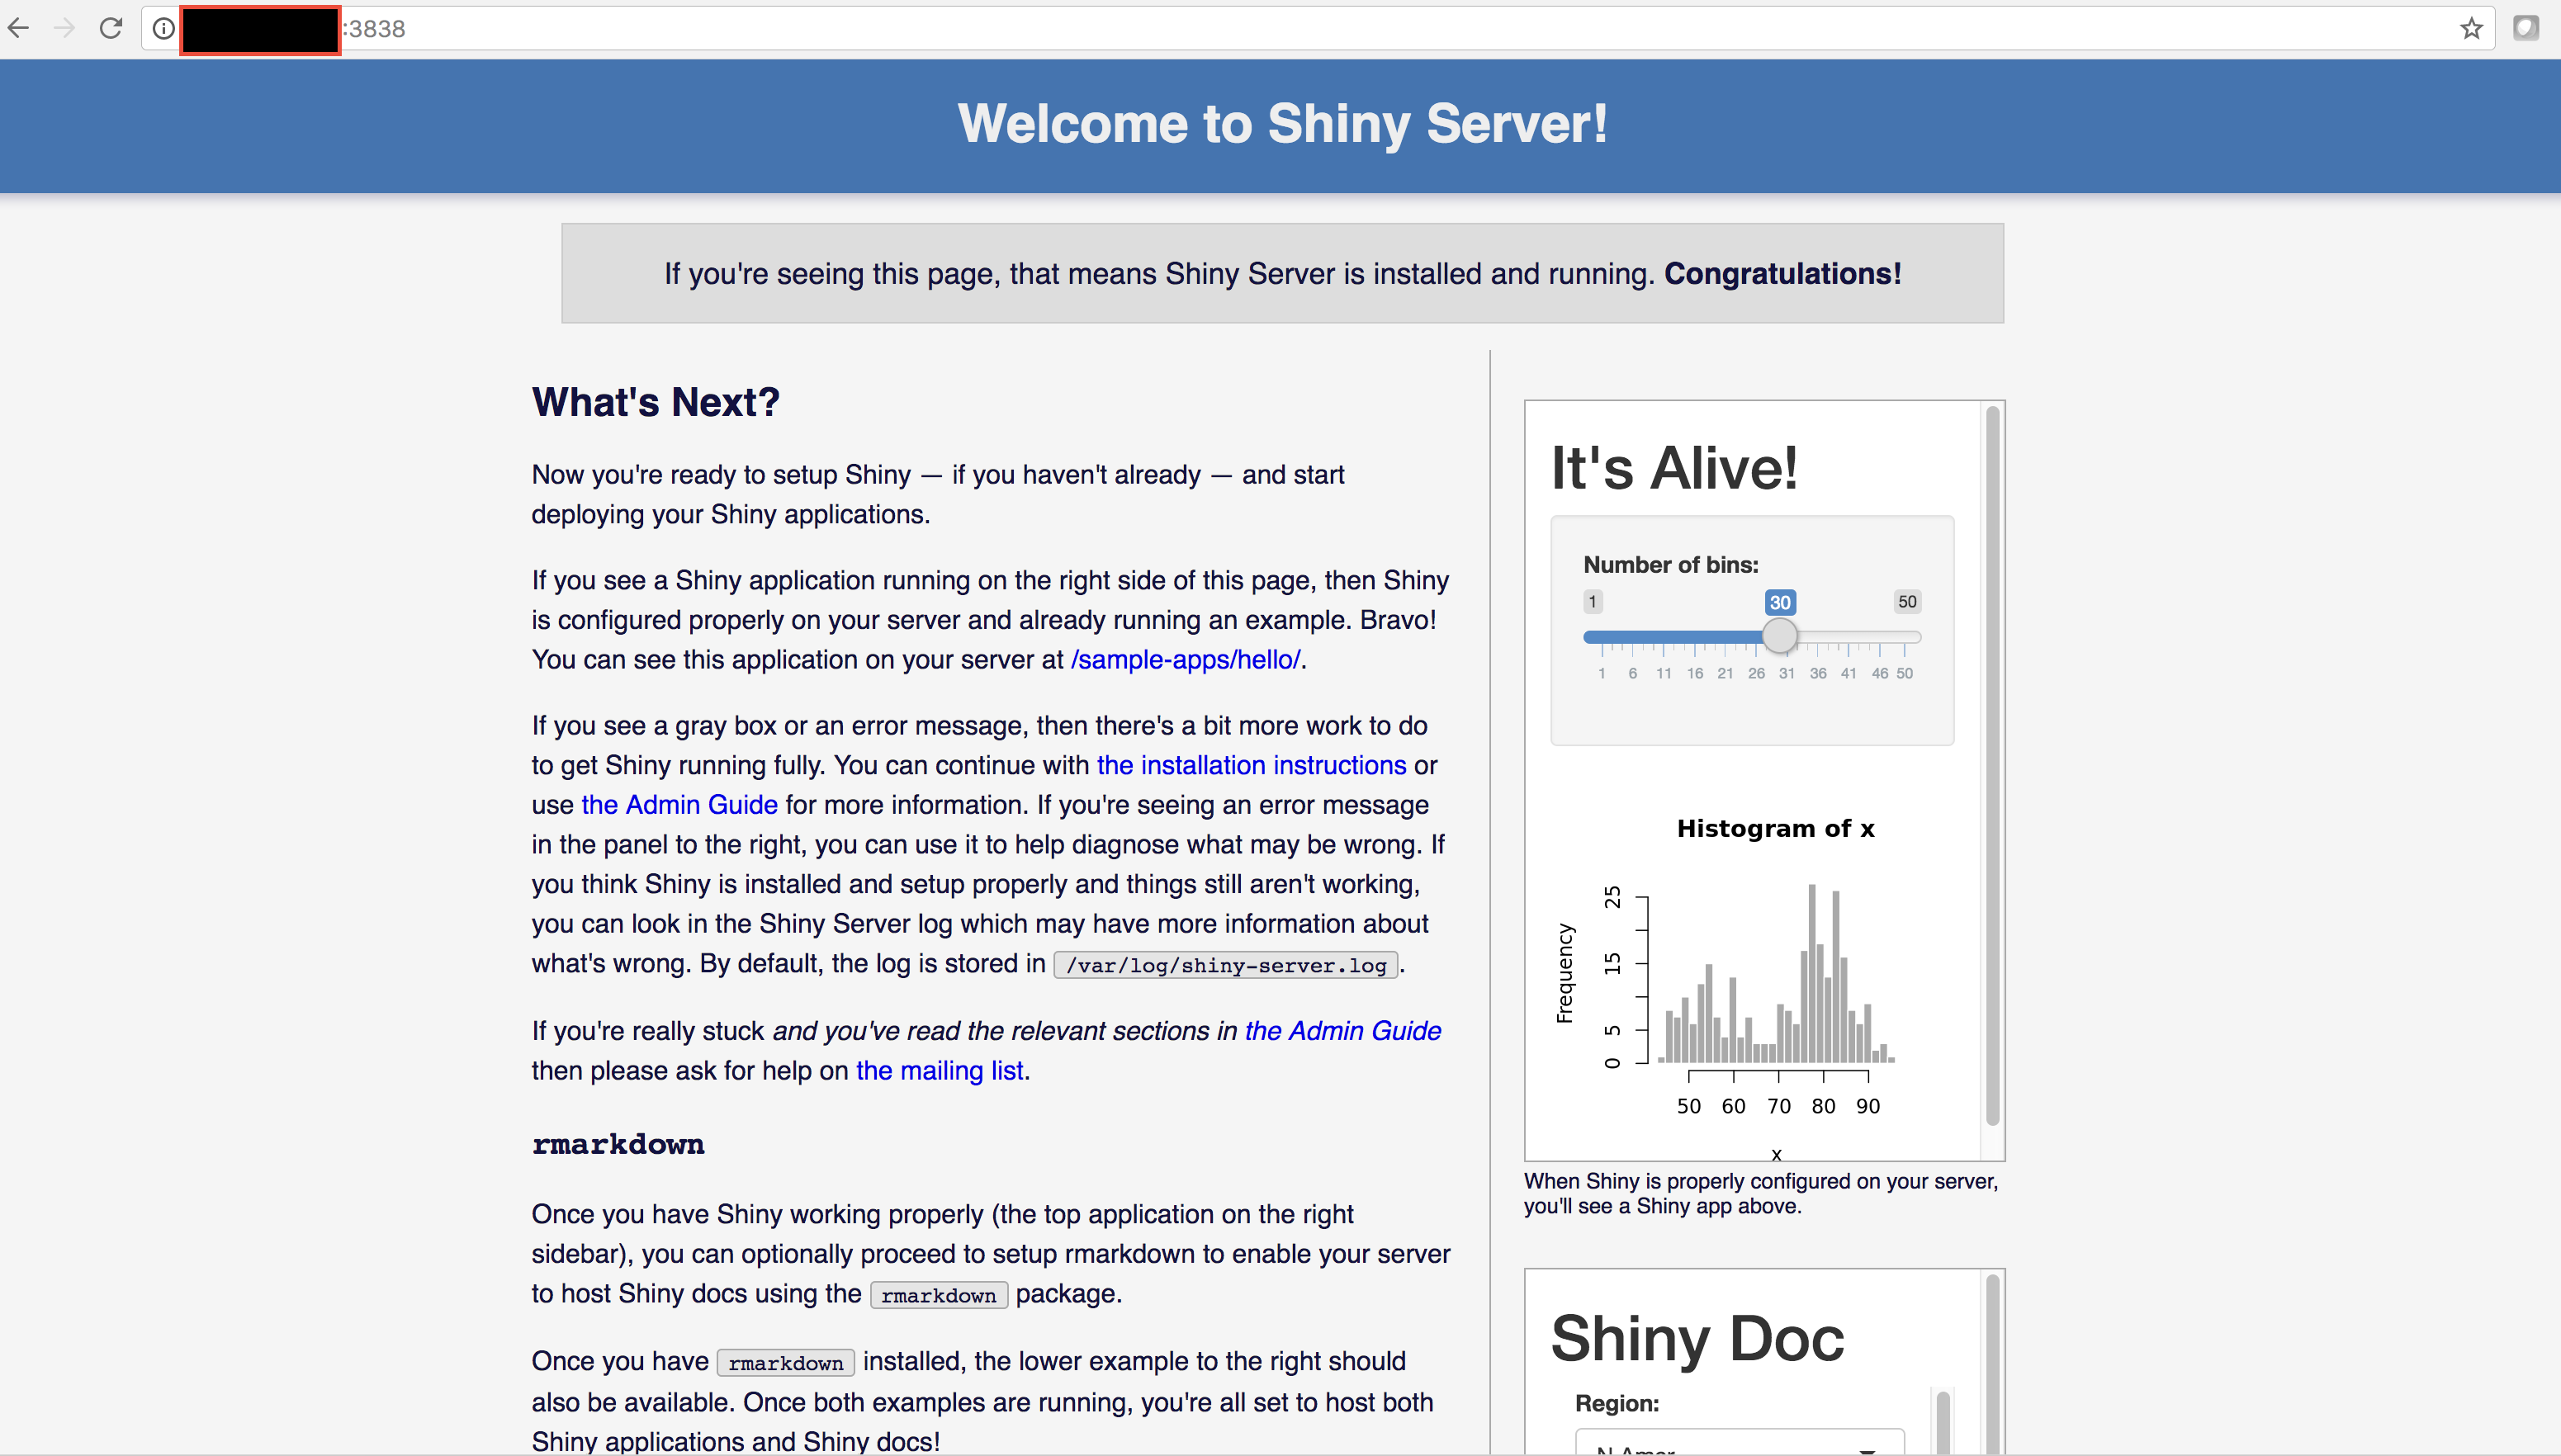
The moment has come. Ok, if you do the same thing like we did for R Studio and navigate your browser to the IPv4 address, but this time with 3838 as the port, you'll successfully see the example sample app:
Go ahead and in Terminal:
$ cd /srv/shiny-server
$ ls
# this should show you index.html and sample-apps

Now, set file permissions to read/write. Another thing I learned the hard way:
### Having problems with file permissions? ###
$ sudo chmod 7777 /srv/shiny-server/
# make a directory if you need
$ sudo mkdir dummy
Now:
$ sudo apt-get install git
Remember to type in y while installing git:
Do you want to continue? [Y/n] y
Clone the Box Office Mojo repo using the "Clone with HTTPS" url:
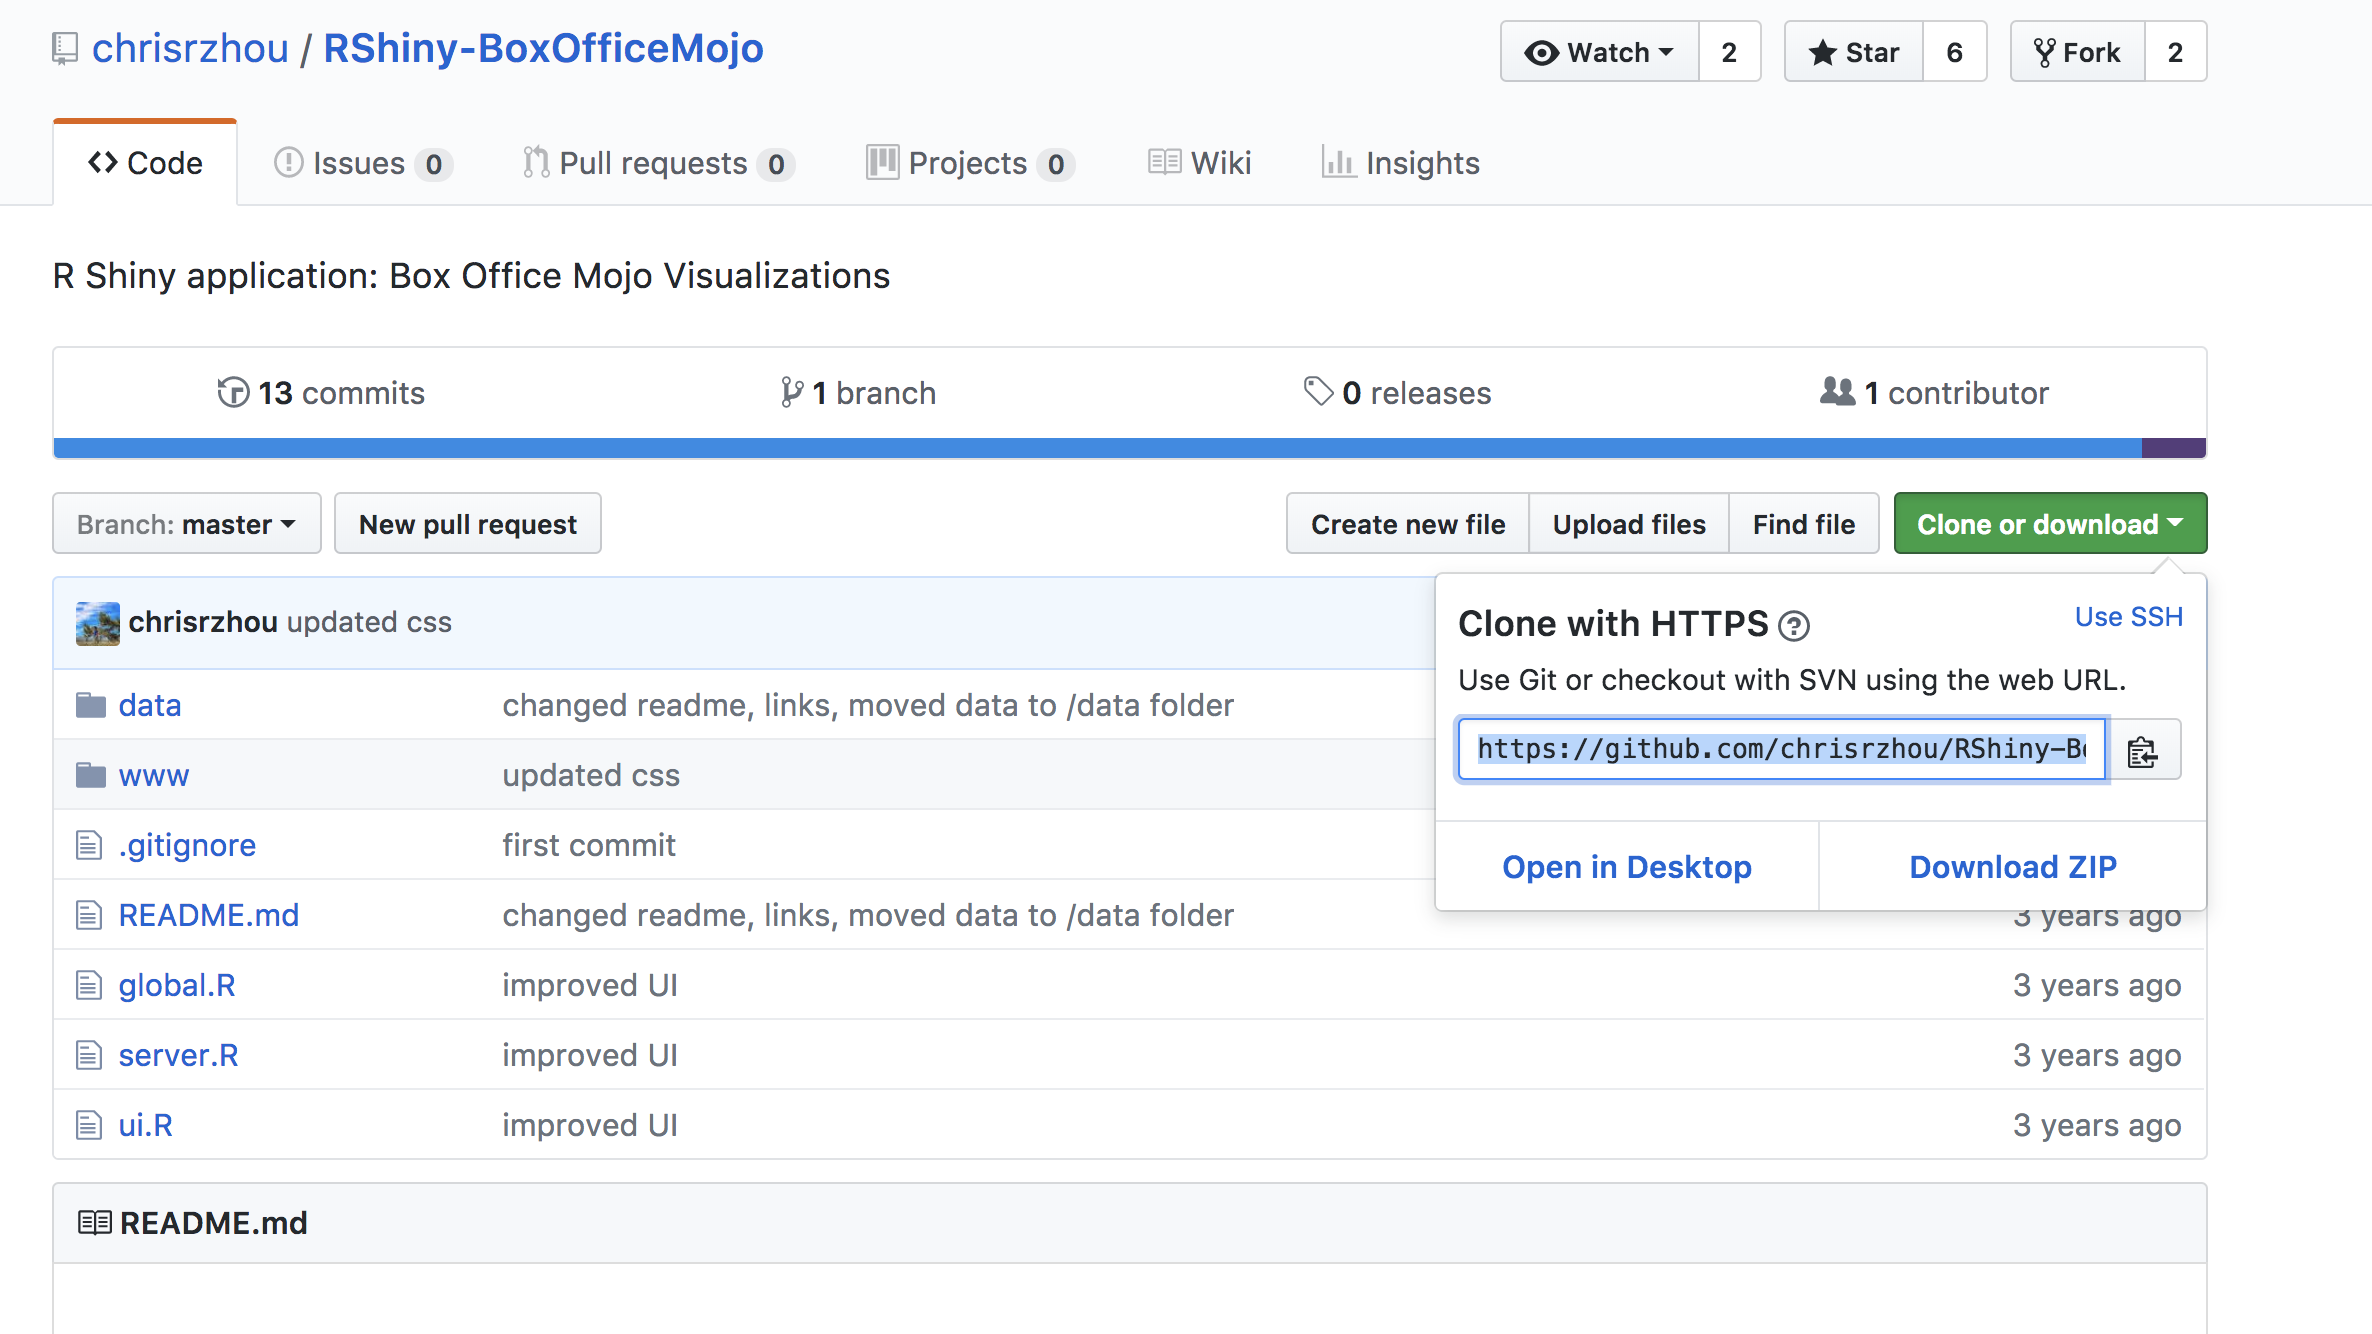
$ git clone https://github.com/chrisrzhou/RShiny-BoxOfficeMojo.git
# navigate to http:ipaddresshere/RShiny-BoxOfficeMojo/
TIP 8
Ok, are you getting a '404' error about nginx? Ready to give up? DON'T!
What you probably need to do is stop the server:
$ sudo service nginx stop
$ sudo stop shiny-server
Wait a minute, now start it:
$ sudo service nginx start
$ sudo start shiny-server
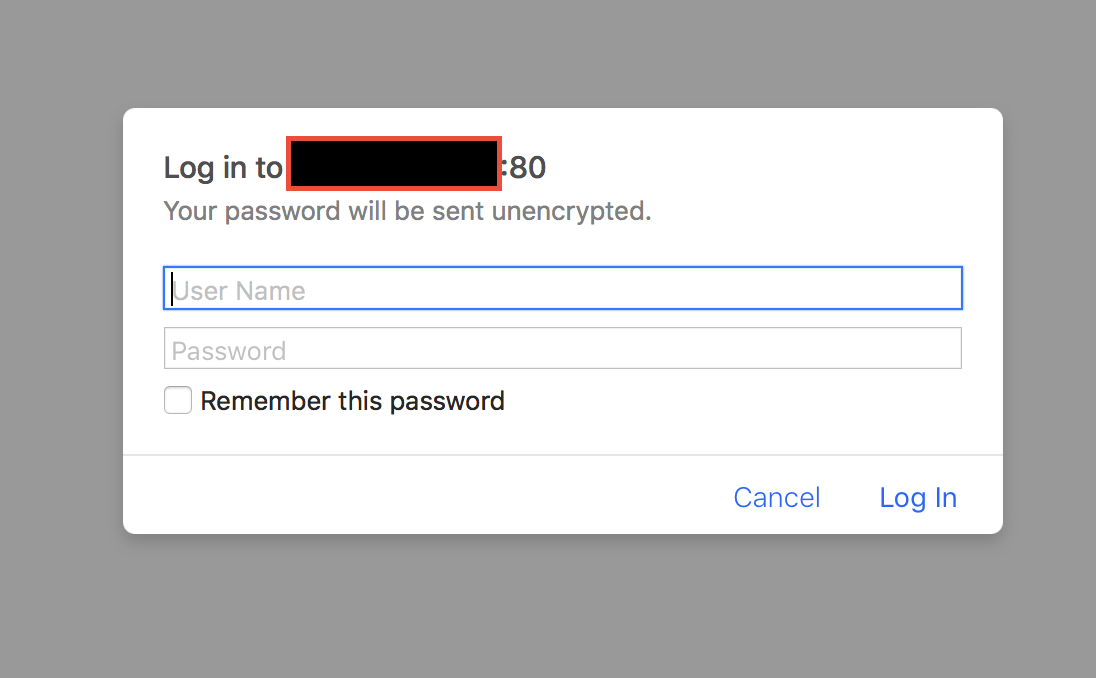
SUCCESS
Go to `http://ipaddresshere/RShiny-BoxOfficeMojo/` You'll be prompted to enter your username and password you set up earlier. Do that and now you can access this page: